Carl Goldberg GBGA0059 User Manual
Page 22
22
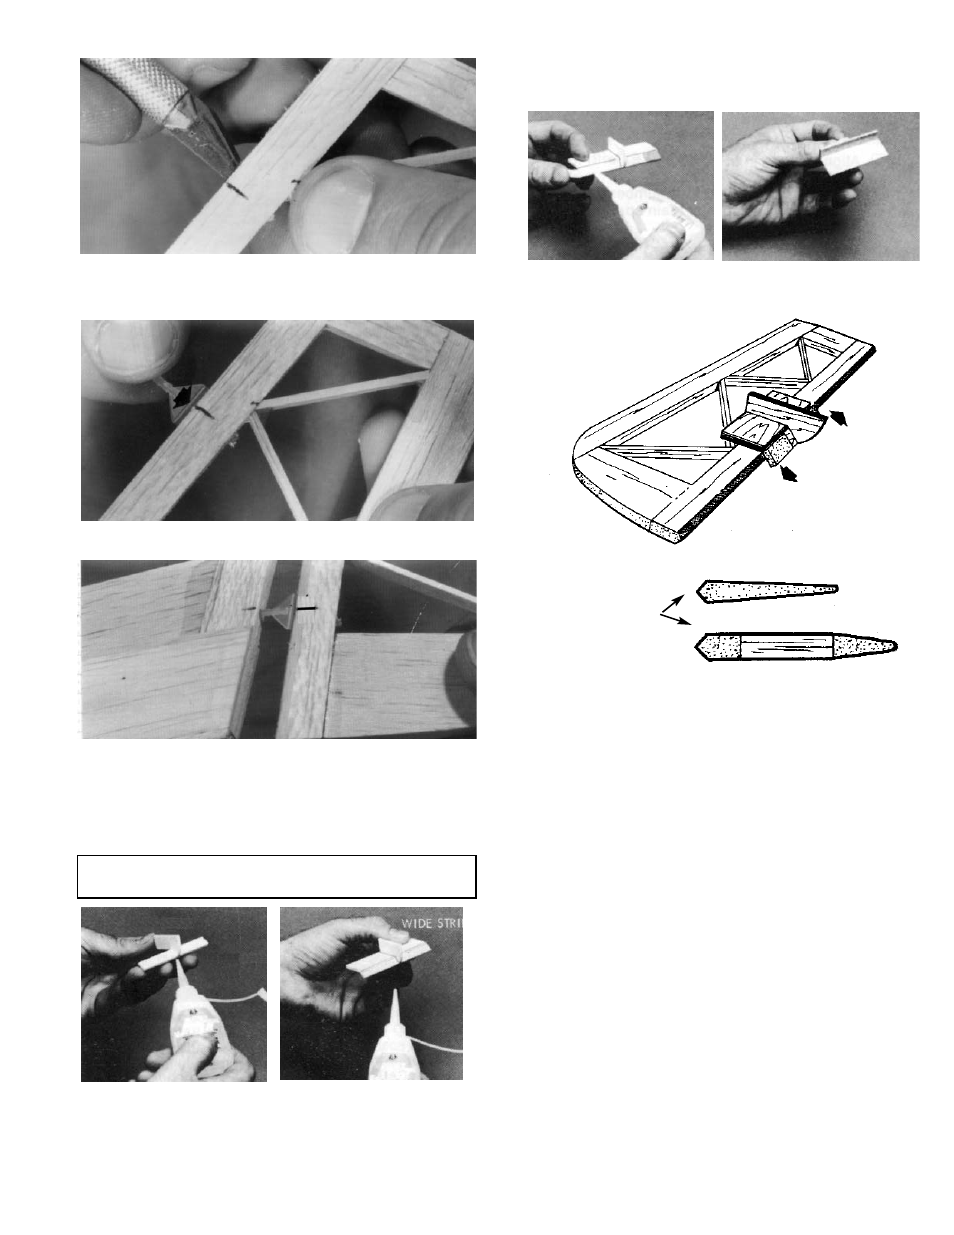
4. Slot each side of the hole for hinge clearance.
Test fit the hinge, so as to not cut too much.
The hinge fit should be snug.
5. Slide the hinge in, but do not glue at this time.
6. Attach the rudder to the fin and the elevator to
the stab and check the fit. Then disassemble
and remove the hinges.
BEVELING RUDDER & ELEVATOR
NOTE: This kit contains D/C ply parts for two tools, but
only one is used to construct the aircraft.
1. First glue the narrow strip to the handle. keep-
ing it square, as shown below.
2. Cut a strip of 100-200 grit sandpaper to fit tool
and tack-glue in place, as shown above.
Then, glue a wide strip to the handle and the
narrow strip, again keeping things square.
3. Tape the trailing edge of the elevator and the
rudder to the work surface.
Using the beveling tool as shown, sand the
leading edges to the center line.
Turn the parts over and repeat the beveling on
the other side of the leading edges.
WHEN COMPLETE, THE
BEVELED SURFACES
SHOULD LOOK LIKE
THIS
COVERING THE AIRCRAFT
INTRODUCTION
There are several ways to cover the frame of a model
airplane. Years ago, the open framework of most air-
planes was covered with a combination of tissue (or
silk) and dope; the solid structures were painted.
Today, most models are covered with polyester films
that resemble either a painted finish or a fabric finish.
These films are easy to apply and actually increase the
strength of the aircraft. The easiest way to finish your
model is to cover it in one color, but as you become
more proficient, you will devise fancier trim schemes.
The following instructions describe the general proce-
dure for covering a model. However, it is important to
carefully read the instructions that come with the
film, as different products are applied in somewhat
different ways.