Control arm assembly, Disassembly, Inspection – Cub Cadet T2-HP User Manual
Page 23: Assembly
T2
®
19
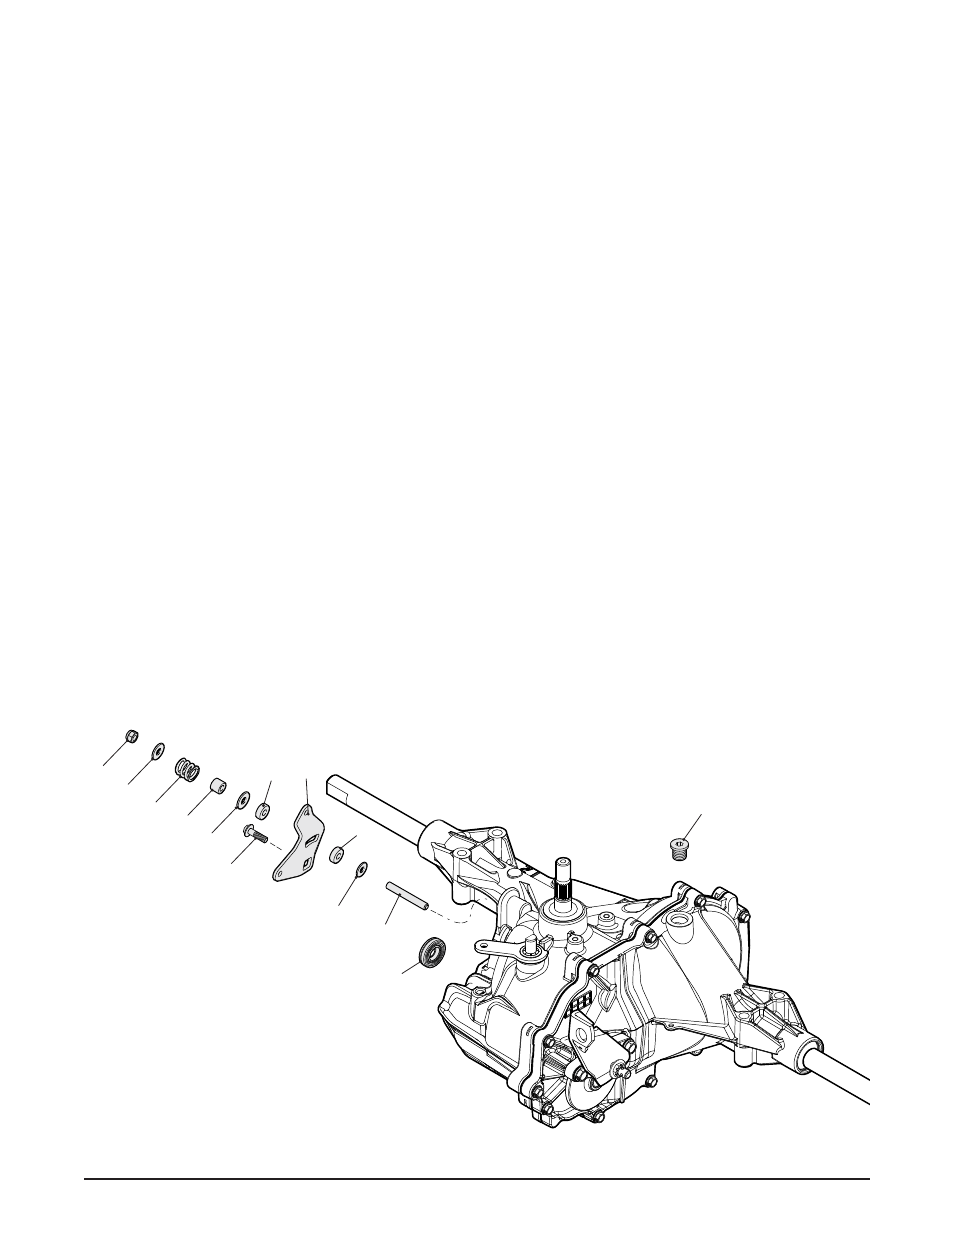
figure 11, Control arm
NOTE: Only remove the seal (110) if do-
ing a complete disassembly or if
the seal is worn or damaged.
COnTrOl arm assembly
Refer to Figure 11
disassembly
1 . Remove all items previously discussed in
their recommended order .
2 . If opening the housing or replacing seals,
remove the oil port plug (13), then; drain oil
from transaxle .
3 . Remove the lock nut (49), the washer (46),
the helical comp spring (48), the spacer
(47), the (second) washer (46), and the
plastic washer (45) .
4 . Remove the Torx head screw (41) and dis-
card .
5 . Remove the control arm (42), the (second)
washer (45), the belleville washer (44), and
and the set screw (43) .
Inspection
1 . Inspect all parts for wear or damage . Re-
place if necessary .
13
49
46
46
48
45
47
41
45
42
44
110
assembly
1 . Reassemble all parts in the reverse order
of disassembly .
2 . When tightening the fasteners, refer to the
table on page 15 for the required torque
values .
3 . Install new Torx head screw (41) and lip seal
(110) from seal kit, if removed .
NOTE: As a general rule, use the low end of
the torque specification on fasteners
when reassembling the unit.
43