Blades, Blade removal – Cub Cadet RZT-S Zero Electric User Manual
Page 136
RZT-S Zero
132
Blades
The condition of the blades will greatly affect the quality of the cut. The blades should be sharpened and bal-
anced after every five acres, depending on local conditions. A dull blade tears the grass instead of cutting it. Torn
grass blades leaves a rough look and makes the grass vulnerable to diseases.
Blades need to be examined for damage before sharpening. Blades must be balanced after sharpening to mini-
mize vibrations. Bent blades are a sign of a blade impact. If a bent blade is found, the blades must be replaced and
the spindles inspected for bent shafts and cracked housings.
The blades that come with the RZT-S Zero are specifically designed to maximize the cutting performance and
run time of the mower.
NOTE: Only used the OEM blades designed for this mower. Use of after market blades can drastically affect
the run time of the mower.
NOTE: The mulch kit, 19A30006100, is required for the RZT-S Zero to mulch. The kit comes with special
mulching blades.
NOTE: Mulching with the RZT-S Zero will reduce the run time of the mower.
The cutting deck on the RZT-S Zero mower is mounted with a slight rake, meaning that the front of the deck is a
1/4” lower than the rear of the deck. This is very important to get the proper air flow in the deck so that the blades can
make the grass blades stand up to get cut.
The air flow in the cutting deck is generated by the
spinning blades. If the blades are mounted upside down,
the air flow will be reversed pushing the grass down
instead of standing up.
Blade removal
1.
Lift and safely support the mower.
2.
Block the blade with a piece of wood to prevent it
from spinning.
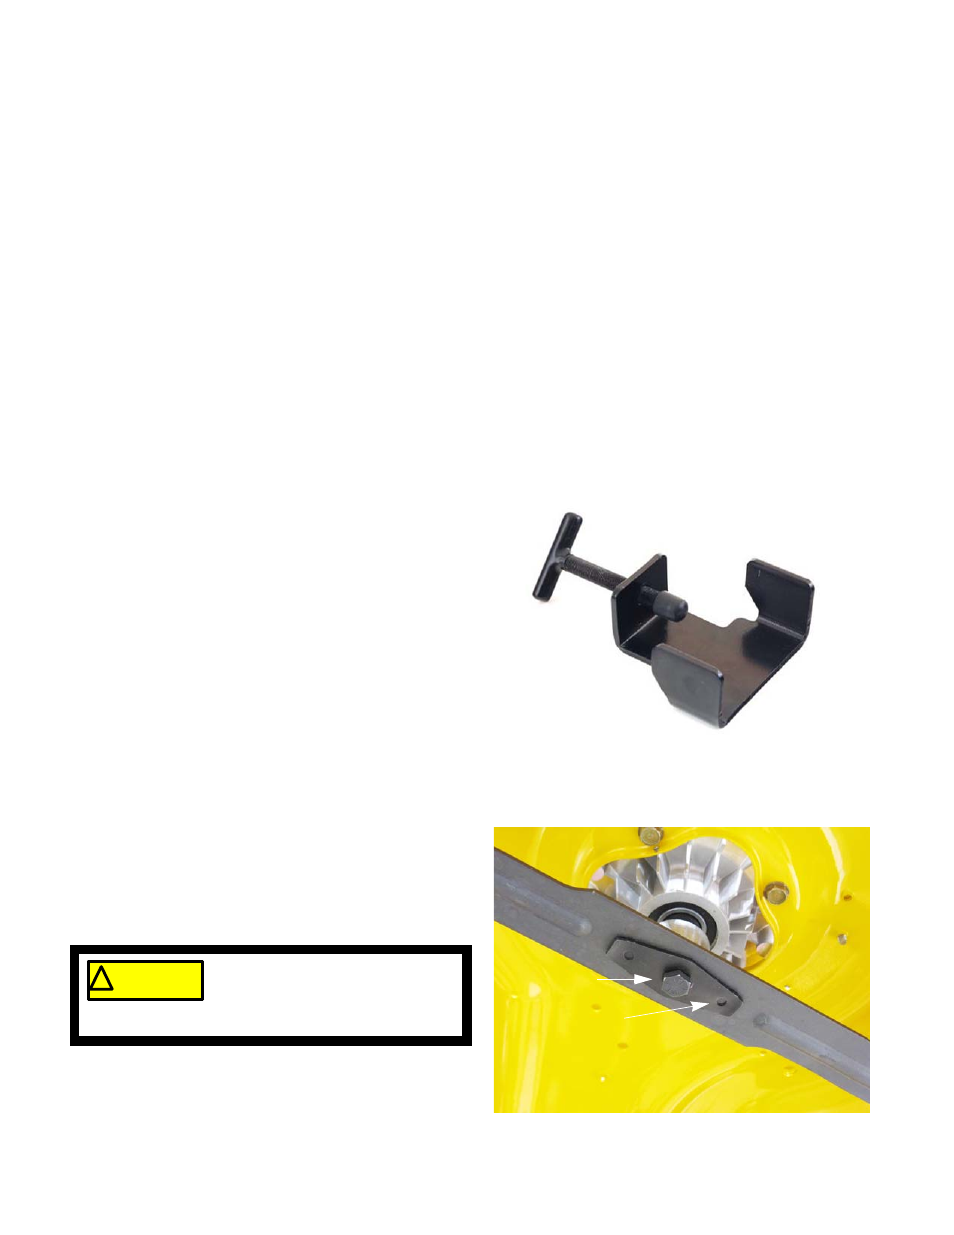
NOTE: MTD blade holding tool 490-850-0005 can
be used to hold the blade while removing the
blade nut. See Figure 7.7.
3.
Remove the blade bolt and diamond-shaped
Belleville blade spring using an impact wrench and
a 5/8” socket. See Figure 7.8.
4.
Remove the blade and the blade adapter.
Figure 7.7
490-850-0005
Figure 7.8
Blade bolt
Belleville washer
! CAUTION
! CAUTION
Use care around the blade while
removing or tightening the bolt. The
blade can spin and cause an injury
to the technician.