6 network configuration – COP-USA DVR2508-FD User Manual
Page 40
DVR User Manual
34
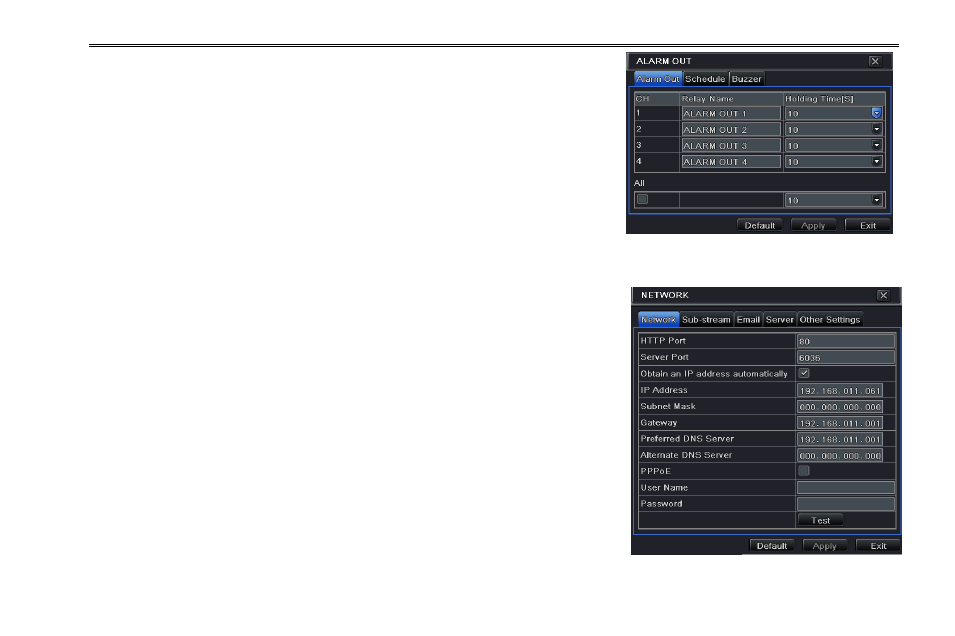
Step 1: Enter into MenuSetupAlarm out tab. Refer to Fig 4-28. Input relay
name and hold time.
Step 2: Select the Schedule tab. This will bring up the schedule setup interface.
The setup steps for schedule for alarm out are similar to normal schedule setup;
you can refer to 4.4.1 Schedule for details.
This step is very important for alarm out. Even if you have enabled alarm out in
the motion based alarm or sensor based alarm, you will not see the result of alarm
out if no schedule is added here.
Buzzer
It is an inbuilt alarm output device. To setup Buzzer: Fig 4-28 Alarm Out
Step1: Enter into MenuSetupAlarm out Buzzer tab;
Step2: Checkmark Buzzer and set buzzer alarm hold time. This would trigger the
buzzer when the system is in alarm.
4.6 Network Configuration
Network configuration includes five submenus: network, sub stream, Email, server
and other settings. Network settings must be configured if DVR is used for
monitoring over network.
4.6.1 Network
Step 1: Enter into MenuSetupNetworknetwork tab. Refer to Fig4-29:
Step 2: HTTP port: the default value is 80. If the value changed, you need to
modify the IP address in the IE address .i.e. if HTTP port is set to 82 and IP
address is,
192.168.0.25
, then you shall input IP address a
in IE browser.
Server port: Communication port. Fig 4-29 Network Configuration-Network