COP-USA DVR2508-FD User Manual
Page 36
DVR User Manual
30
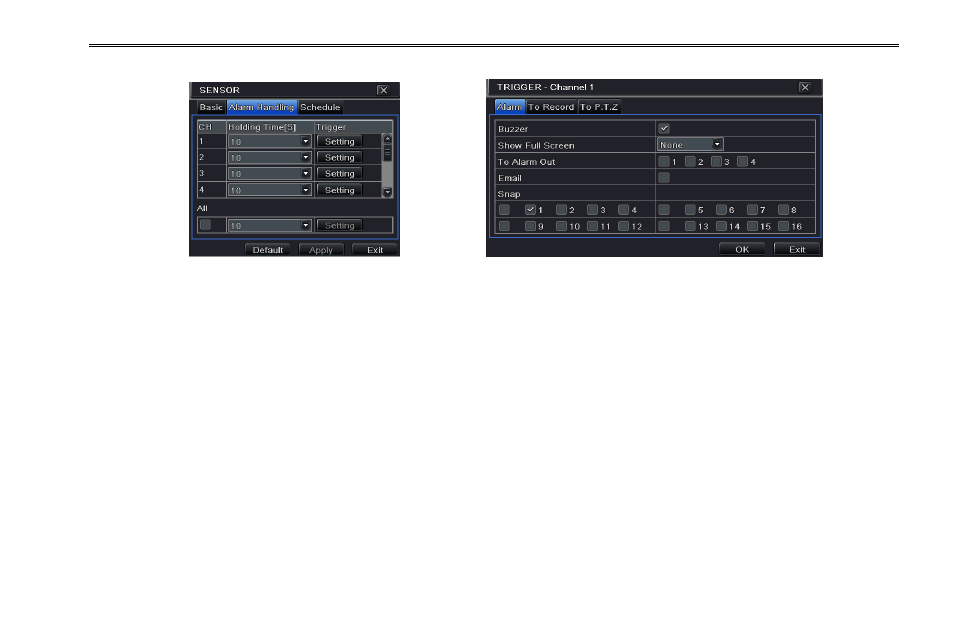
Select hold time and then click Setting button. A dialog box will pop-up as Fig 4-21:
Fig 4-20 Alarm Configuration-Sensor-Alarm Handling Fig 4-21 Alarm Handling-Trigger
Step 6: Enter into alarm tab to select the options to handle alarm.
Buzzer: If selected, the local inbuilt buzzer would be activated on an alarm.
Full screen alarm: If selected, there will pop up the chosen channel on the monitor on an alarm trigger.
To alarm out: If selected, this would trigger the external relay output on detecting a sensor based alarm.
Email: If you select this option, the DVR will send an email alert to the preconfigured email address in case of a sensor based
alarm from the particular input.
Snap: If selected, the system will snap images of the checked channels on an alarm and save them in the HDD automatically.
Step 7: Enter into To Record tab. Select recoding channels. It would be recorded in case of an alarm. Click OK button to save
the setting.
Step 8: Enter into To PTZ tab. Set preset, cruise and track options for a PTZ in case of a sensor based alarm. Single or multiple
PTZ units could be programmed to perform this function on the same alarm.
Step9: Enter into Schedule tab. Refer to Fig 4-22. The setup steps for schedule for sensor based alarm are similar to normal
schedule setup. You can refer to Chapter 4.4.1 Schedule for more details. This step is very important for sensor alarm. Even if
you have enabled the sensor alarm for all channels and setup the trigger, you will not see the result of sensor alarm if no
schedule is added.
If you have set the schedule for senor based recording in the same timeline, recordings can also be triggered.