COP-USA DVR2508-FD User Manual
Page 38
DVR User Manual
32
any other motion alarm (specific to channel) until 30 seconds. If there is other motion detected during this period, it is
considered it as continuous movement, otherwise it will be considered as a single motion.
Step3: The setup steps of motion trigger are similar to „Alarm Handling‟. You can
refer to Chapter 4.5.1 Sensor Alarm Handling for more details.
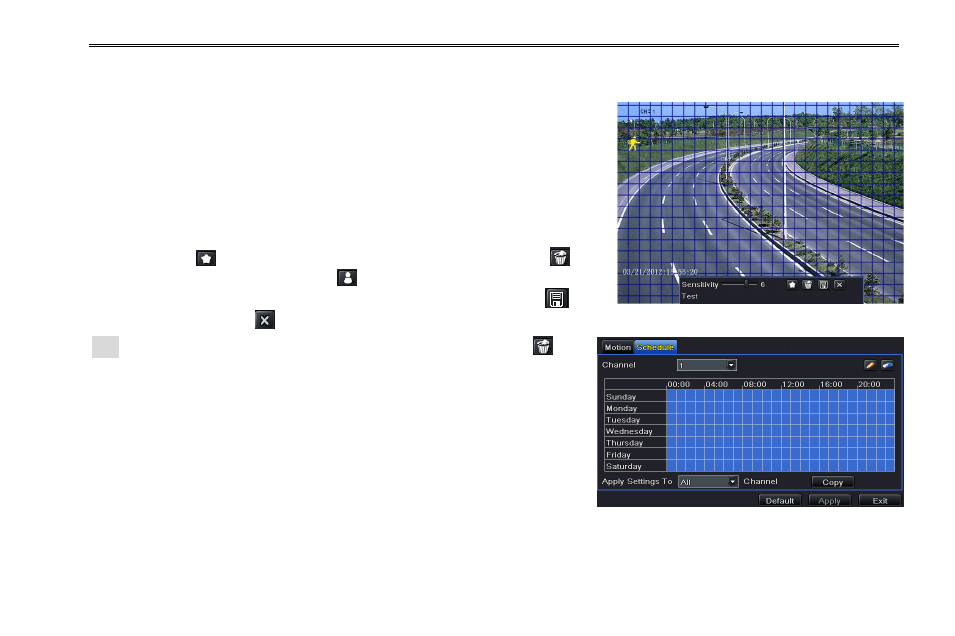
Step4: Click “Setting” button under the Area to display the following picture as
shown in Fig 4-24:
Step5: In the Area tab, you can drag slide bar to set the sensitivity value (1-8).
The higher the value is the more sensitive it is to motion. Since the sensitivity is
influenced by color and time (day or night), you can adjust its value according to
the practical conditions. Left click the grid and drag to delete area. Drag again to
add area. Click
icon to set the whole area as detection area. Click
icon
to clear the set detection area. Click
icon to test the sensitivity as per the
local conditions. Once motion is sensed, it displays a figure icon. Click
icon
to save the setting. Click
icon to exit the current interface. Fig 4-24 Motion-Area
Note: Prior to setting motion detection field it is recommended that you click
icon
to clear the existing field and set afresh.
Step6: Select “All” to setup all channels with the same parameters.
Step7:
Click “Apply” button to save the setting.
Step 8: Enter into Schedule tab. The setup steps for schedule for motion
based alarm are similar to normal schedule setup; you can refer to 4.4.1
Schedule for details.
This step is very important for motion based alarm. Even if you have enabled
the motion based alarm for all channels and setup the trigger, you will not see
the result of motion based alarm if no schedule is added. Fig 4-25 Motion-Schedule
If you have set the schedule for senor based recording in the same timeline, recordings can also be triggered.