Top cover and side handle – Elecraft KPA500 Kit Assembly Manual User Manual
Page 43
42
Top Cover and Side Handle
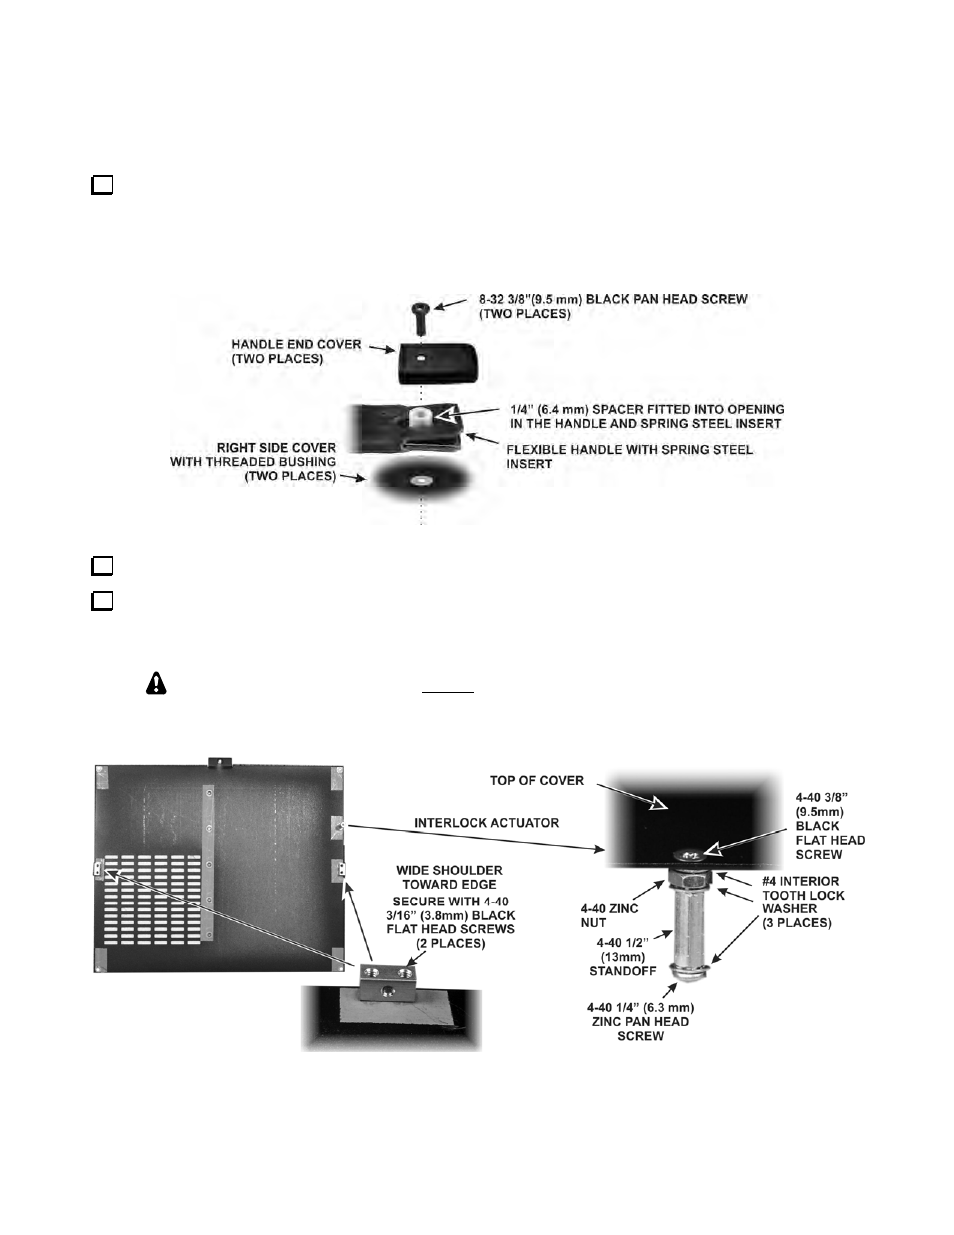
Install the handle on the right side of the KPA500 as shown in Figure 62. Be sure the spacer passes through
the openings in both layers of the rubber handle and the opening in the spring steel insert. Note that the handle is
shown with the ridges facing away from the panel. That is the most common orientation. It can be reversed so
the ridges face the panel. Some builders feel this gives them a better grip when carrying the KPA500, but others
find that the ridges are uncomfortable to hold.
Figure 62. Installing the Side Handle.
Locate the top cover and remove any masking tape found on the inside (partially painted) surface.
Mount two 2D fasteners and the interlock actuator on the bottom (inside) surface of the top cover as shown
in Figure 63. The interlock actuator will press against the interlock switch on the side panel when the top cover
is in place to enable the high voltage supply.
Assemble the Interlock Actuator exactly as shown below. Leaving any parts out will
result in the actuator not operating the interlock switch properly, causing a voltage fault
when you attempt to operate the KPA500.
Figure 63. Preparing Top Cover for Installation.