Elecraft KPA500 Kit Assembly Manual User Manual
Page 16
15
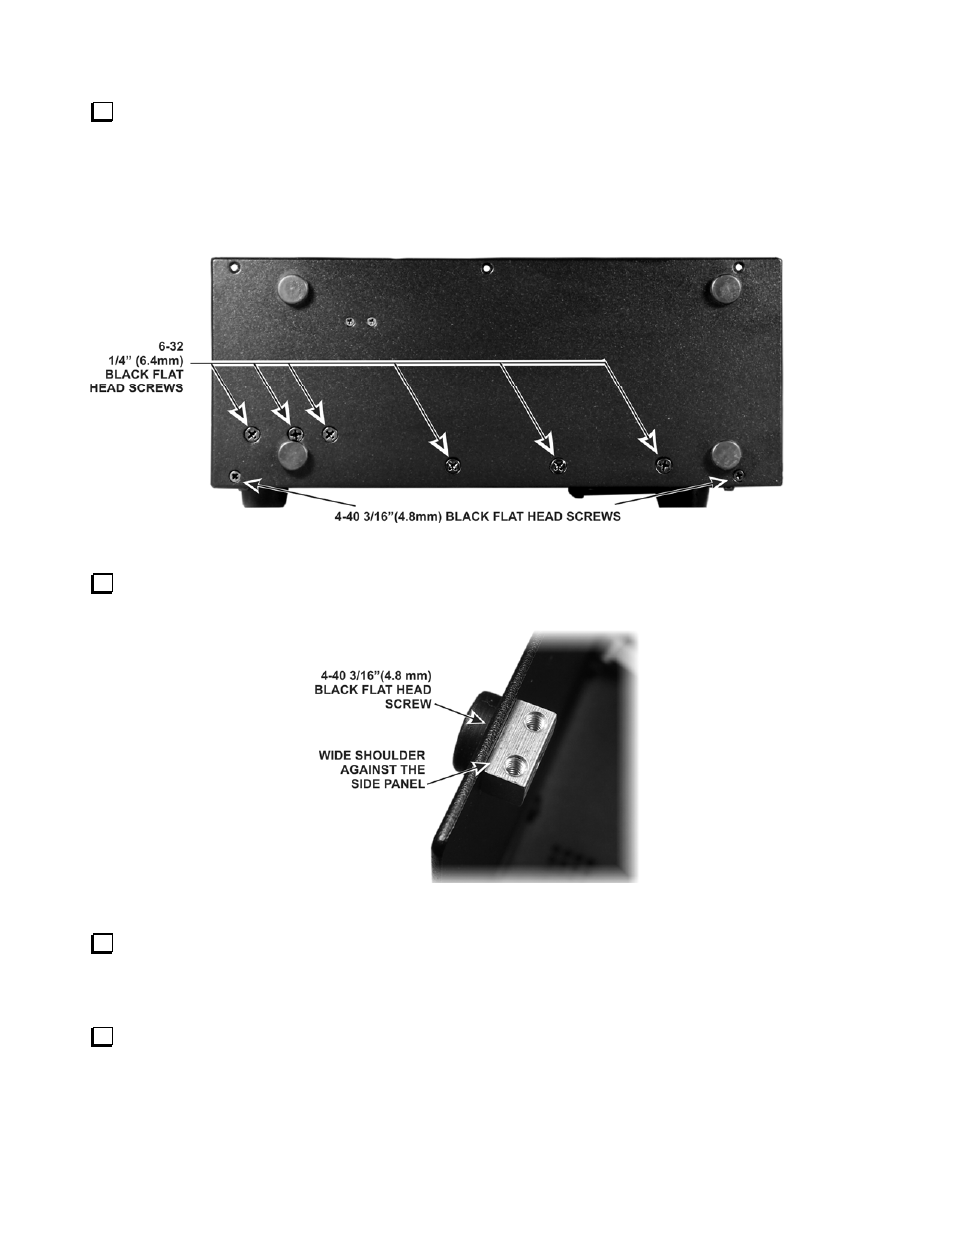
Mount the left side panel on the bottom cover as shown in Figure 14. Note that two different screw sizes are
used. Loosely start all the screws so the panel can move slightly as needed to align all the holes. Tighten all the
screws.
Note:
This side panel is installed now to provide a secure, stable chassis for installing components. Later, it will
be removed temporarily to install the power transformer. The transformer is installed as late as possible since its
weight makes handling the chassis more difficult.
Figure 14. Mounting the Left Side Panel on the Bottom Cover.
Mount a 2D fastener at the top of the left side panel near the front end. The fastener goes on the inside
surface of the panel, parallel with the top edge and with the wide shoulder against the panel (see Figure 15).
Figure 15. Mounting a 2D Fastener on the Left Side Panel.
Mount another 2D fastener at the top of the left side panel near the back (above the power supply module),
oriented just like the 2D fastener you installed near the front in the last step. That will leave only one open hole
near the top center of the side panel. It will be used later.
Set the bottom cover assembly aside in a safe place until it is called for later.