EFCO 8800 Series Assembly Instructions Vol.5 User Manual
Page 79
EFCO 2009
Page 79
Series 8700 / 8800 Unitized Curtain Wall Assembly Instructions - Volume 5
Exterior WA07 starts
and ends 3” above the
sill sash and wraps
around on three sides
of the vent.
Interior WA07
starts at the center
of the head sash
and wraps around
on all four sides of
the vent.
Apply a piece of the WA07 preset
gasket to the exterior leg of the sill
sash of the vent that starts and stops
6” short of the jamb sash on each end.
Section 31 - Gasket Application and Hardware Mounting On Vent Frame
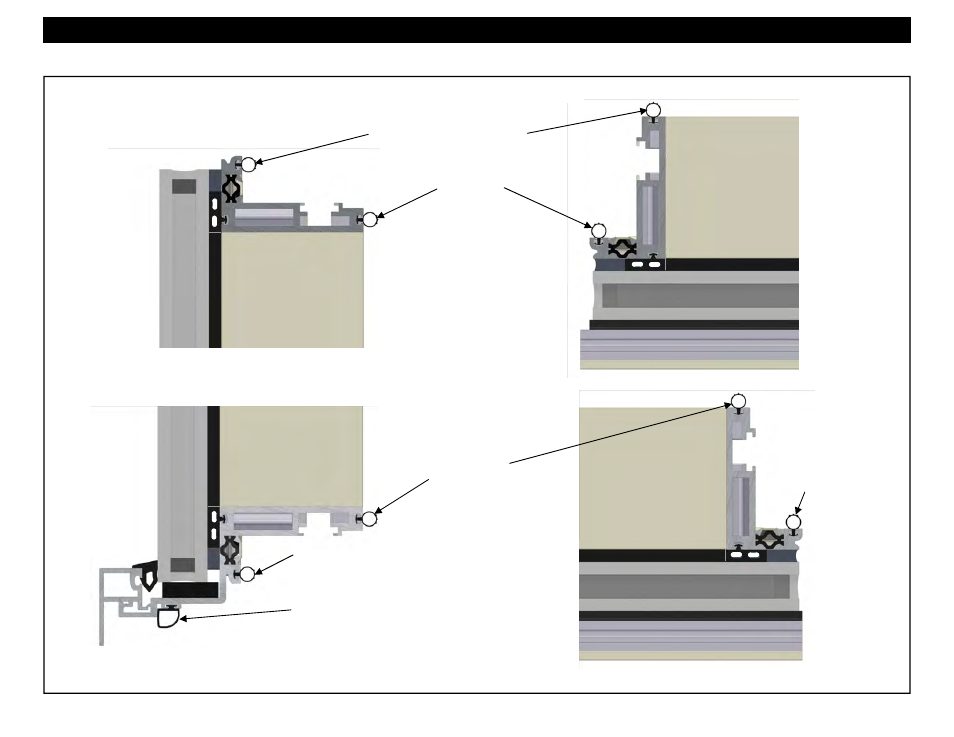
Figure 205 HEAD
Figure 206 SILL
Exterior WA07 starts and ends 3”
above the sill sash and wraps
around on three sides of the vent.
Figure 207 JAMB
Figure 208 JAMB
Interior WA07
starts at the center
of the head sash
and wraps around
on all four sides of
the vent.
Slide in a piece of the WS00 gasket
into the fin bar of the sill sash of the
vent. WS00 cut length to equal that of
the fin where the gasket is applied.
Captured Vent at Stack Sill