EFCO 8800 Series Assembly Instructions Vol.5 User Manual
Page 27
EFCO 2009
Page 27
Series 8700 / 8800 Unitized Curtain Wall Assembly Instructions - Volume 5
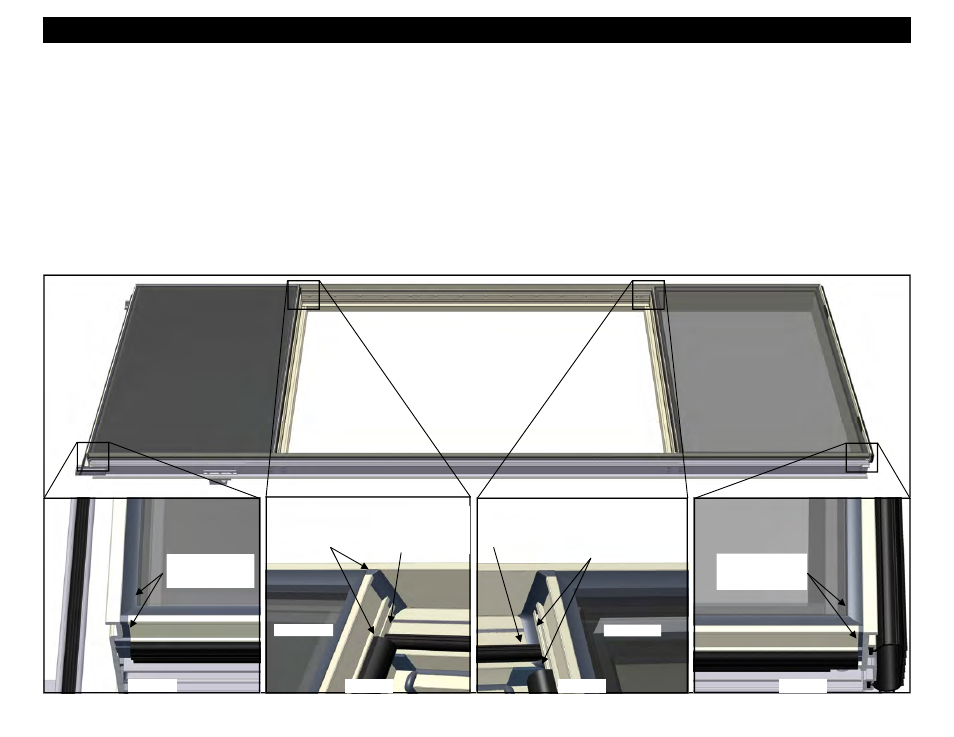
Section 22 - SSG Vent Unit Glazing at Fixed Horizontal : D. Weather Seal Application
Figure 36
1. Using an approved solvent or cleaner, clean the sealant contact surfaces of the glazing and adapters of all oils and other contaminants.
2. If sealant primer is required, apply it per the primer/sealant manufacturer’s instructions.
3. Insert 3/8” diameter backer rod between the glazing and adapters around all four corners of each lite of glazing. Refer to Volume 2, Figure 38 page 17 for more
information.
4. Apply sealant into the void between the adapters and glazing to form the weather seal and tool smooth. If the sealant is properly and carefully applied, masking
tape on the adjacent surfaces is not necessary.
5. Seal the ends of adapter at the head of the vent, running the sealant to the face of the vertical, but not across the face of the vertical. This allows weeps for the
glazing pocket of the lite above the vent. Tool the sealant neatly into the adjacent surfaces. Slide the WS00 gasket out of the way to apply this seal. Return WS00
to its former position after sealing. See Figure 38.
6. Seal the ends of the adapter at the sill of the vent, running the sealant to the vertical and across the face and around to where the adapter meets the horizontal. Lift
WA07 gasket out of the way to apply this seal. Tool the sealant neatly into the adjacent surfaces. Return WA07 to its former position after sealing. See Figure 39.
7. Before the sealant begins to cure or skin over, tool the sealant into the joints smoothly, taking care to smooth and blend the sealant in the corners and intermediate
intersections as shown below. See Figures 37 through 40. Seen in section view, the sealant should have an hourglass shape and maintain a 2:1 width to depth
ratio as shown in Volume 2, Figure 38 on page 17. Remove any excess sealant from the surrounding surfaces before the sealant begins to cure.
HEAD
SILL
Sealant continuity
joint and weather
seals.
VENT HEAD
Sealant continuity
joint and weather
seals.
Figure 37
Figure 38
Figure 39
Figure 40
Omit sealant at the
face of the vertical
to create weeps for
the lite above.
VENT SILL
Slide back WS00
gasket and seal the
adapters as shown.
Seal the ends of the
adapter, along the
face of the vertical,
and around to the
horizontal.
Lift WA07 gasket
back and seal the
adapters as shown.