EFCO 8800 Series Assembly Instructions Vol.5 User Manual
Page 54
EFCO 2009
Page 54
Series 8700 / 8800 Unitized Curtain Wall Assembly Instructions - Volume 5
Section 26 - Assembly and Glazing - SSG Vent at Fixed Horizontal
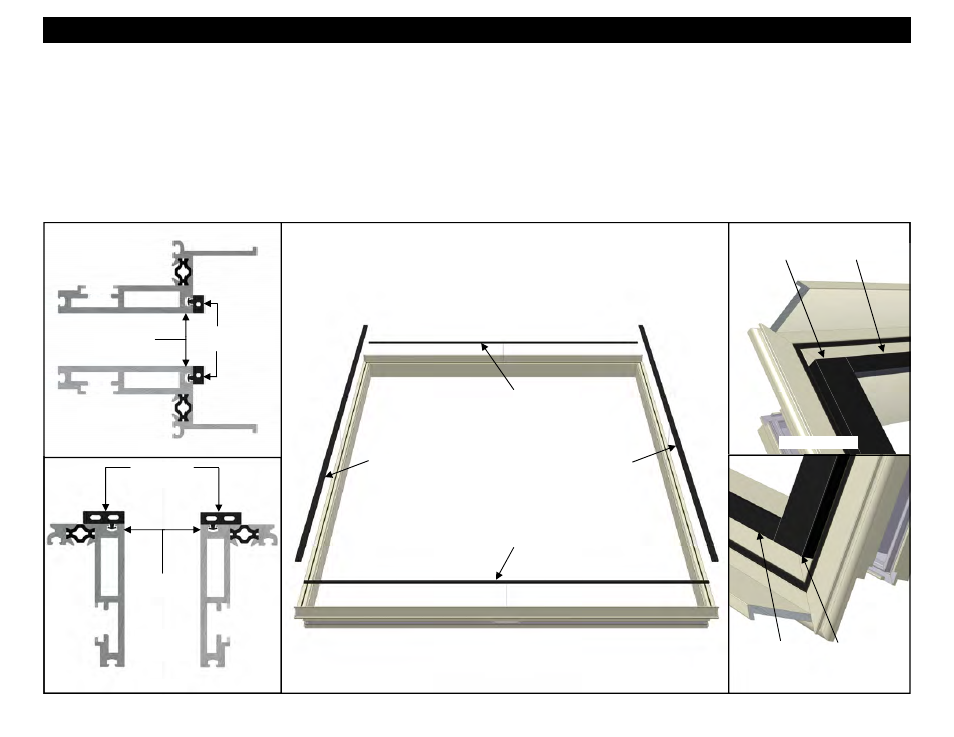
Figure 97
6. Using an approved solvent or cleaner, clean the surfaces of the sash to receive the WC18, WS10 spacer gaskets and sealant of all oils and other
contaminants. The sealant manufacturer’s preparation and application instructions should be followed exactly.
7. If sealant primer is required, apply it per the primer/sealant manufacturer’s instructions. See the note in Figure 97 below.
8. Frames must be true and square before being structurally glazed. Improperly squared units will cause significant problems during vent operation. Check
the frame for squareness by comparing the difference between the two diagonal measurements of the frame by measuring from corner to opposing corner
for the two diagonal dimensions. The vent frame must be absolutely square for glazing.
9. Apply WS10 offset spacer gaskets to the vertical sash members. Ensure the gaskets are applied as shown in Figure 99 and are flush with the side of the
sash at the D.L.O. WS10 runs through at the corners, with WC18 running in between. Cut the gasket long, so it can be trimmed flush with the WC18
gaskets, as shown in Figures 100 and 101. Notch the gasket dart on each end of WS10 to clear the miter at the corners of the frame.
10. Apply WC18 offset spacer gaskets to the head and sill sash members. WC18 runs between the WS10 gaskets at the vertical sash members.
WS10 Offset
SSG Spacer
WS10 Offset
SSG Spacer
WC18 Offset
SSG Spacer
WC18 Offset
SSG Spacer
HEAD
SILL
Figure 99
Figure 98
Figure 100-Head
Figure 101-Sill
WC18 Offset
SSG Spacer
WS10 Offset
SSG Spacer
WS10 Offset
SSG Spacer
WC18 Offset
SSG Spacer
WS10 Offset
SSG Spacer
WC18 Offset
SSG Spacer
Apply flush
with sash.
Apply flush
with sash.
Head Sash 1H67
Sill Sash 1H67
Jamb Sash
1H66
Note: After cleaning and priming the glazing substrates (priming when required), the
glazing must be set and the structural silicone applied immediately. The time between
cleaning, priming, and applying the structural silicone should be less than two hours.
Otherwise, the substrates may become contaminated, and the primer will oxidize. If
units have been prepared for glazing at the end of the day, and sealant has not yet been
applied, cleaning and priming must be redone prior to glazing the next day.