Mounting your furnace, Mounting the thermostat, Fasten furnace top – Qmark CFWF - Counterflow Electric Wall Furnace User Manual
Page 6: Fasten furnace bottom, Figure 7, Figure 8 figure 9
Mounting the Thermostat
1. Read instructions for thermostat. Grasp thermostat
cover and pull gently outward at top to remove.
2. Connect the thermostat wires to terminal screws
marked R and W on the base.
3. Push excess wire back through the hole in the wall
and plug hole with insulation to prevent drafts from
affecting thermostat operation.
4. Fasten the thermostat base to the wall through the
mounting holes with the screws provided.
5. Set dip switches to 1-ON, 2-OFF, and 3-OFF.
6. Replace the thermostat cover.
Mounting Your Furnace
Note: If you are installing the CFWFRO optional rear out-
let refer to Optional Rear Outlet Installation on page 7
before proceeding.
1. If you have elected to recess your heater, clear the
recess of all construction debris.
2. Move furnace upright into position. Drop the flex con-
duit through the hole provided in the top of the fur-
nace.
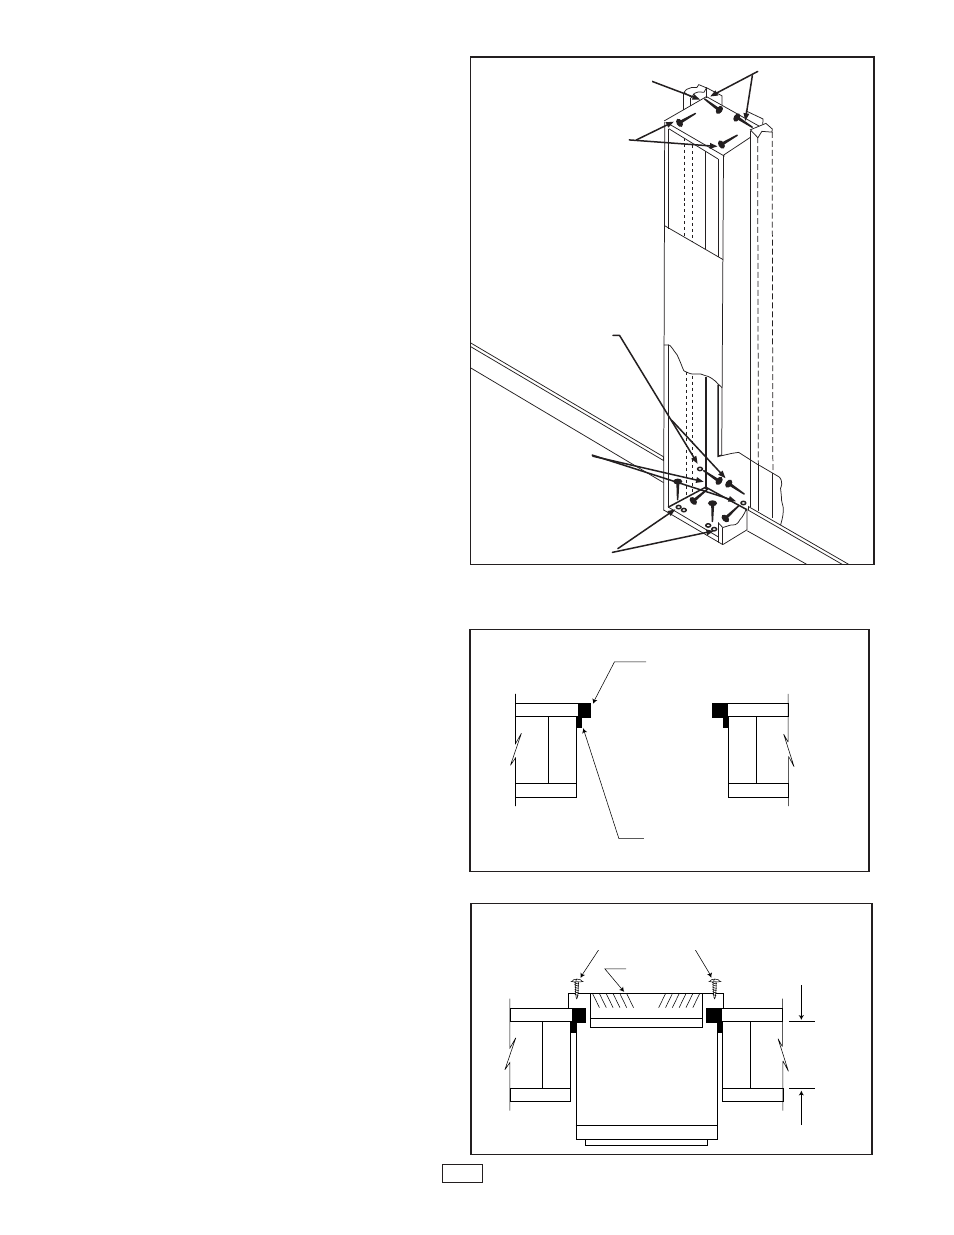
3. Fasten Furnace Top (Recessed Mounting) to the
studs through holes provided into top flanges using
(2) long screws provided (Fig. 8).
Fasten Furnace Top
(Surface Mounting)
Fasten furnace top to wall using (2) metal anchors
(packed in hardware kit) by placing them over the back
flange of furnace top and screwing to wall with (2) long
screws provided. See Fig. 8.
Note: Some fasteners are not provided and some
holes are not pre-drilled due to the many various con-
struction situations that may be encountered.
Suitable fasteners for your application may be pur-
chased at your local hardware store
Fasten Furnace Bottom
(Surface and Recessed Mount)
Drill (2) holes in the bottom of the furnace cabinet near
each side. Fasten the furnace through these holes to the
floor. If your floor is made of concrete, use the alternate
fastening location as shown in Fig. 7.
Figure 7
METAL ANCHORS
RECESSED MOUNT
TOP FASTENING
SURFACE MOUNT
TOP FASTENING
NOTE: INTERNAL COMPONENTS
NOT SHOWN FOR CLARITY
RECESSED
MOUNT BOTTOM
FASTENING IF
CONCRETED
FLOOR
SURFACE MOUNT
BOTTOM FASTENING
IF CONCRETE FLOOR
BOTTOM FASTENING
WOOD FLOOR
NOTE: DO NOT USE BOTTOM DOOR HOLES FOR
MOUNTING FURNACE
yyy
yy
yyy
yyy
yy
yyy
yyy
yyy
Figure 8
Figure 9
PLASTER GROUND
NAIL PLASTER GROUND TO WALL STUD
SCREW
GRILLE
5-3/8”(137 MM)
MAX RECESS
RECESSED MOUNTING
(10 INCH MOUNTING BOOT REQUIRED)
6