Installing the system battery – Dell PowerEdge C1100 User Manual
Page 95
Installing System Components
95
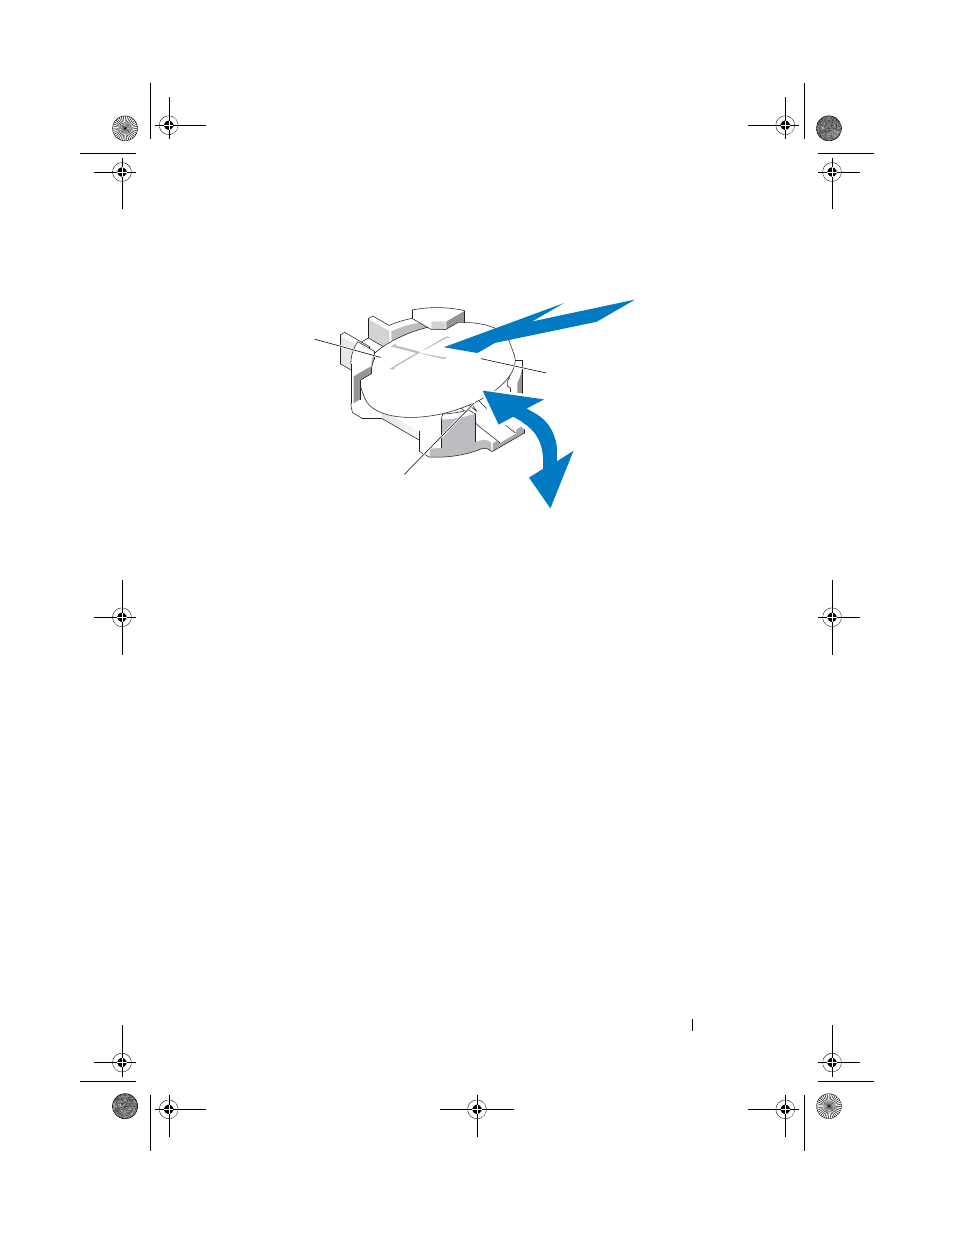
Figure 3-26. Removing and Installing the System Battery
Installing the System Battery
1 Support the battery connector by pressing down firmly on the positive side
of the connector.
2 Hold the battery with the "+" facing up, and slide it under the securing
tabs at the positive side of the connector.
3 Press the battery straight down into the connector until it snaps into place.
4 Install the cooling shroud. See "Installing the Cooling Shroud" on page 57.
5 Close the system. See "Closing the System" on page 56.
6 Reconnect the system to the electrical outlet and turn the system on,
including any attached peripherals.
7 Enter the System Setup program to confirm that the battery is operating
properly. See "Using the System Setup Program" on page 35.
8 Enter the correct time and date in the System Setup program's Time and
Date fields, and re-enter any customized option settings as needed.
9 Exit the System Setup program.
1
positive side of battery connector
2
system battery
3
negative side of battery connector
3
1
2
book.book Page 95 Tuesday, February 26, 2013 11:33 AM