Installing the non-redundant power supply, E figure 3-17 – Dell PowerEdge C1100 User Manual
Page 81
Installing System Components
81
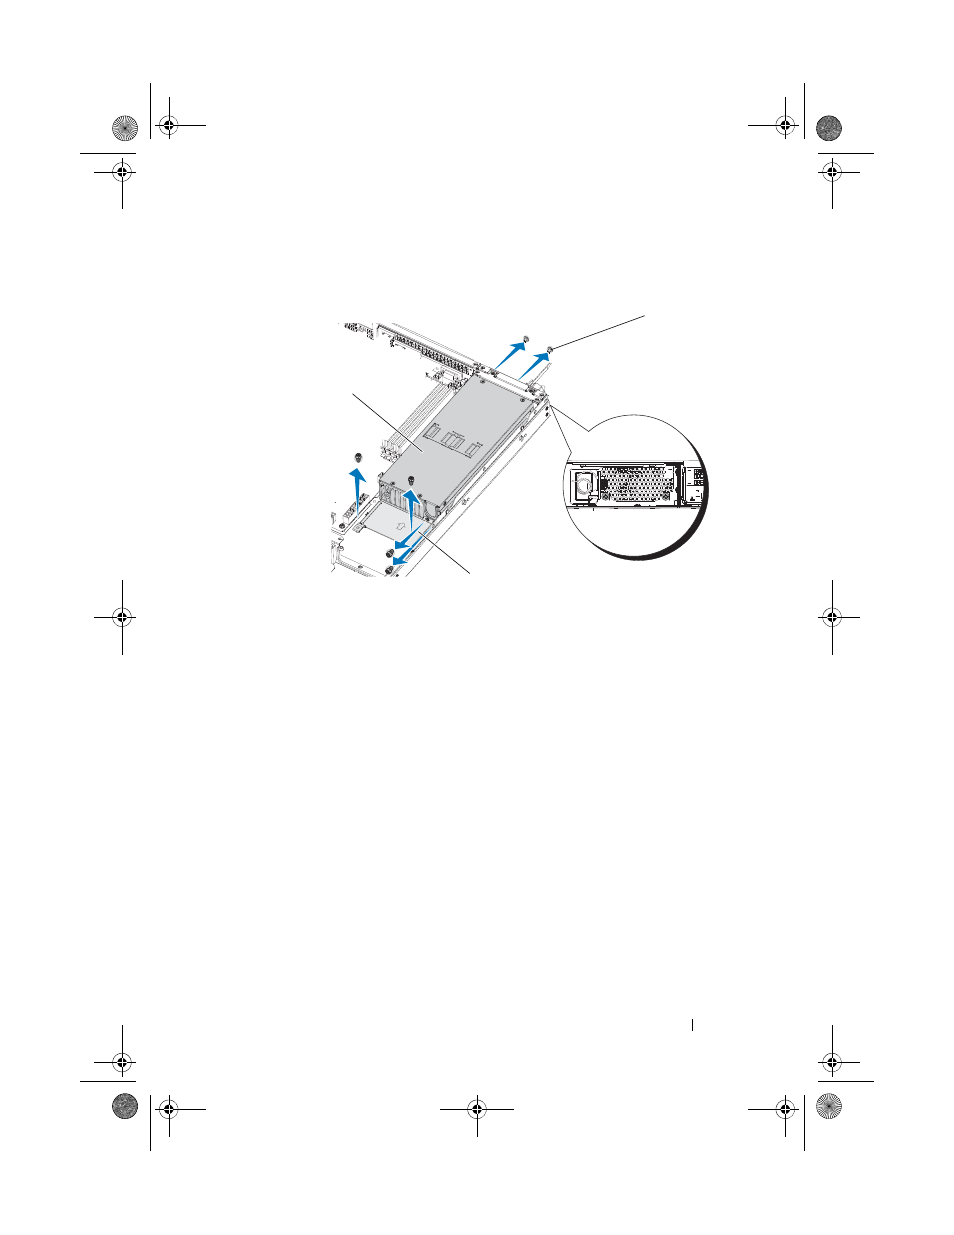
Figure 3-17. Removing and Installing the Non-Redundant Power Supply
Installing the Non-Redundant Power Supply
1 Insert the replacement power supply and the securing bracket firmly into
the bay. See Figure 3-17.
2 Replace the two screws at the back.
3 Replace the four screws securing the bracket.
4 Replace the cables connecting the power supply to the system board and
backplane. See Figure 5-2, Figure 5-4, and Figure 5-6.
5 Replace the system cover. See "Closing the System" on page 56.
6 Connect the power cable to the power supply and plug the cable into a
power outlet.
7 Reconnect your system and peripherals to their electrical outlets, and turn
on the system.
1
power supply
2
screws (6)
3
bracket
2
3
1
book.book Page 81 Tuesday, February 26, 2013 11:33 AM
- Inspiron 530 (2 pages)
- OptiPlex 755 (82 pages)
- OptiPlex 755 (45 pages)
- OptiPlex 755 (248 pages)
- OptiPlex 755 (622 pages)
- OptiPlex 755 (528 pages)
- OptiPlex 760 (76 pages)
- OptiPlex 760 (203 pages)
- OptiPlex 745 (428 pages)
- OptiPlex 745 (212 pages)
- OptiPlex 745 (360 pages)
- OptiPlex 780 (89 pages)
- OptiPlex 780 (10 pages)
- OptiPlex 780 (74 pages)
- OptiPlex 780 (80 pages)
- OptiPlex 780 (73 pages)
- OptiPlex 780 (40 pages)
- OptiPlex 780 (14 pages)
- OptiPlex GX620 (221 pages)
- OptiPlex GX620 (294 pages)
- OptiPlex GX620 (338 pages)
- Inspiron 530 (226 pages)
- OptiPlex 960 (Late 2008) (16 pages)
- OptiPlex GX260 (100 pages)
- OptiPlex GX260 (235 pages)
- OptiPlex FX160 (Late 2008) (132 pages)
- OptiPlex FX160 (20 pages)
- OptiPlex FX160 (Late 2008) (20 pages)
- OptiPlex 210L (258 pages)
- OptiPlex 210L (150 pages)
- OptiPlex 210L (130 pages)
- OptiPlex 210L (128 pages)
- OptiPlex 210L (300 pages)
- OptiPlex 320 (140 pages)
- OptiPlex 320 (132 pages)
- OptiPlex 320 (312 pages)
- OptiPlex 320 (266 pages)
- OptiPlex 320 (356 pages)
- OptiPlex 320 (44 pages)
- OptiPlex GX240 (86 pages)
- OptiPlex GX240 (283 pages)
- OptiPlex GX240 (298 pages)
- OptiPlex GX240 (182 pages)
- OptiPlex GX240 (144 pages)
- OptiPlex GX240 (121 pages)