Installing the heat sink, Ws. see figure 3-7 – Dell PowerEdge C1100 User Manual
Page 59
Installing System Components
59
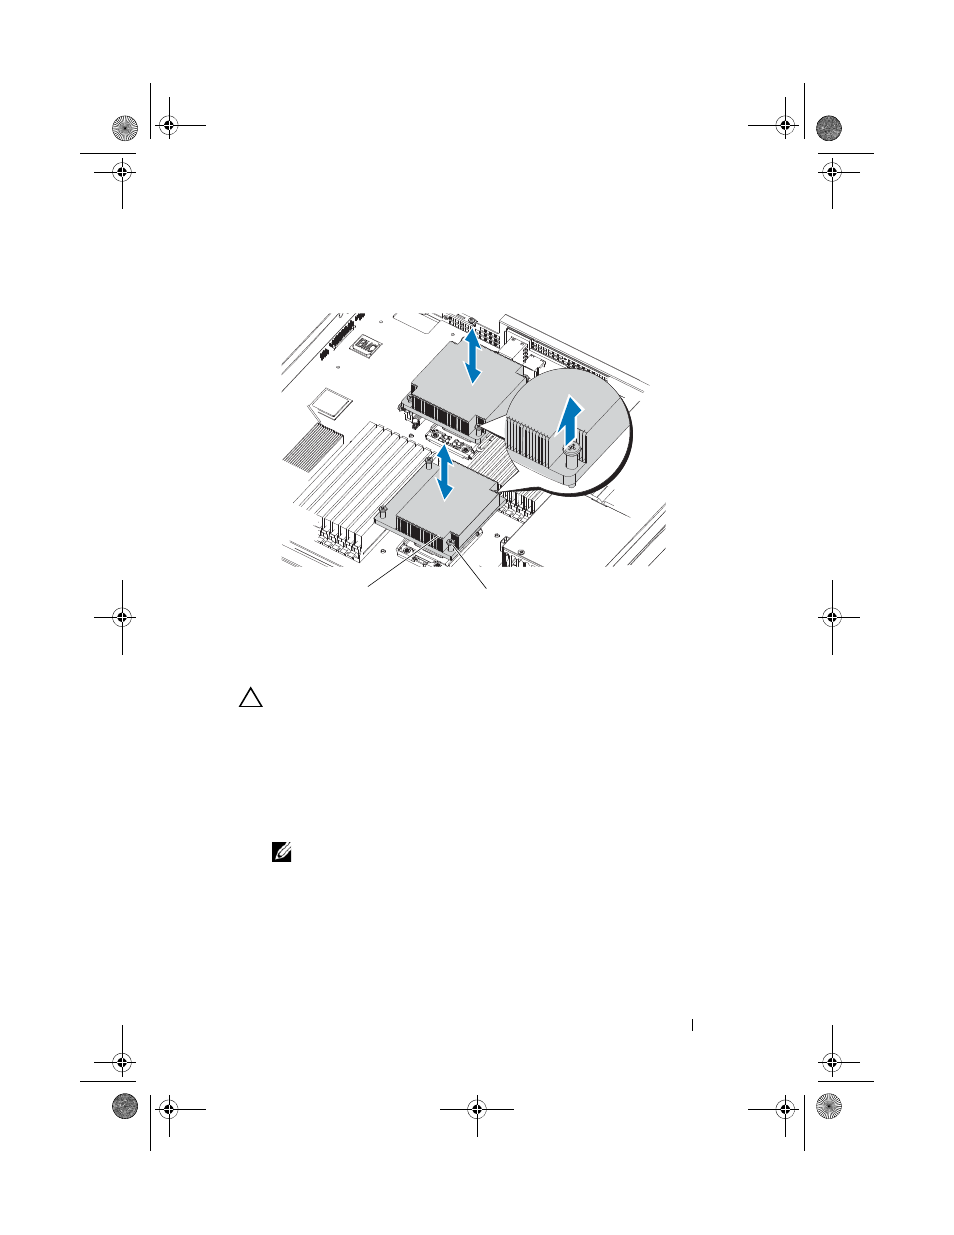
Figure 3-7. Removing and Installing the Heat Sink
Installing the Heat Sink
CAUTION:
The heat sinks for CPU0 and CPU1 are different and are labelled
accordingly. They must be installed in the correct location to prevent the
system from overheating.
1 Using a clean lint-free cloth, remove the thermal grease from the heat sink.
2 Apply new thermal grease evenly to the center of the top of the
new processor.
3 Remove the protective cover from the underside of the heat sink.
NOTE:
Using excess thermal grease can cause grease to contact the
processor shield, which can cause contamination of the processor socket.
4 Place the heat sink(s) on top of the processor(s) and tighten the four
captive screws.
5 Replace the cooling shroud. See "Installing the Cooling Shroud" on
1
heat sink
2
screws (4 each)
2
1
book.book Page 59 Tuesday, February 26, 2013 11:33 AM
- Inspiron 530 (2 pages)
- OptiPlex 755 (82 pages)
- OptiPlex 755 (45 pages)
- OptiPlex 755 (248 pages)
- OptiPlex 755 (622 pages)
- OptiPlex 755 (528 pages)
- OptiPlex 760 (76 pages)
- OptiPlex 760 (203 pages)
- OptiPlex 745 (212 pages)
- OptiPlex 745 (360 pages)
- OptiPlex 745 (428 pages)
- OptiPlex 780 (73 pages)
- OptiPlex 780 (40 pages)
- OptiPlex 780 (14 pages)
- OptiPlex 780 (89 pages)
- OptiPlex 780 (10 pages)
- OptiPlex 780 (74 pages)
- OptiPlex 780 (80 pages)
- OptiPlex GX620 (221 pages)
- OptiPlex GX620 (294 pages)
- OptiPlex GX620 (338 pages)
- Inspiron 530 (226 pages)
- OptiPlex 960 (Late 2008) (16 pages)
- OptiPlex GX260 (100 pages)
- OptiPlex GX260 (235 pages)
- OptiPlex FX160 (Late 2008) (132 pages)
- OptiPlex FX160 (20 pages)
- OptiPlex FX160 (Late 2008) (20 pages)
- OptiPlex 210L (258 pages)
- OptiPlex 210L (150 pages)
- OptiPlex 210L (130 pages)
- OptiPlex 210L (128 pages)
- OptiPlex 210L (300 pages)
- OptiPlex 320 (140 pages)
- OptiPlex 320 (132 pages)
- OptiPlex 320 (312 pages)
- OptiPlex 320 (266 pages)
- OptiPlex 320 (356 pages)
- OptiPlex 320 (44 pages)
- OptiPlex GX240 (86 pages)
- OptiPlex GX240 (283 pages)
- OptiPlex GX240 (298 pages)
- OptiPlex GX240 (182 pages)
- OptiPlex GX240 (144 pages)
- OptiPlex GX240 (121 pages)