Installing drives: dell™ optiplex™ e1 managed pc, Installing drives, Removing and replacing front-panel inserts – Dell OptiPlex E1 User Manual
Page 68: Overview
Installing Drives: Dell™ OptiPlex™ E1 Managed PC
Removing and Replacing Front-Panel Inserts
Installing a Drive in the 5.25-Inch Drive Bay
Installing an EIDE Hard-Disk Drive
Overview
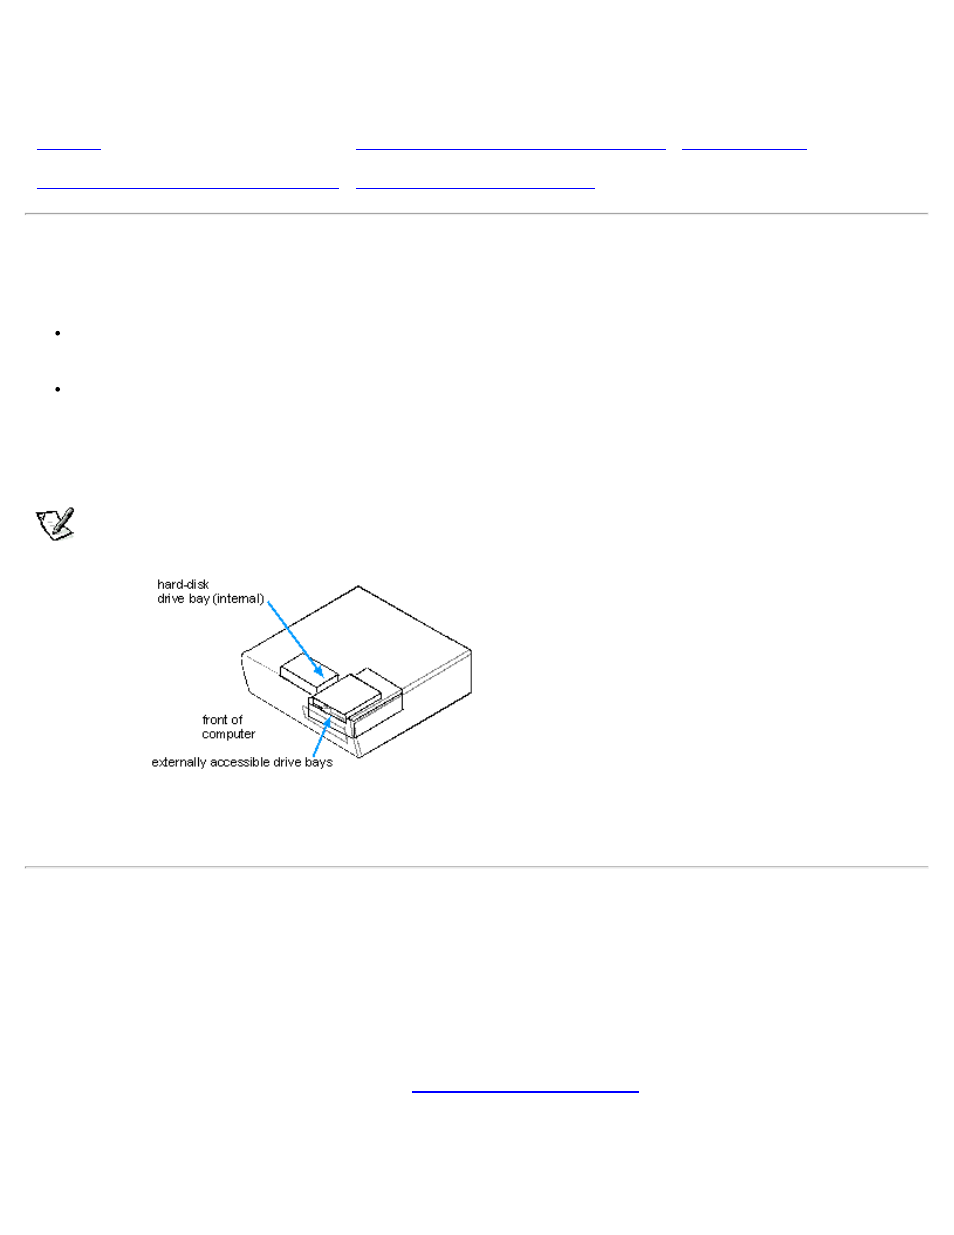
Your Dell computer has three drive bays for installing the following types of drives (see Figure 7-1):
The externally accessible drive bays at the front of the computer consist of one 3.5-inch drive bay (dedicated to a 3.5-inch
diskette drive) and one 5. 25-inch bay that can hold one half-height, 5.25-inch device—typically a tape drive or CD-ROM
drive.
The hard-disk drive bay (located to the left of the externally accessible drive bays) can hold a single 3.5-inch enhanced
integrated drive electronics (EIDE) hard-disk drive.
The next two sections contain information that you will need in several of the installation procedures described later in the chapter.
The remaining sections of this chapter cover each type of drive installation.
NOTE:
In all of the following procedures, left and right refer to your left and right as you face the front of the computer.
Figure 7-1. Drive Locations
Removing and Replacing Front-Panel Inserts
Empty drive bays contain a front-panel insert to protect the inside of the computer from dust particles and ensure proper airflow
within the computer. Before you install a drive in an empty drive bay, you must first remove the front-panel insert.
To remove the insert covering the 5.25-inch bay, follow these steps:
1. Turn off the system, including any attached peripherals, and disconnect all the AC power cables from their power
sources.
2. Remove the computer cover as instructed in "
3. Lay the computer cover upside down on a flat work surface, with the front of the cover facing toward you.
4. With your thumbs, press in each end of the insert until it snaps free of the cover (see Figure 7-2).