Installing a dimm, Removing a dimm – Dell OptiPlex E1 User Manual
Page 64
5.
Press
The system should have already changed the value in the System Memory category to reflect the newly installed memory.
Verify the new total.
NOTE:
If the memory total is incorrect, turn off your computer and peripherals and disconnect them from their
power sources, remove the computer cover, and check the installed DIMMs to make sure that they are seated
properly in their sockets. Then repeat steps 4 and 5.
6. When the System Memory total is correct, press the
See your Diagnostics and Troubleshooting Guide for information on running the Dell Diagnostics and troubleshooting any
problems that may occur.
Installing a DIMM
To install a DIMM, follow these steps:
1. Locate the first empty socket in which you plan to install a DIMM.
For optimum performance, DIMMs should be installed in consecutive sockets beginning with socket A.
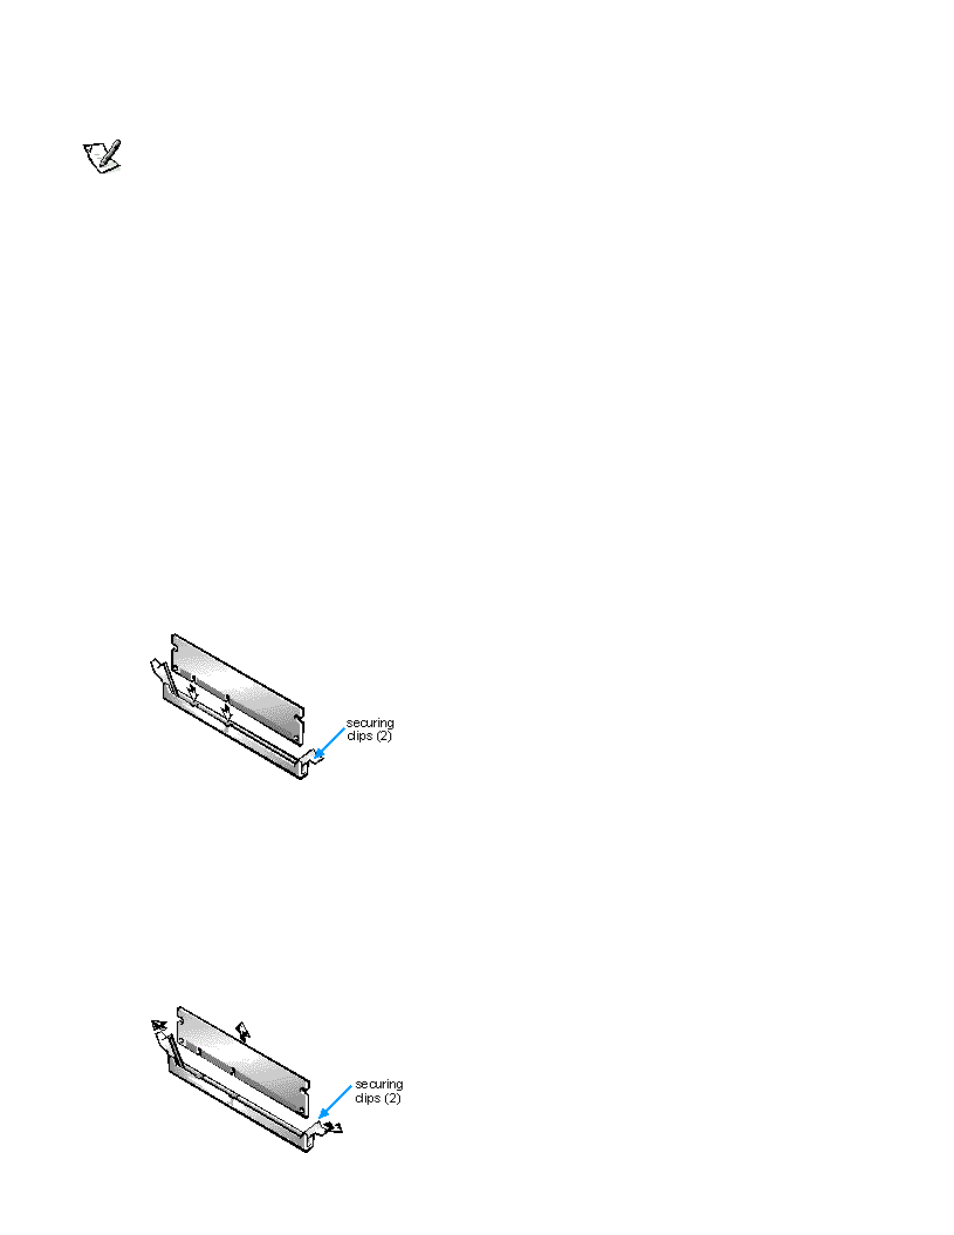
2. Locate the plastic securing clips at each end of the socket. Press the clips outward until they snap open.
3. Orient the DIMM to the socket by aligning the notches in the DIMM's edge connector with the crossbars in the
socket.
4. Press the DIMM straight into the slot running down the center of the socket (see Figure 6-7) until the securing clips
snap into place around the ends of the DIMM.
Figure 6-7. Installing a DIMM
Removing a DIMM
To remove a DIMM, press the securing clips outward (see Figure 6-8) simultaneously until the DIMM disengages from the socket
(it should pop up slightly).