Edge Lighting Cirrus Channel, Wall Grazer User Manual
Page 3
3
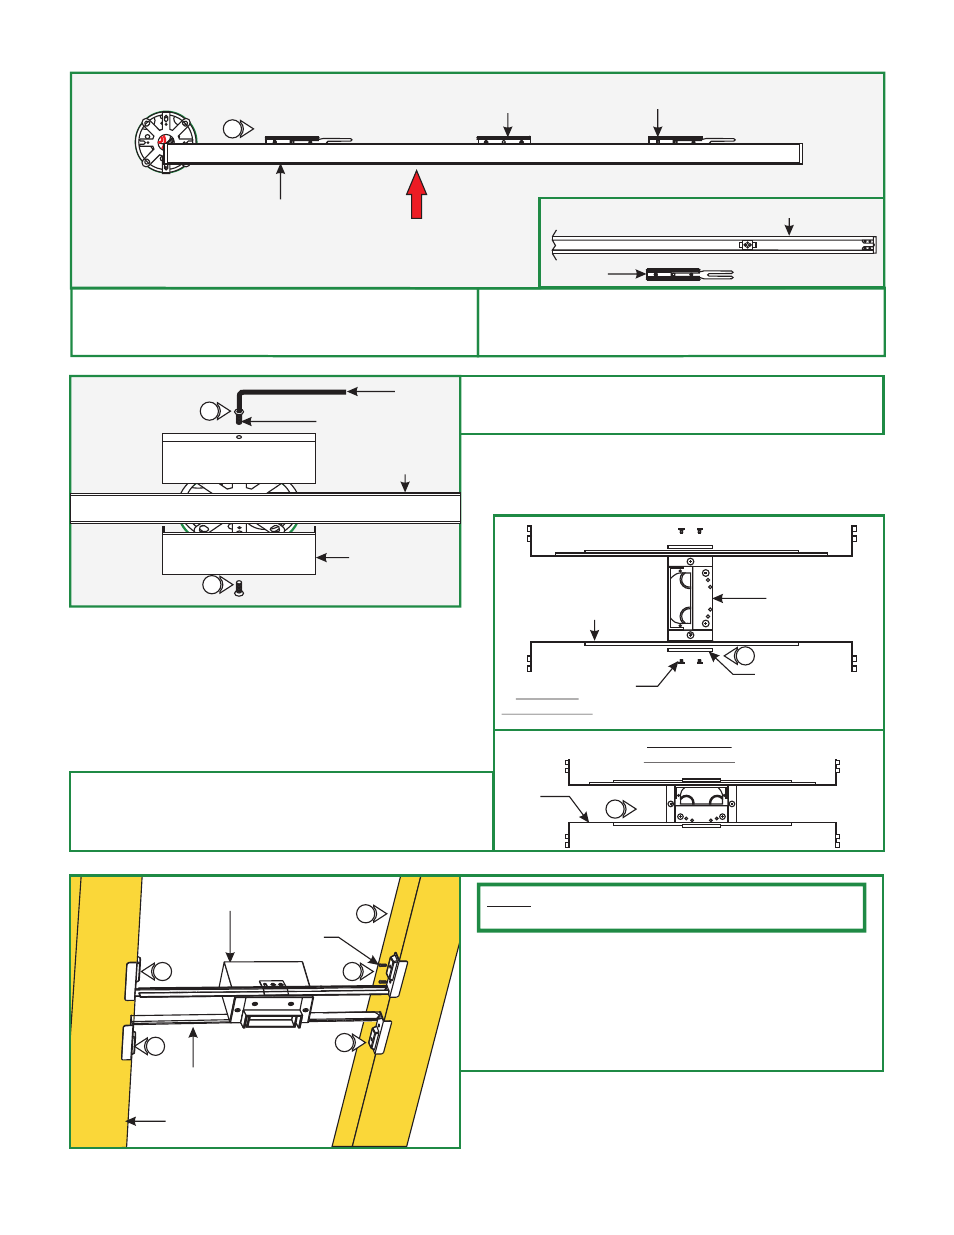
MOUNTING
CLIP (C-MCL)
LOCKING CLIP
10
CHANNEL
10: Carefully snap channel onto the locking/mounting clips
then slide 2" into receiving bracket to lock in place. Make
sure not to nick the wires.
11: If applicable, connect the remaining channels by following
"Connecting the Channel" on page 1. Then secure by
repeating step 10 (above).
BACK OF CHANNEL
RECEIVING BRACKET
LOCKING
CLIP
I
J
12: Place each canopy piece against the channel & line up the
canopy hole with the crossbar hole. Secure the canopy in
place with the screw & Allen wrench provided.
CHANNEL
SCREW
CANOPY
12
12
ALLEN
WRENCH
Install the Channel using the
Junction Box (C-1RE-JBOX)
K
2
3
1
2
3
1
JUNCTION
BOX
MOUNTING
BRACKET
1: Mount each adjustable mounting bar to one side of the
junction box (mounts to any side of the housing depending
on the orientation of the channel) and secure them with the
mounting brackets and two Phillips screws provided.
ADJUSTABLE
MOUNTING BAR
PHILLIPS
SCREW
1
VERTICAL
ORIENTATION
HORIZONTAL
ORIENTATION
1
JUNCTION
BOX
2
3
1
2
3
1
STUD
ADJUSTABLE
MOUNTING BAR
#8 SCREW
L
2
4
4
4
4
JUNCTION BOX
2:
box to be mounted.
3: Place the adjustable mounting bars between the studs.
4: Make sure the lips on the adjustable mounting bars are
against the studs. Secure the adjustable bars to the
studs with the eight #8 screws.
Select the location between the two studs for the Junction
NOTE:
The adjustable mounting bars mount to studs that are
spaced 16" to 24" apart.