Drew Technologies DASHDAQ-XL User Manual
Page 19
19
ADDING SUPPORT FOR ENHANCED OBD II DATA
Enhanced data purchased with the DashDAQ will be pre-installed when you receive your DashDAQ. If you purchase the enhanced
license after the original purchase or wish to change the driver you may use the DashDAQ recovery tool to update the DashDAQ to
include the purchased driver into the available device driver list. Check out the “Updating DashDAQ” section for more details.
If a user buys a Chrysler Enhanced driver for example:
1. The user purchases the add-on at
www.dashdaq.com
and then waits for confirmation of driver purchase from Drew Tech.
2. Next the user runs the update tool and selects the appropriate drivers.
3. Lastly the driver is available in the DashDAQ Device Manager driver lists.
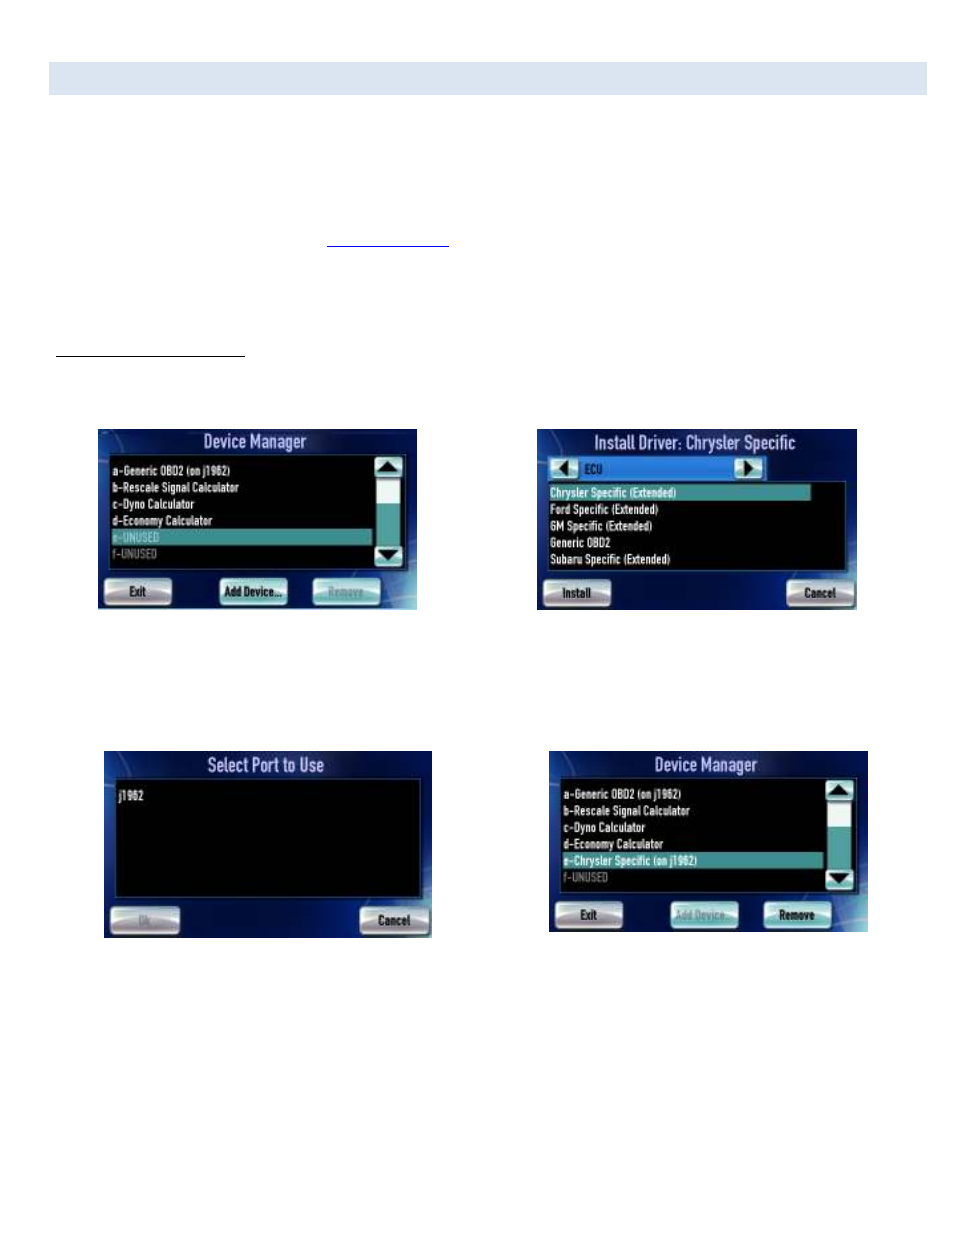
To install an Enhanced Driver:
1. Select an unused port and tap [Add Device].
Tap [Driver] to choose and install a new driver
Select the driver for Chrysler enhanced OBD II data
2. Locate and select the enhanced driver you wish to install under the “ECU” screen. Tap [Install].
3. Select [j1962] and then tap [OK].
Tap [Save] to confirm the device installation
New signals will be available on E-ChryslerSpecific
Now that we see the Chrysler Specific driver populated in slot [E], we will now be able to view the Chrysler specific parameters on any
gauge after we run “Find Signals” again.
**If you receive an error of port in use you may need to switch port types or remove an incompatible driver from the device
manager. Some Enhanced data can not be used when Generic OBD or other Enhanced Data driver are installed in the Device
Manager.