Drew Technologies DASHDAQ-XL User Manual
Page 13
13
GAUGE SETUP & NAVIGATION
DashDAQ offers the ability to monitor hundreds of vehicle sensors for real time display and data logging. Data sample rates will vary by
vehicle. This rate is a fixed amount and the total of active signal being monitored and logged will share this sample rate.
NAVIGATING GAUGES
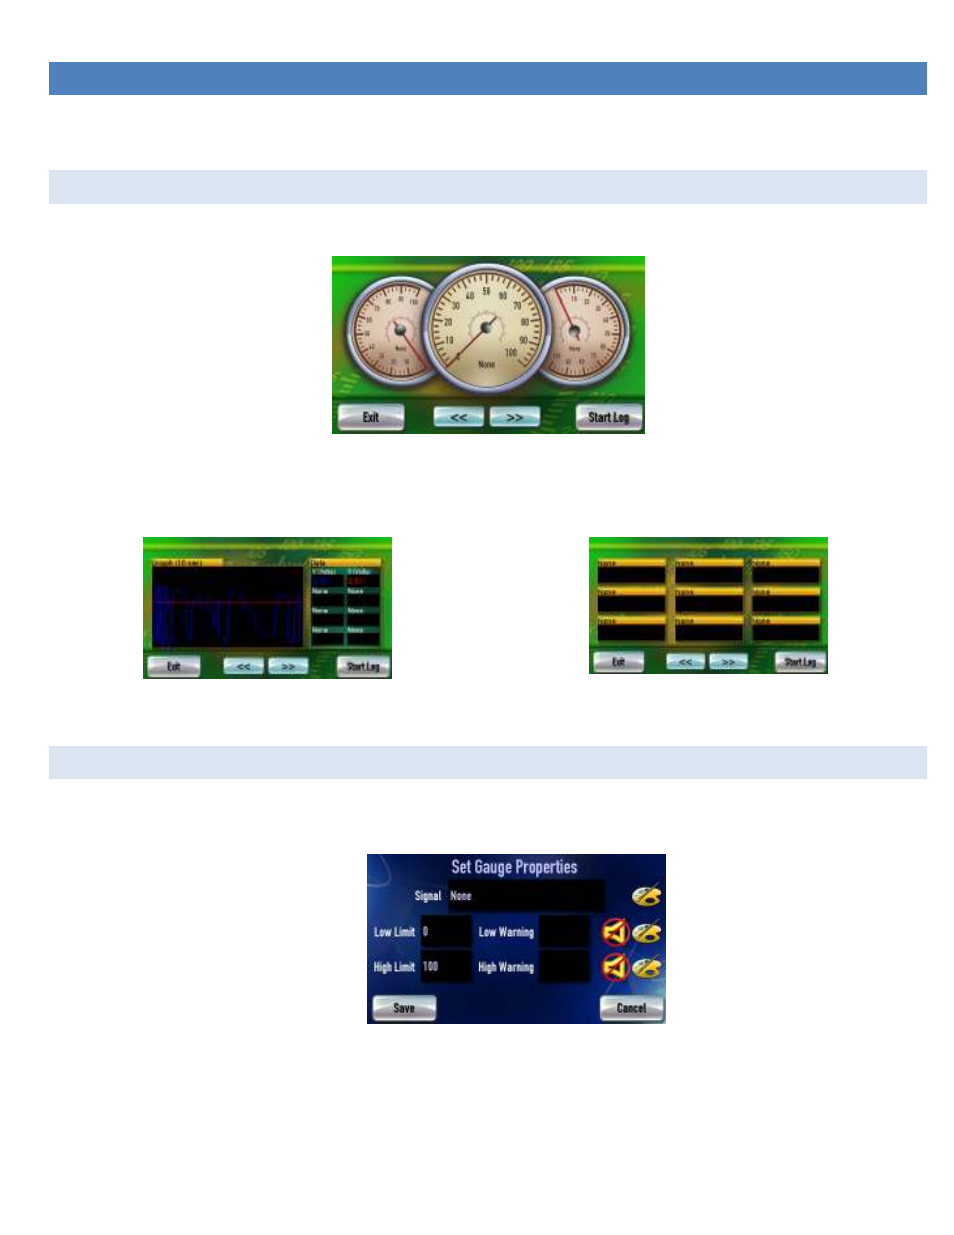
From the Main Menu tap [Gauges].
Layout with 3 round gauges
Tap on the [<<] and [>>] buttons to view other gauge layout options. Two gauge layout examples:
Layout for graphing up to 8 signals
Layout for displaying up to 9 numeric signals
ASSIGN A SIGNAL TO A GAUGE
Be sure the New Vehicle Setup (pg 11) has been completed before assigning signals to a gauge.
1. Tap on the gauge region where the signal will be displayed. This screen will appear:
Assign signal screen
2. Tap on [Signal] area in the black region.
3. Use the [<] or [>] at the top to select the Data group you wish to select your signals from.
4. Use the scroll bar to the right to locate and select the signal you wish to monitor.
5. Tap [Save].