Drew Technologies DASHDAQ-XL User Manual
Page 18
18
LICENSED DASHDAQ DRIVERS
Some third party devices require the purchase of a licensed driver in order to provide full operation with the DashDAQ. These licenses
can be purchased online at,
www.dashdaq.com
, or by calling Drew Technologies. Licenses can be purchased at the time of purchase or
any time thereafter.
Licenses are assigned to the DashDAQ, based on the DashDAQ serial number, and can not be refunded or transferred.
A license purchased after the original DashDAQ purchase, can be added to the DashDAQ using the DashDAQ Recovery tool. An email
will be sent alerting you when you can update your device with the new license.
Follow the Updating DashDAQ instructions below for further instructions.
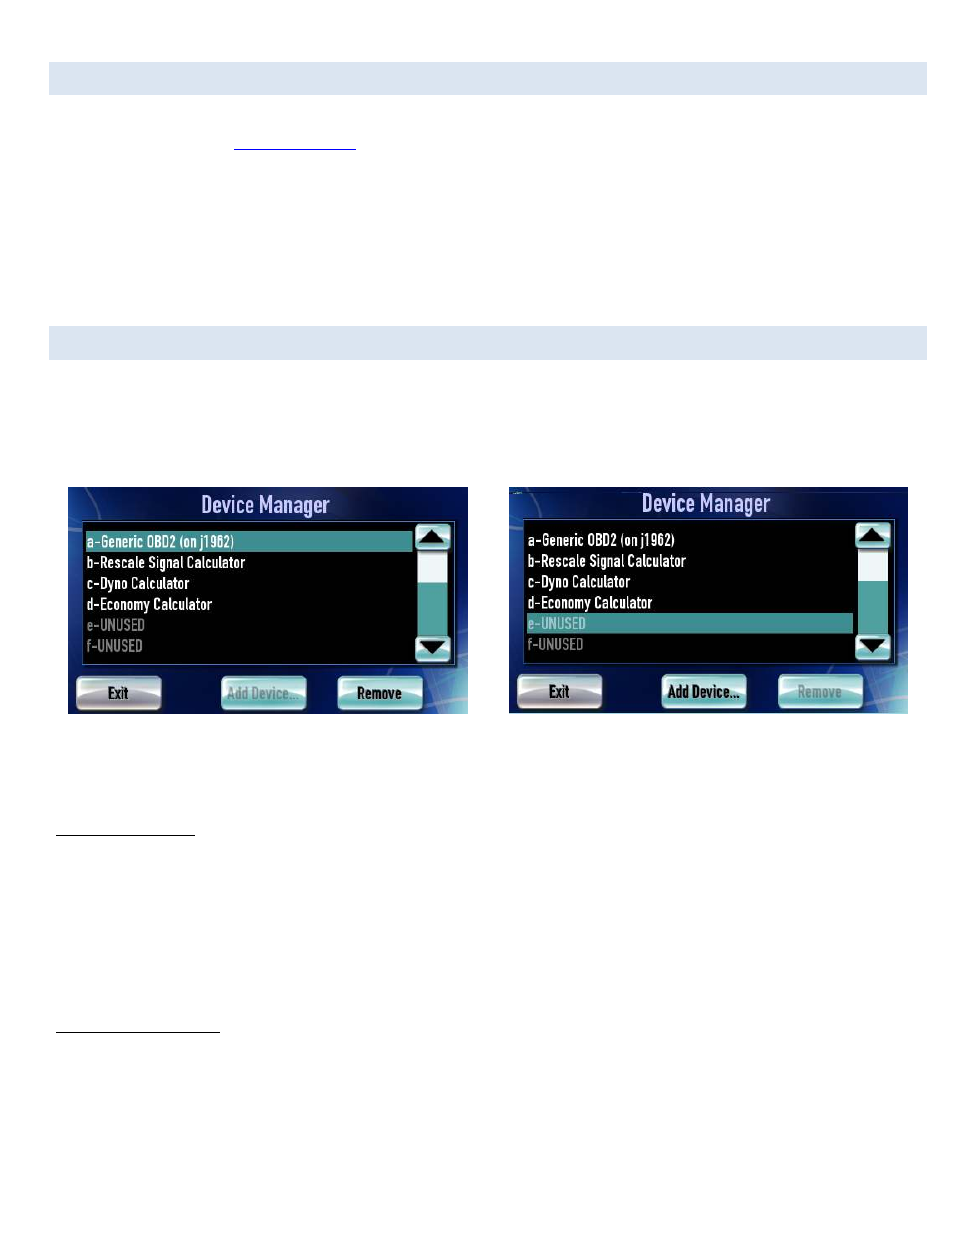
USING DEVICE MANAGER
The DashDAQ Device Manager is where the various pre-installed and licensed drivers and non-OBD II inputs can be added or removed
for use with the DashDAQ.
From the Main Menu tap on [Setup], then [Devices], then [Manager].
Device manager screen
Selecting the next available slot
Notice that there are lettered ports labeled from A-H. These are ports are where the active drivers are specified.
To add a driver/input:
1. Select an unused port and tap [Add Device]
2. Using the [<] or [>] locate and select the driver you wish to install. Then tap [install].
3. Next select which port the input is located on. You can only have 1 item per port type.
4. If you receive an error of port in use you may need to switch port types or remove an incompatible driver from the device
manager.
Now your device will be installed in the slot you specified. All installed devices can be assigned to any gauge.
To remove a driver/input:
1. Select the Driver/Input and tap [remove].
Removing the driver/input does NOT delete the driver/input from the DashDAQ. You can always add it back in the future.