Mounting to the mrs (monitor rail system) – Amico Falcon Combo Arm User Manual
Page 8
8 Amico Accessories Inc.
Mounting To The MRS (Monitor Rail System)
FIT Station
WARNING
DO NOT attempt to mount/remove the FIT Station from the rail when loaded with any
instrument
WARNING
DO NOT mount the FIT Station anywhere near or above a Patient’s head.
WARNING
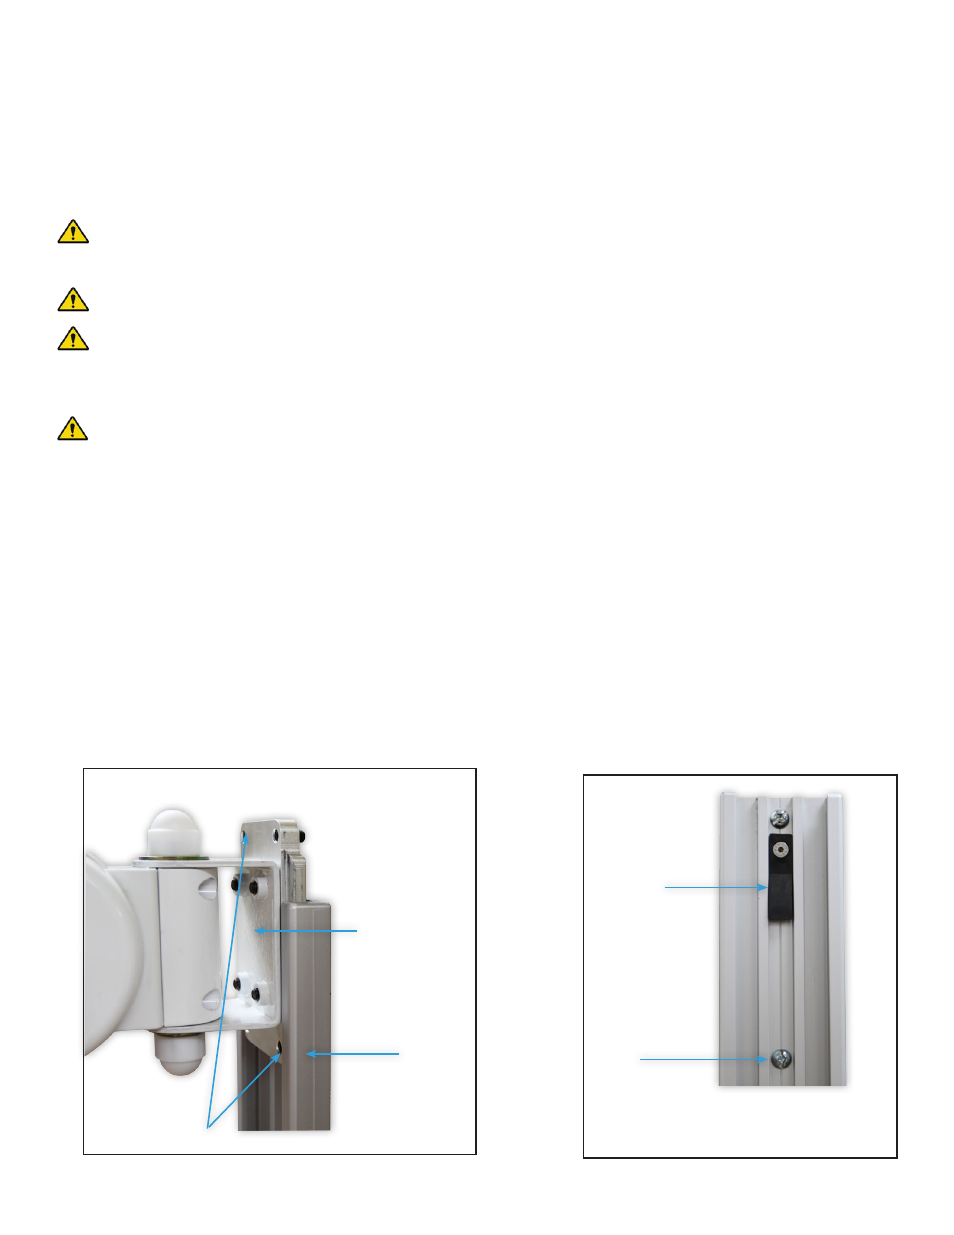
To prevent the Mounting Adapter from sliding down the MRS, ensure the four set screws
are fastened to the tightest possible position, serious injuries could result if the set screws are not properly
fastened. (Figure 1)
WARNING
Ensure rail is stable and properly installed before mounting FIT Station.
NOTE
The top and bottom stopper are there to prevent the Mounting Adapter from sliding out of the
MRS. The Mounting Adapter must be taken out from the top of the MRS with the top stopper pressed back into
the MRS (Figure 2)
1. Install Height locking Lever (See Page 25)
2. Engage the Height Locking Lever with the AHM in the highest position.
3. Lift up the FIT Station and guide the Mounting Adapter into the top of the MRS Rail (Figure 1).
4. Once the arm is positioned at the desired height in the MRS, tighten all four set screws to the tightest possible
position on the Mounting Adapter using a 1/8’’ HEX key.
(Figure 2)
Bottom
Stopper
Top Stopper
MRS Rail: Length for representational use only
(Figure 1)
MRS
Mounting
Adapter
1/4-20 Set
Screws
SECTION 2: Installation on Rail Systems