Air-pro® meter disk installation, Air-pro – Great Plains YP825AR Operator Manual User Manual
Page 80
76
YP825AR
Great Plains Manufacturing, Inc.
401-923M
2014-06-17
Air-Pro
®
Meter Disk Installation
1.
Cross-check Seed Rate Chart data against part
number/description molded into disks to be used.
Population Risk:
Use the same disk in all active rows.
2.
Inspect disks to be installed. Do not install damaged
or excessively worn disks. Either can cause irregular
seeding. Chips and cracks accelerate brush wear.
3.
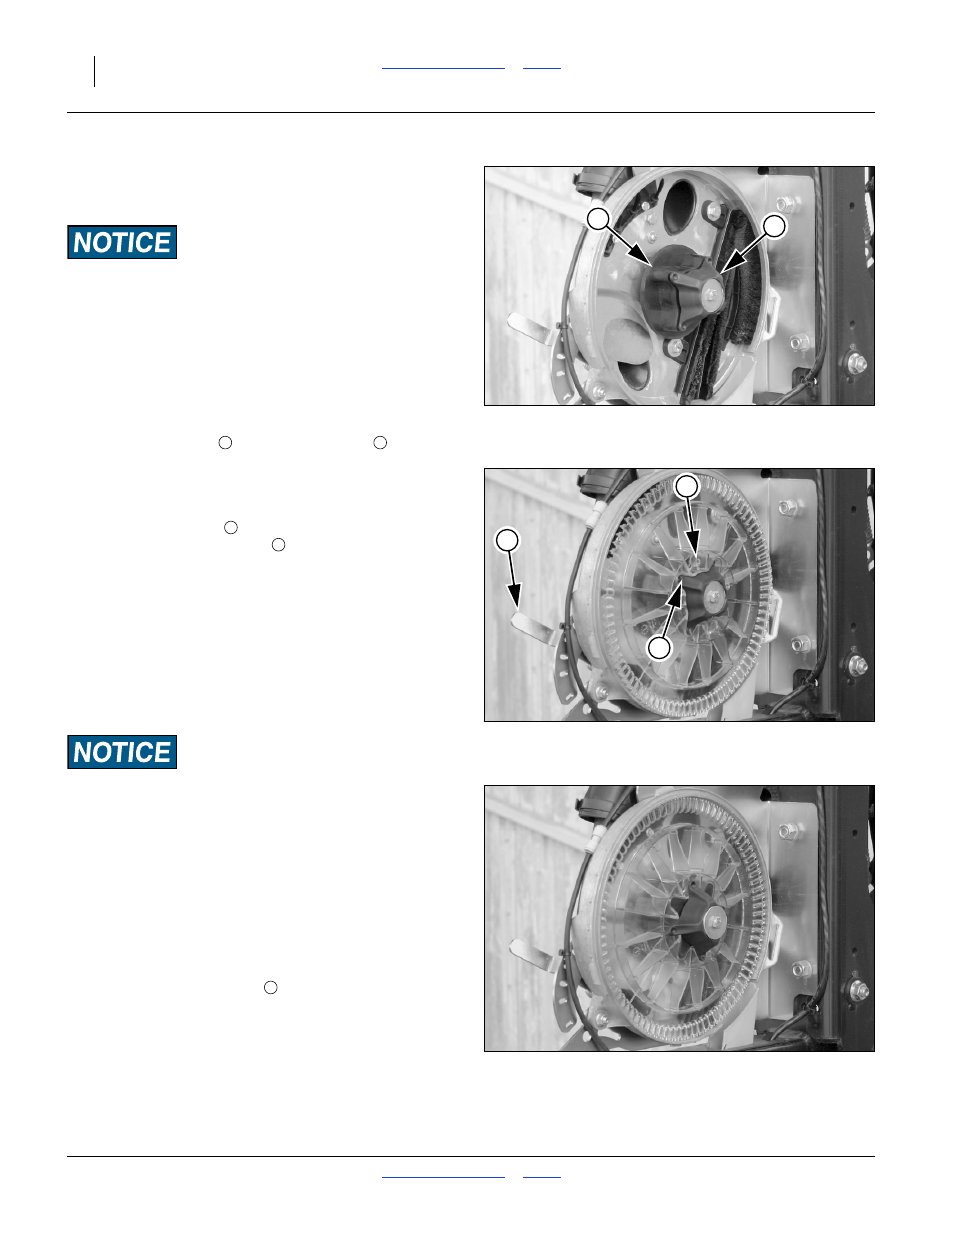
Remove meter rain cover (page 74).
Refer to Figure 94 (depicting an empty meter)
4.
Inspect meter (see page 101 for details).
5.
Make sure clamp
is aligned with seat
.
Refer to Figure 95
6.
With the seed pocket side facing the meter housing,
place the new seed disk on the disk seat.
7.
Rotate disk clamp
clockwise 45
° to clamp disk.
Clamp seats into detents
in disk hub.
Note: On a new meter, or with new brushes installed,
force the disk into the brushes to allow the disk
clamp to rotate. This condition eases as the brush
fibers are trained during initial rotations.
Note: With slightly used brushes, when a disk is first
clamped, it is normal for the disk hub to be flat with
the face of the disk seat only on the inlet (rear) side.
The disk fully seats as it first turns. This condition
eases as the brush fibers receive further use.
Brush Mis-Seating Risk:
Rotate disks forward shortly after disk installation. If planting
is not anticipated within an hour or two of disk installation,
rotate the drive system a few turns to ensure that meter brushes
lean in the correct direction. Correct lean improves meter
performance and reduces air consumption. This step is
particularly important for new brushes.
Brush seating may be accomplished with or without seed
present. With the planter raised, rotate the ground drive
wheel, or rotate the meter drive shaft, top forward, with a
7
⁄
8
inch open-end wrench.
8.
Reset seed inlet shutter
to setting recommended
by Seed Rate Chart, or to your own developed value.
9.
On the seed monitor console, select the new
Material, seed disk Cell Count, and target
population.
10. Re-install rain cover (page 74).
Figure 94
Disk Removed From Meter
29608
2
1
1
2
Figure 95
Disk on Clamp and Seat
29611
3
1
4
1
3
Figure 96
Disk Clamped
29614
4