In100 mortise lock, Lock installation, 1 prepare door 6 – SARGENT IN100 Mortise Locks User Manual
Page 6: A. verify hand and bevel of door, B. door preparation
6 1-800-810-WIRE • www.sargentlock.com • A8122A
Copyright © 2012, Sargen
t Manufacturing Company
, an A
SS
A AB
LO
Y G
roup company
. All right
s reser
ved
.
Reproductions in whole or in par
t without express writ
ten permission of Sargen
t Manufacturing Company is prohibited
.
6/30/12
IN100 Mortise Lock
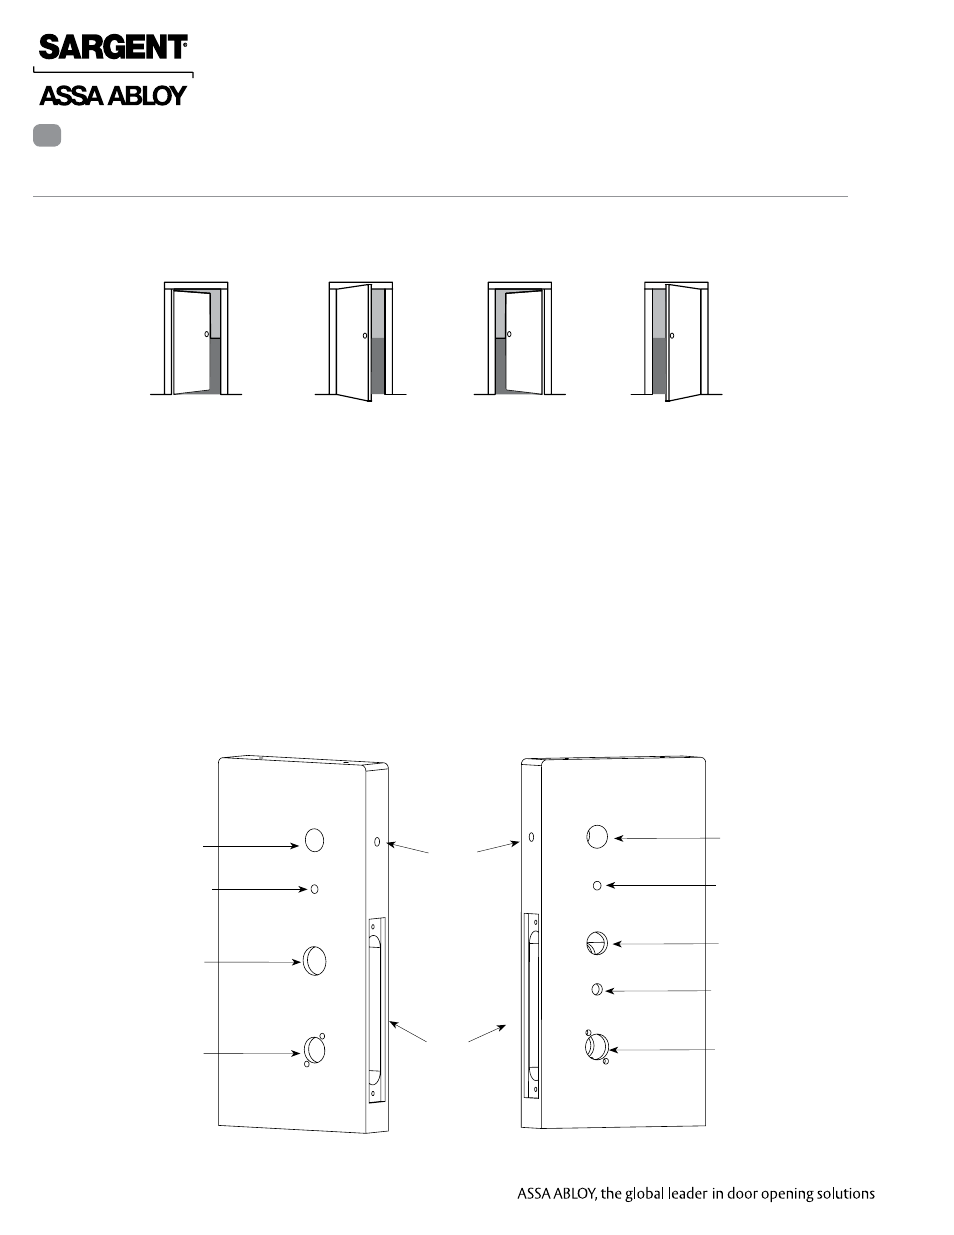
A. Verify Hand and Bevel of Door
Stand on outside of locked door when determining door hand.
Lock Installation
LH
Left Hand
Hinges Left
Open Inward
LHRB
Left Hand
Reverse Bevel
Hinges Left
Open Outward
RH
Right Hand
Hinges Right
Open Inward
RHRB
Right Hand
Reverse Bevel
Hinges Right
Open Outward
Fig. 1A
1 Prepare Door
6
B. Door Preparation
Prior to installation, all holes must be free of burrs, debris and sharp edges.
Prepare door according to appropriate template (see website
www.intelligentopenings.com).
• Field Template: A8120 (ships with product)
• Door Manufacture’s Template: 4697
Through-bolt Hole
Thumb Turn Lever Hole
Outside Cylinder Hole
(only with cylinder
installation)
Outside of Door
Inside of Door
Ribbon Cable Hole
Lever Handle Hole
Through-bolt Hole
Ribbon Cable Hole
Inside of Lock body
Wire Hole
Lever Handle Hole
Through-bolt Hole
Mortised
Thumb Turn Lever Hole
Fig. 1B
External DPS
Hole