Joining the wing panels – E-flite Advance 25e User Manual
Page 9
9
E-flite Advance 25e ARF Assembly Manual
Drawing not to scale
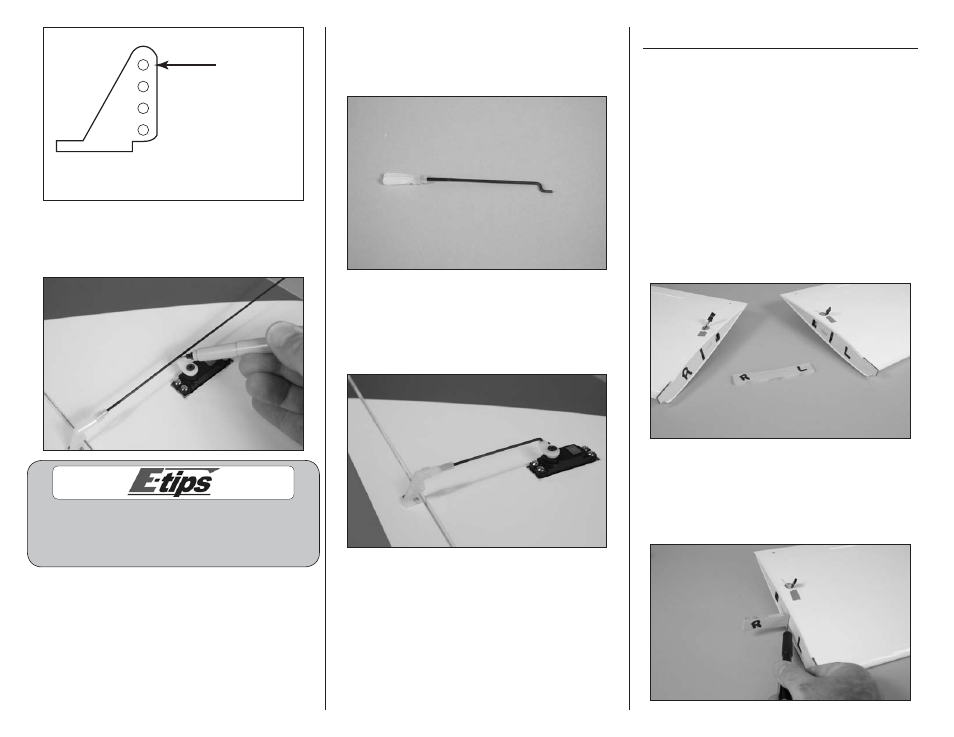
Attach clevis
to outer hole
16. Use a felt-tipped pen to mark the pushrod
where it crosses the hole in the servo horn that was
enlarged in Step 6.
Making a Z-bend takes some skill. There is
plenty of excess wire to experiment with. We
recommend using Z-bend pliers (HAN119) to
make the perfect Z-bend in your pushrod wire.
17. Disconnect the clevis from the control horn.
Make a Z-bend in the pushrod wire using a pair
of pliers. Use side cutters to trim the excess wire to
match the photo below.
18. Insert the bend in the hole of the servo
horn. Reconnect the clevis to the outer hole of
the control horn. Slide the silicone tube over
the forks of the clevis to prevent it from opening
accidentally in flight.
19. Repeat Steps 1 through 19 to install the
remaining aileron servo and linkage. Remove the
low-tack tape securing the aileron before joining the
wing panels.
Joining the Wing panels
Required parts
Wing panel with aileron (left and right)
Hardwood wing joiner
Required Tools and Adhesives
30-minute epoxy
Pencil
Low-tack tape
Paper towel
Mixing stick
Mixing cup
Epoxy brush
Rubbing alcohol
Medium grit sandpaper
1. Locate the hardwood wing joiner. Mark the joiner
and wing panels with an “R” and “L” so the joiner
can be associated with a particular wing panel for
test fitting.
2. Slide the wing joiner into one of the wing panels.
Use a pencil to draw a line on the joiner against the
wing as shown. The joiner should easily slide into
the wing panel. If not, use medium grit sandpaper
to lightly sand the joiner so it slides in easily.