Radio installation – E-flite Advance 25e User Manual
Page 11
11
E-flite Advance 25e ARF Assembly Manual
9. Repeat Steps 5 through 8 to apply epoxy to the
exposed joiner and to the remaining wing panel.
Slide the panels together and use low-tack tape to
hold them tightly together until the epoxy fully cures.
Make sure to use a paper towel and rubbing alcohol
to remove any excess epoxy before it begins to cure.
10. Once the epoxy has fully cured, remove the
tape from the wing.
We recommend working through the next two sections
of the manual to allow the epoxy to fully cure.
Radio Installation
Required parts
Fuselage
Servo with hardware (2)
Transmitter
Receiver
Y-harness
Hook and loop tape
Required Tools and Adhesives
Scissors
Phillips screwdriver: #1
Thin CA
Side cutter
Pin vise
Drill bit: 5/64-inch (2mm)
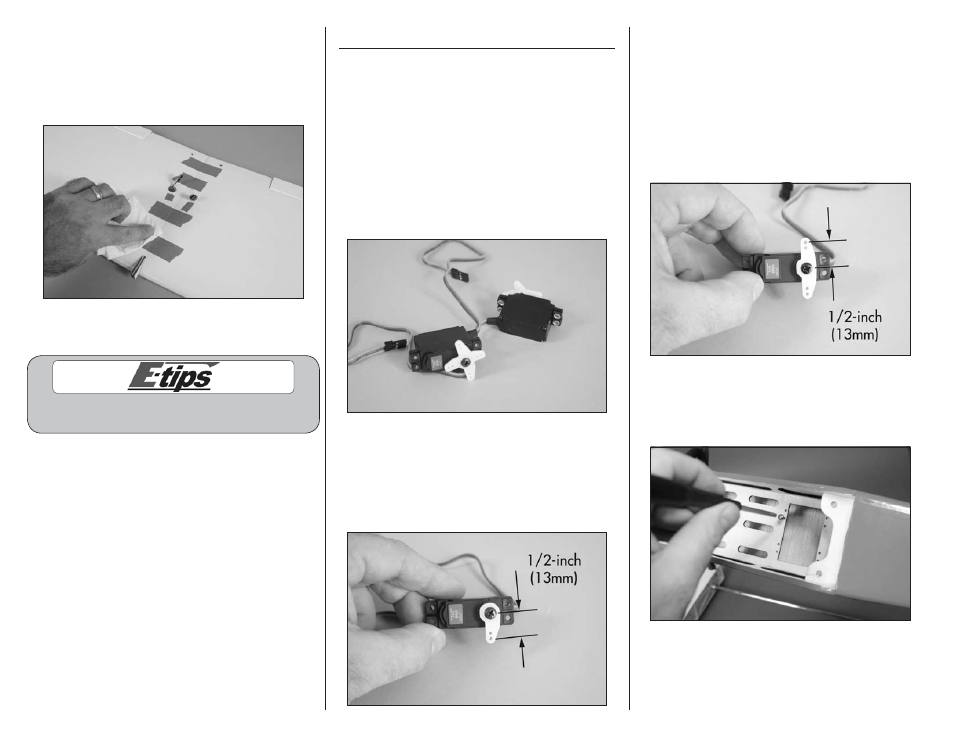
1. Prepare the rudder and elevator servos by
installing the rubber grommets and brass eyelets.
2. Use the radio system to center the elevator
servo. Enlarge the hole in the servo arm that is
1/2-inch (13mm) from the center of the servo. Use
side cutters to remove the remaining arms from
the horn so they don’t interfere with the operation
of the servo.
3. Use the radio system to center the rudder servo.
Enlarge the hole in the servo arm that is 1/2-inch
(13mm) from the center of the servo for the rudder
pushrod. Use side cutters to remove the shorter
arms from the horn so they don’t interfere with the
operation of the servo. Make sure to leave the two
arms as shown: one connects to the rudder, the
other connects to the nose gear steering. Do not
enlarge any of the holes on the side of the arm for
the steering pushrod.
4. Use a #1 Phillips screwdriver to thread a
servo mounting screw in each of the eight servo
mounting holes. This will cut threads into the
surrounding wood.