E-flite Advance 25e User Manual
Page 26
26
E-flite Advance 25e ARF Assembly Manual
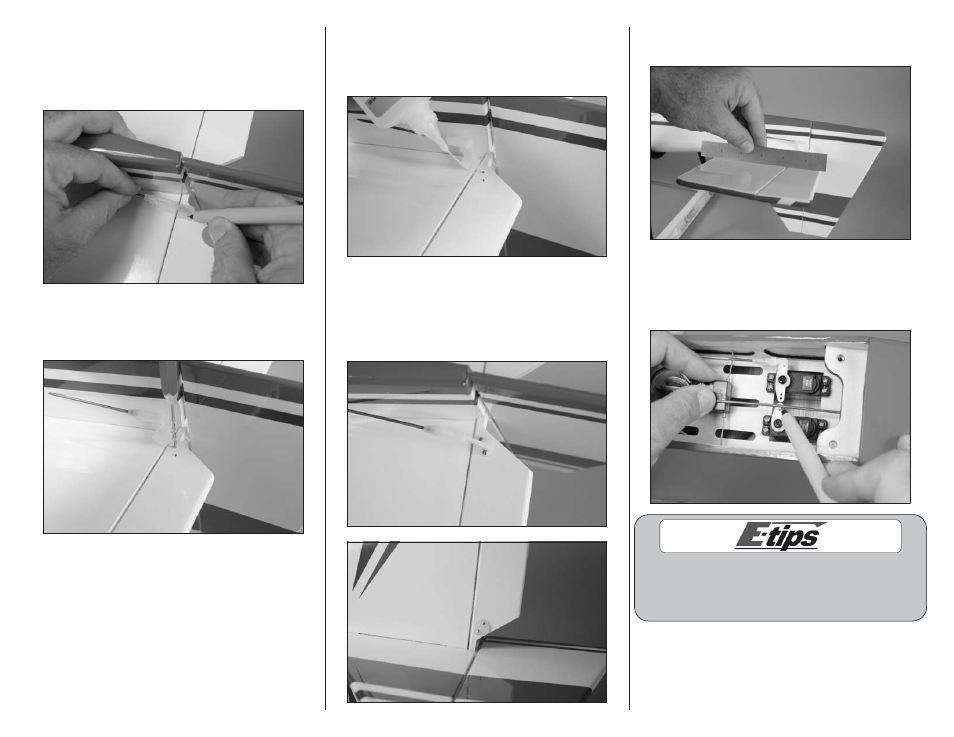
4. Rest the control horn on the elevator so the holes
in the horn align with the elevator hinge line. The
pushrod wire will help aligning the horn. Use a
felt-tipped pen to mark the locations for the control
horn screws.
5. Use a pin vise and 5/64-inch (2mm) drill bit
to drill the two holes for the elevator control horn
mounting screws.
6. Apply 2–3 drops on thin CA in each of the holes
to harden the surrounding wood. This will keep the
control horn secure and prevent the surrounding
wood from becoming damaged over time.
7. Attach the control horn to the elevator using two
2mm x 12mm machine screws and the control horn
backplate. Use a #1 Phillips screwdriver to tighten
the screws. Make sure not to over-tighten the screws
and damage the underlying wood.
8. Use a ruler to check that the elevator and
stabilizer are in alignment with one another.
9. Use the radio system to center the elevator servo.
Use a felt-tipped pen to mark the pushrod where it
crosses the hole in the elevator servo horn that was
enlarged previously.
Making a Z-bend takes some skill. There is
plenty of excess wire to experiment with. We
recommend using Z-bend pliers (HAN119) to
make the perfect Z-bend in your pushrod wire.