Hinging the elevator and rudder – E-flite Advance 25e User Manual
Page 24
24
E-flite Advance 25e ARF Assembly Manual
hinging the Elevator and Rudder
Required parts
Fuselage assembly Rudder with hinges
Elevator with hinges
Required Tools and Adhesives
Pin vise
Drill bit: 1/16-inch
Thin CA
T-pins
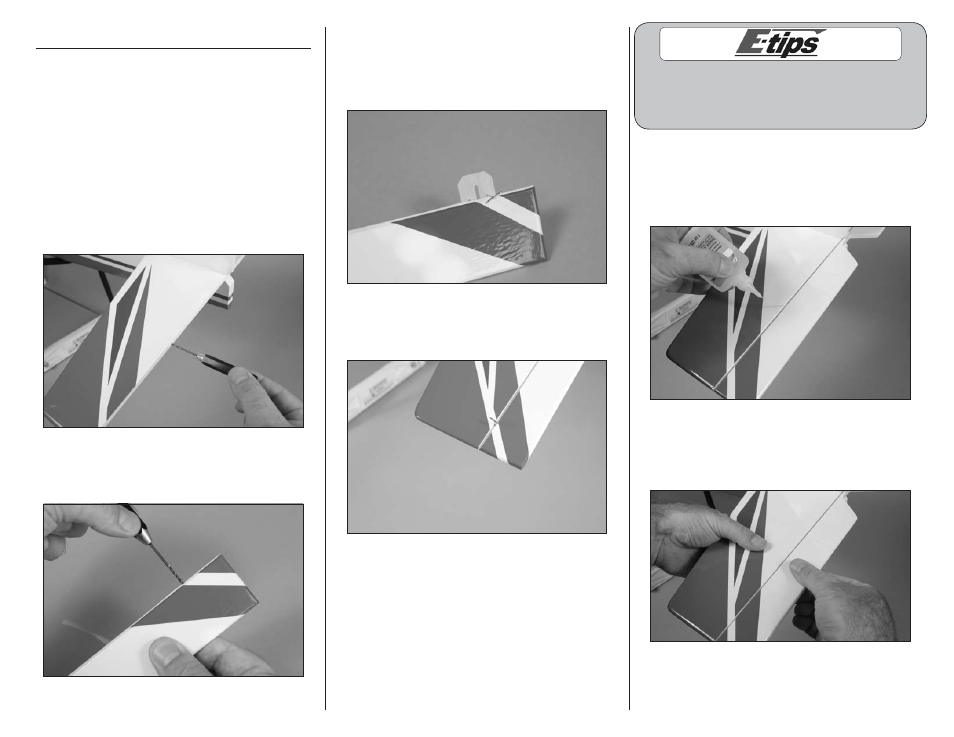
1. Use a pin vise and 1/16-inch (1.5mm) drill bit
to drill a hole in the center of each hinge slot in the
stabilizer. This will provide a tunnel for the CA to
wick into, making the bond between the hinge and
wood stronger.
2. Remove the hinges from the elevator. Prepare
the elevator for hinging following the procedure
described in Step 1.
3. Slide the hinges into the elevator. Insert the
hinges so the holes in the hinge are at the hinge
line. Insert a T-pin through one of the holes to keep
the hinge centered when the elevator is installed on
the stabilizer.
4. Slide the six hinges in the elevator into the slots
on the stabilizer. Check that the ends of the elevator
are aligned with the ends of the stabilizer.
When gluing the hinges, do not use a CA
accelerator. The CA must be allowed time to
soak into the hinges to provide the best bond
between the hinge and surrounding wood.
5. Remove the T-pins from the hinges. Make sure
the elevator is tight against the stabilizer. Wick thin
CA into each hinge, both top and bottom, until the
hinge is saturated with CA. Allow the CA to fully
cure before proceeding.
6. Once the CA has fully cured, gently pull on the
elevator and stabilizer to make sure the hinges are
glued securely. If not, reapply thin CA to any hinges
that are not secure.