Canopy installation - option 2, Decal installation – E-flite Advance 25e User Manual
Page 29
29
E-flite Advance 25e ARF Assembly Manual
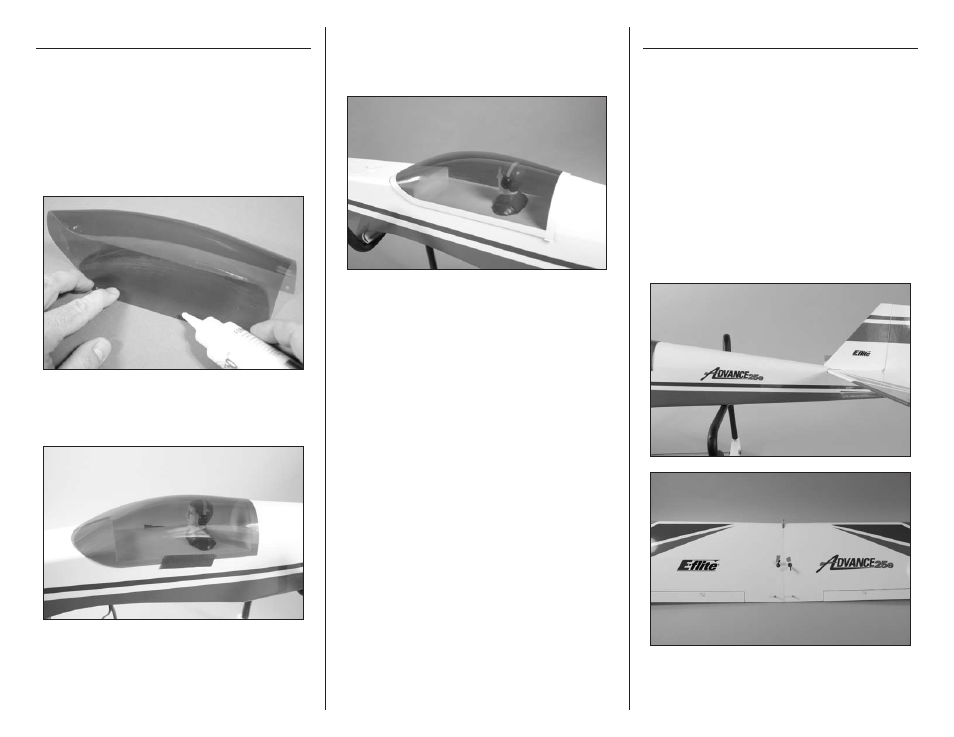
Canopy Installation - Option 2
Required parts
Fuselage assembly Canopy
Striping tape
Required Tools and Adhesives
Low-tack tape
Canopy glue
1. Apply a thin bead of canopy glue around the
perimeter of the canopy.
2. Use low-tack tape to hold the canopy in position
on the fuselage. Make sure it is centered left-to-right
on the fuselage.
3. Remove the low-tack tape once the glue has fully
cured. Apply the striping tape around the edge of
the canopy. Work slowly, pulling the tape to stretch
it around the curves at the front of the canopy.
Decal Installation
Required parts
Fuselage assembly Wing assembly
Required Tools and Adhesives
Spray bottle
Dish washing detergent
Paper towel
Hobby knife with #11 blade
1. Apply the decals to your model using the photos
located in this section of the manual and the box
art from your model. Use a spray bottle and a drop
of dish washing liquid sprayed in the location of
the decal to allow repositioning of the decal. Use
a paper towel as a squeegee to remove excess
water from under the decal. Allow the model to rest
overnight so the remaining water can evaporate.