Wing installation – E-flite Advance 25e User Manual
Page 20
20
E-flite Advance 25e ARF Assembly Manual
Wing Installation
Required parts
Wing assembly
Fuselage assembly
4mm x 25mm machine screws
Plywood wing bolt plate
Required Tools and Adhesives
Felt-tipped pen
Hobby knife with #11 blade
Medium CA
Phillips screwdriver: #2
Paper towel
Rubbing alcohol
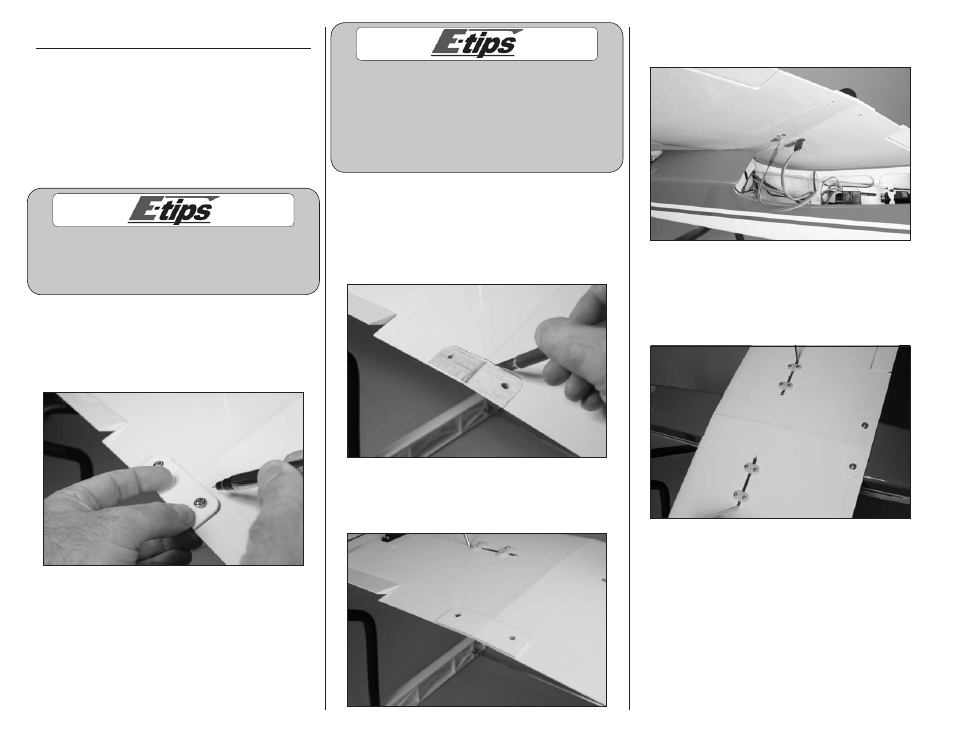
Before installing the wing bolt plate, draw a centerline
on the underside of the plate and lightly score the
plate so it can easily conform to the dihedral angle
of the wing. Use care not to cut through the plate.
1. Place the plywood wing bolt plate on the bottom
of the wing. Trace the outline of the wing bolt plate
on the bottom of the wing. We used the two 4mm
x 25mm machine screws to keep the plate in the
correct position.
When cutting through the covering, use a
new #11 blade and light pressure to avoid
cutting into the underlying wood, which could
weaken the underlying structure, causing it
to fail in flight. We also recommend using a
hot knife to melt through the covering to help
reduce damaging the underlying wood.
2. Remove the plate from the wing. Use a hobby
knife and #11 blade to trim the covering inside
the lines drawn in the previous step by 1/16-inch
(1.5mm). Remove the covering, exposing the bare
wood. The lines can be removed using a paper
towel and rubbing alcohol.
3. Use medium CA to glue the wing bolt plate to the
bottom of the wing. Make sure the holes are aligned
before the CA fully cures.
4. Connect the leads between the aileron Y-harness
and aileron servos.
5. Place the wing on the fuselage. Make sure
the aileron servo leads are tucked in and not
exposed between the wing and fuselage. Use two
4mm x 25mm machine screws and a #2 Phillips
screwdriver to secure the wing to the fuselage.