Recommended radio equipment, Power 25 motor setup, Power 32 motor setup – E-flite Advance 25e User Manual
Page 4: Optional accessories, Required tools and adhesives, Hinging the ailerons
4
E-flite Advance 25e ARF Assembly Manual
Recommended Radio Equipment
You will need a minimum 4-channel transmitter,
receiver and six servos. You can choose to purchase
a complete radio system. If you are using an
existing transmitter, just purchase the other required
equipment separately. We recommend the crystal-
free, interference-free Spektrum
™
DX6 2.4GHz DSM
®
6-channel system. If using your own transmitter, we
recommend the following radio equipment.
If you own the Spektrum DX6i radio, or you are using
a different DSM2 radio, just add the AR6200 DSM2
™
6-channel receiver and four JR SPORT
™
MN48 servos.
Complete Radio System
SPM6600
DX6i DSM2 6CH system
Or purchase Separately
SPMAR6200
AR6200 DSM2 6-Channel
Full-Range Receiver
JSP20040
MN48 Servo (4)
JRPA135
Y-harness ailerons to receiver
JSP98100
3-inch (76mm) Servo Extension
power 25 Motor Setup
EFLM4025A
Power 25 BL Outrunner
Motor, 870Kv
EFLA1040L
40-Amp Lite Pro SB
Brushless ESC
EFLB32003S30
3200mAh 3S 14.8V 30C Li-Po,
12AWG EC3
APC12080E
12 x 8E Electric Propeller
power 32 Motor Setup
EFLM4032A
Power 32 Brushless Outrunner
Motor, 770Kv
EFLA1060
60-Amp Pro Switch-Mode BEC
Brushless ESC
EFLB32004S30
3200mAh 4S 14.8V 30C Li-Po,
12AWG EC3
APC12060E
12 x 6E Electric Propeller
Optional Accessories
EFLSP175
1
3
/
4
-inch Aluminum Spinner
with 4mm and 5mm Collets
EFLA110
Power Meter
EFLC505
Intelligent 1- to 5-Cell
Balancing Charger
EFLAEC312
Charge Lead with 12-inch
Wire and Jacks, 16AWG
EFLA151
1/9 Civilian Pilot, Blue
Required Tools and Adhesives
Tools & Equipment
Drill
Epoxy brush
Felt-tipped pen
Flat file
Low-tack tape
Mixing cup
Mixing stick
Medium grit sandpaper
Paper towel
Pencil
Pin vise
Phillips screwdriver: #1, #2
Pliers
Rubbing alcohol
Ruler
Scissors
Side cutter
Spinner
Square
T-pins
Drill bit: 1/16-inch (1.5mm), 5/64-inch (2mm)
Hex wrench: 2.5mm, 3/32-inch
Hobby knife with #11 blade
Optional Tools & Equipment
Balancing stand (optional)
Box wrench: 10mm
Z-bend pliers
Adhesives
30-minute epoxy
Silicone adhesive
Thin CA
Medium CA
Threadlock
During the course of building your model we
suggest you use a soft base for the building surface.
Such things as a foam stand, large piece of
bedding foam or a thick bath towel will work well
and help protect the model from damage during
assembly. This is not shown in the instructions
to provide the greatest detail in the photos.
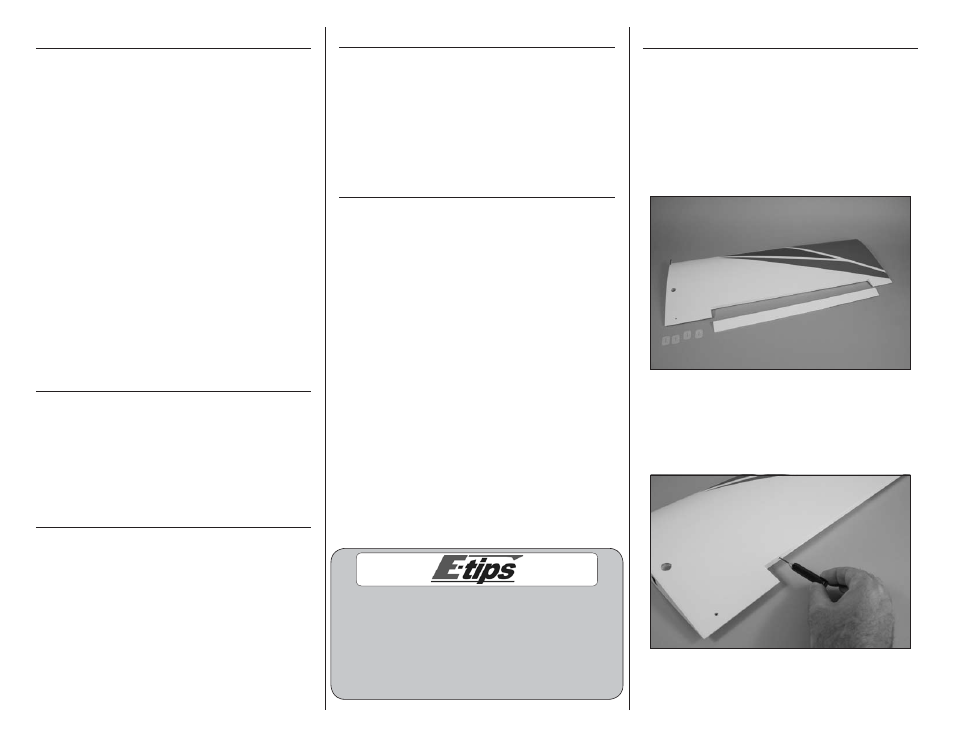
hinging the Ailerons
Required parts
Wing panel with aileron (left and right)
Required Tools and Adhesives
Thin CA
T-pins
Pin vise
Drill bit: 1/16-inch (1.5mm)
1. Locate the wing panel. Separate the aileron from
the wing panel. Set the four hinges aside at this time.
2. Use a pin vise and 1/16-inch (1.5mm) drill bit
to drill a hole in the center of each hinge slot in the
wing panel. This will provide a tunnel for the CA to
wick into, making the bond between the hinge and
wood stronger.