E-flite Advance 25e User Manual
Page 16
16
E-flite Advance 25e ARF Assembly Manual
Always use threadlock on metal-to-metal fasteners.
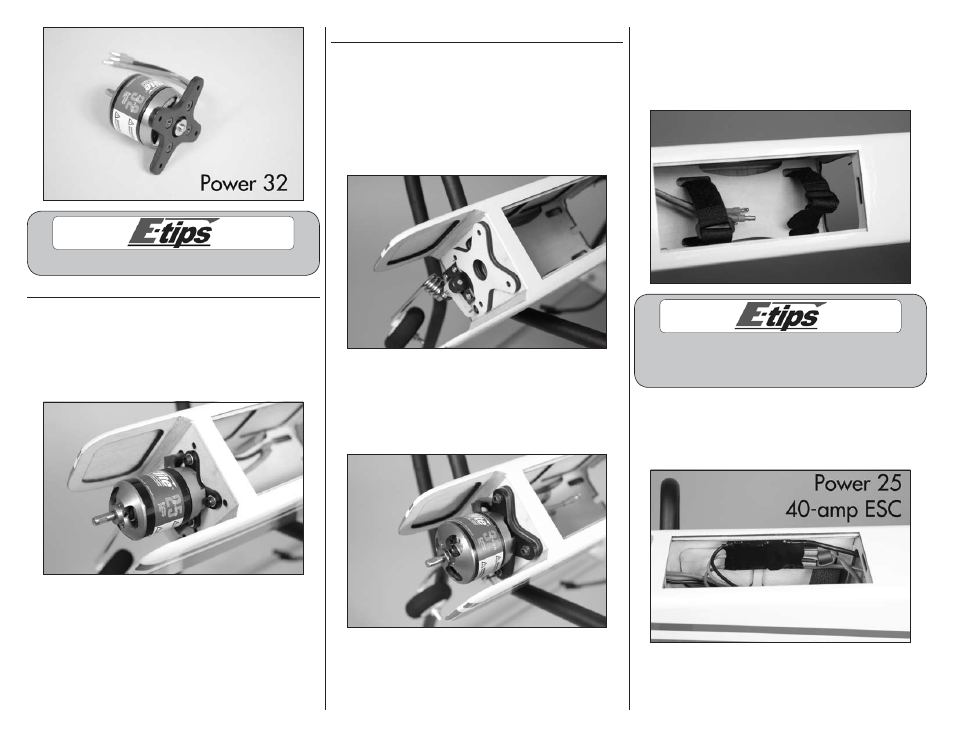
pOWER 25 SpECIFIC
2. Attach the motor to the firewall using the
hardware provided with the motor. Guide the leads
from the motor through the hole in the firewall. Use
a 2.5mm hex wrench to tighten the bolts securing
the motor to the firewall.
pOWER 32 SpECIFIC
2A. Locate the plywood spacer. The spacer will be
placed between the motor and firewall. Check the fit
of the spacer, as it will be notched for the nose gear
mount and will line up with the holes in the firewall
for the motor. There is a front and back to the
spacer, so if the holes don’t line up, flip it around so
that they do.
2B. Guide the leads from the motor through the
hole in the firewall. Use the hardware provided with
the motor to attach it to the firewall. Use a 2.5mm
hex wrench to tighten the bolts securing the motor to
the firewall.
3. Insert the hook and loop straps through the
slots in the battery tray. Make sure not to get the
steering pushrod inside the straps as this will cause
the steering linkage to bind, possibly damaging the
rudder servo.
Matching the colors between the ESC and motor
when they are connected results in the correct
motor direction if using all E-flite components.
4. Connect the leads from the motor to the leads
from the speed control. Use hook and loop tape
to secure the speed control inside the fuselage as
shown.