E-flite Advance 25e User Manual
Page 7
7
E-flite Advance 25e ARF Assembly Manual
5. Use the string to pull the servo lead through
the wing and out of the hole in the top of the
wing panel.
Leave a small amount of string tied to the servo lead.
Tape the string to the top of the wing to prevent
the servo lead from falling back into the wing.
6. Use the screws provided with the servo to secure
it in the wing. The output shaft of the servo will face
the aileron. Use a #1 Phillips screwdriver to tighten
the servo mounting screws.
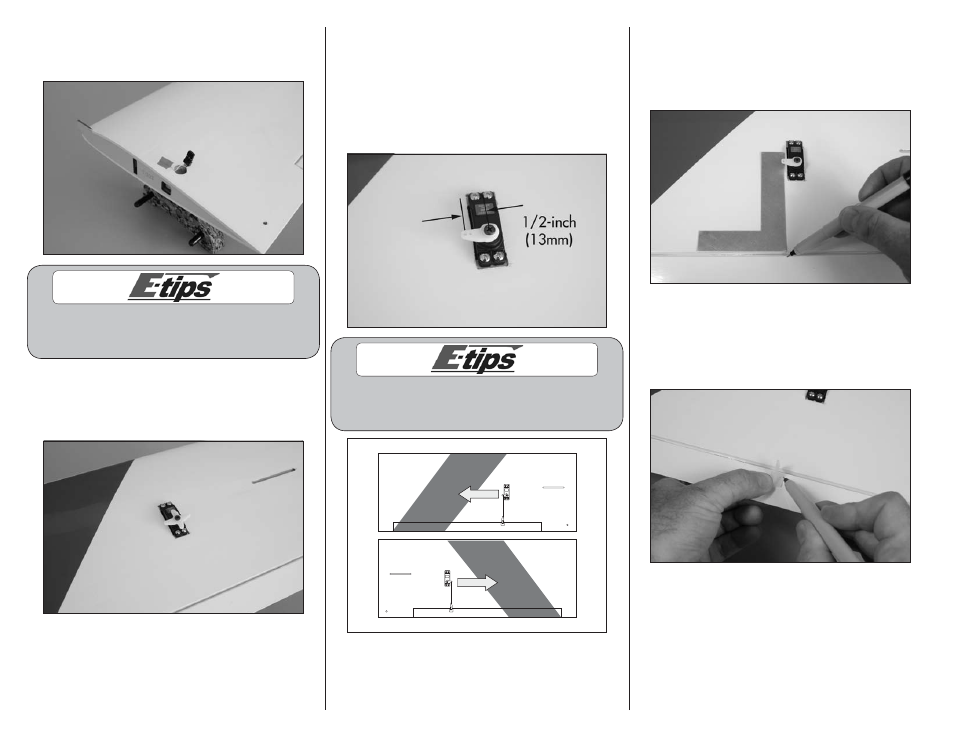
7. Use the radio system to center the aileron servo.
Position the servo horn parallel to the hinge line
of the aileron. Enlarge the hole in the servo horn
facing toward the wing tip that is 1/2-inch (13mm)
from the center of the horn using a pin vise and
5/64-inch drill bit. Use side cutters to remove any
unused arms from the servo horn so they don’t
interfere with the operation of the aileron servo.
When installing the aileron servos, the
linkages must connect to the side of the
servo facing the wing tips as shown.
Toward Wing Tip
Toward Wing Tip
8. Position a square so it is aligned with the edge of
the wing and the hole in the servo horn enlarged in
Step 6. Use a felt-tipped pen to mark the aileron for
the aileron control horn. This aligns the horn and
linkage correctly for your model.
9. Position the control horn on the aileron. The holes
in the control horn will align with the hinge line of
the aileron, and with the mark made in the previous
step. Use a felt-tipped pen to transfer the locations
for the control horn mounting screws on the aileron.