E-flite Advance 25e User Manual
Page 23
23
E-flite Advance 25e ARF Assembly Manual
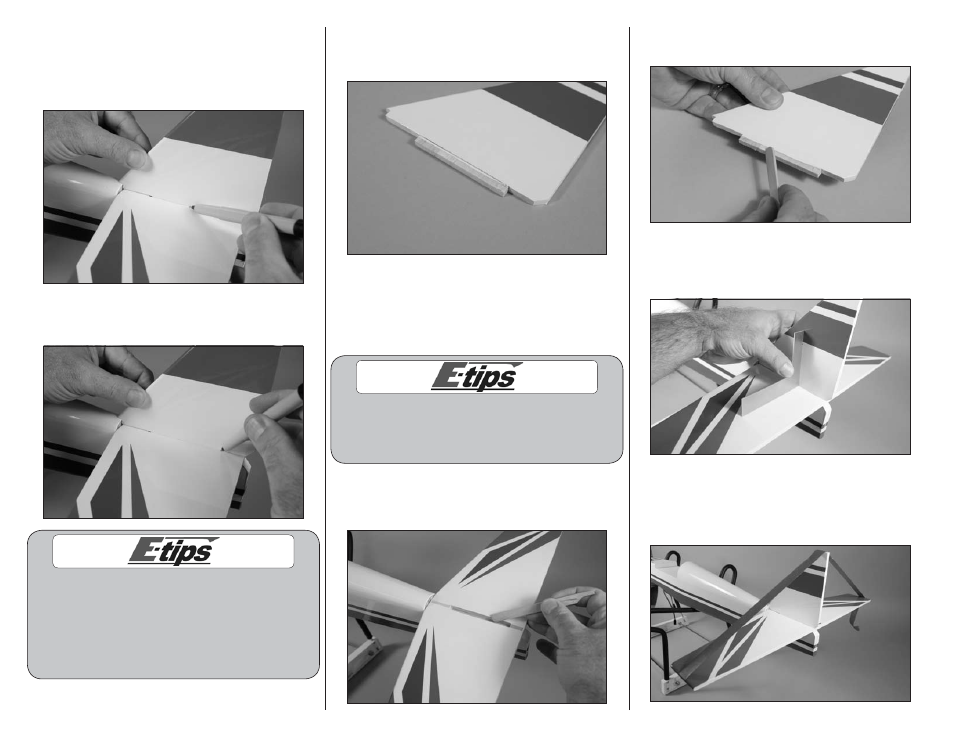
14. Remove the T-pins from the stabilizer. Position
the fin in the slot in the stabilizer. It must rest tightly
against the stabilizer. Use a felt-tipped pen to
transfer the top edge of the stabilizer on the bottom
of the fin.
15. Use a felt-tipped pen to trace the outline of the
fin on the top of the stabilizer.
When cutting through the covering, use a
new #11 blade and light pressure to avoid
cutting into the underlying wood, which could
weaken the underlying structure, causing it
to fail in flight. We also recommend using a
hot knife to melt through the covering to help
reduce damaging the underlying wood.
16. Use a hobby knife and #11 blade to remove
the covering from the fin 1/16-inch (1.5mm) below
the line drawn in the previous steps.
17. Use a hobby knife and #11 blade to trim the
covering inside the lines drawn on the stabilizer by
1/16-inch (1.5mm). Remove the covering, exposing
the bare wood. The lines can be removed using a
paper towel and rubbing alcohol.
The following steps must be completed
before the epoxy begins to cure. Make
sure to read through and understand the
following steps before mixing any epoxy.
18. Mix 1/2 ounce (15mL) of 30-minute epoxy.
Apply a thin coat of epoxy to the exposed wood
and in the slot on the top of the stabilizer.
19. Apply a thin coat of epoxy to the exposed
wood at the bottom of the fin.
20. Place the fin in position in the slot. Use
a square to make sure the fin is perpendicular
to the stabilizer.
21. Use low-tack tape and T-pins to keep the fin
in position until the epoxy fully cures. Use a paper
towel and rubbing alcohol to remove any excess
epoxy before it cures.