Motor installation – E-flite Advance 25e User Manual
Page 15
15
E-flite Advance 25e ARF Assembly Manual
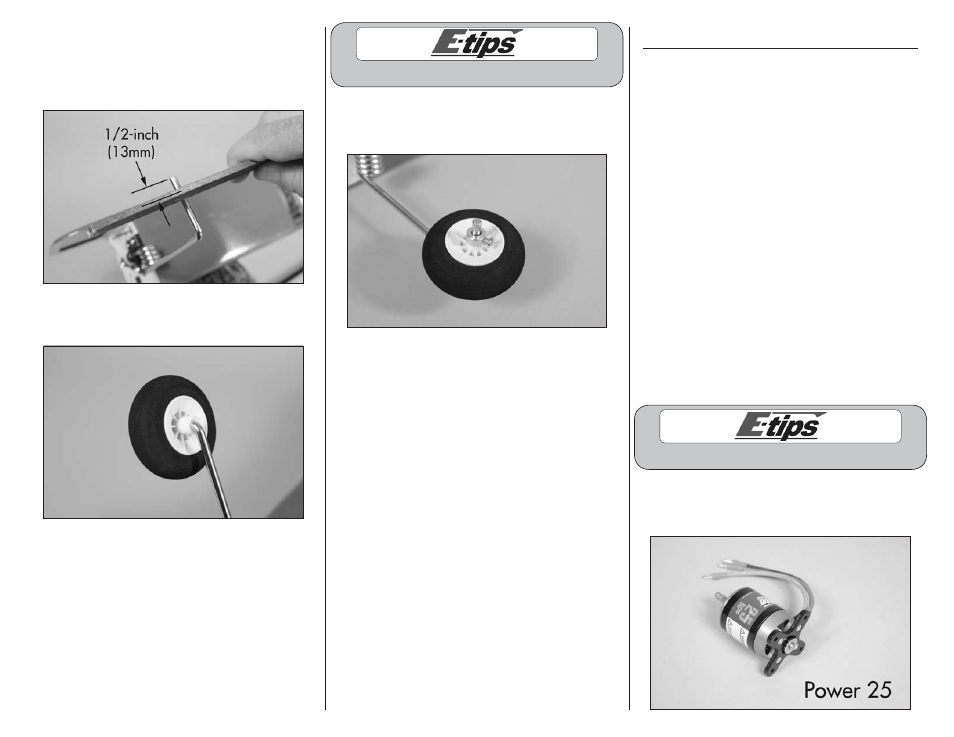
11. Use a flat file to make a 1/4-inch (6mm) wide
flat area on the nose gear wire that is 1/2-inch
(13mm) from the end of the wire. This will give the
screw in the wheel collar a place to rest, making it
more secure when installed.
12. Slide the nylon spacer on the nose gear wire,
then the 2-inch (51mm) wheel.
Always use threadlock on metal-to-metal fasteners.
13. Secure the wheel to the nose gear wire using a
wheel collar and a #1 Phillips screwdriver to tighten
the screw.
Motor Installation
Required parts
Transmitter
Fuselage assembly
Power 25 motor with hardware
40-Amp speed control (ESC) for Power 25
Propeller, 12 x 8
3200mAh 3S 11.1V motor battery (charged)
Hook and loop strap (2)
Hook and loop tape
Servo extension, 3-inch (76mm)
Required Tools and Adhesives
Threadlock
Phillips screwdriver: #2
Scissors
Hex wrench: 2.5mm
Optional Required parts
Power 32 motor with hardware
60-Amp speed control (ESC) for Power 32
Plywood adapter plate for Power 32
Propeller, 12 x 6
3200mAh 4S 14.8V motor battery (charged)
Optional Tools and Accessories
Spinner
Box wrench: 10mm
Hex wrench: 3/32-inch
Always use threadlock on metal-to-metal fasteners.
1. Use a #2 Phillips screwdriver to attach the
X-mount to the back of the motor using the
hardware provided with the motor.