Rockwell Automation 2711E-ND7 PanelView 1400E File Transfer Utility User Manual
Page 29
2–14
Publication 2711E–6.8 – January 1998
7. In the registration window, enter your user name and company
name. After you enter the required information, choose Next.
8. In the confirmation window, verify the user information you have
entered. Select Yes to proceed or No to edit the user information.
9. In the Welcome dialog box for the File Transfer Utility, it
recommends that you close all open Windows applications. If you
have done that, choose Next.
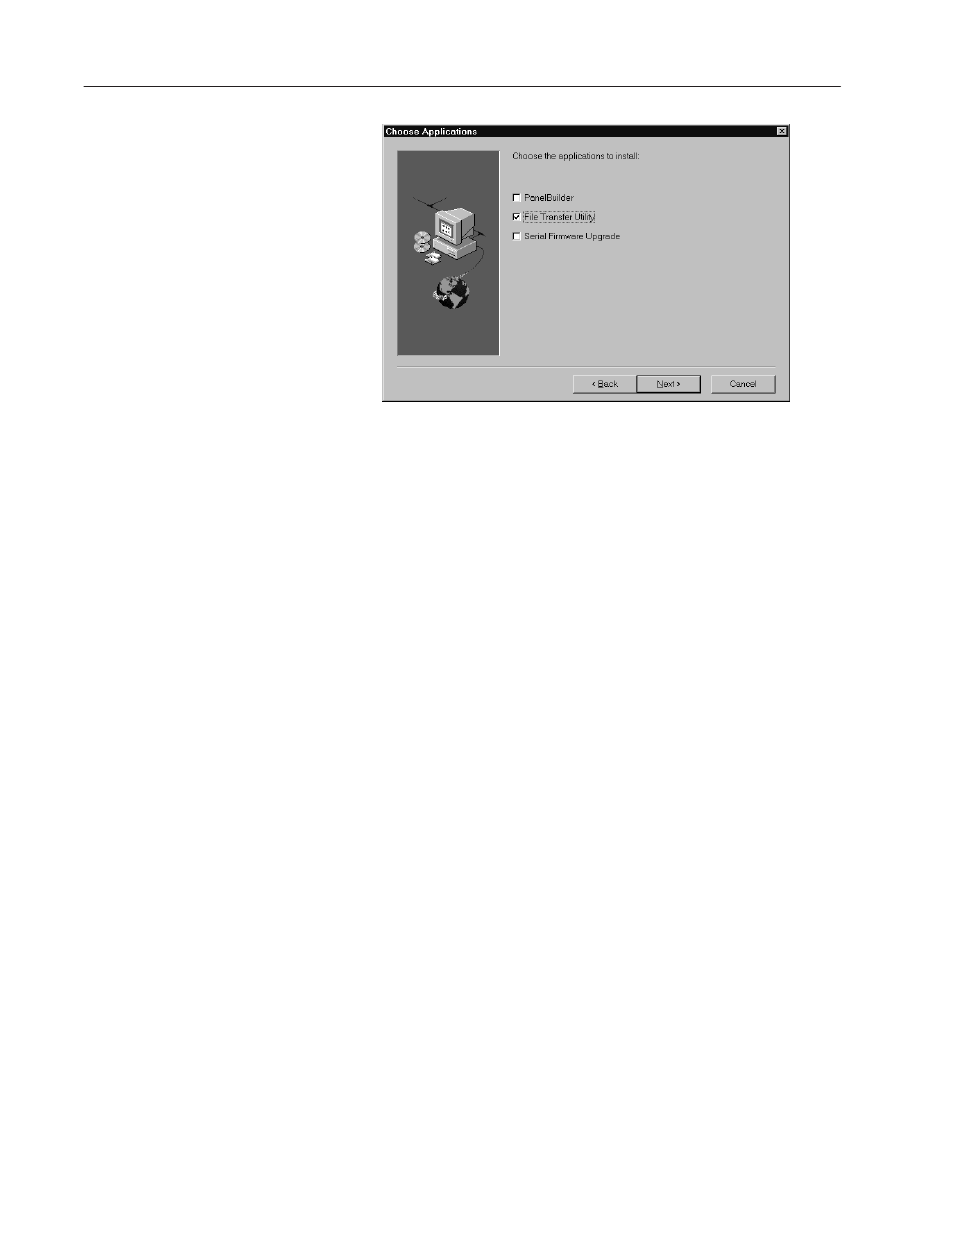
If you have chosen other applications to install, the first selected
application automatically begins to install.
10. In the FTU32 registration window, enter the serial number. You
can obtain registration information from the software registration
card that is in your PanelBuilder 1400e package (A-B Catalog
Number 2711E-ND1) or PanelView 1200/1400e Transfer Utility
package (A-B Catalog Number 2711E-ND7). Choose Next.
11. Choose the drive and directory in which the FTU32 will be
installed. By default, this is C:\AB\PB1400E\FTU32. To change
the destination drive or directory, type the new drive and/or
directory in the Program Files field. Then choose Next.
12. Choose the program folder (program group) in which you want to
install the FTU32’s icons, which includes a Readme file icon, the
Transfer Utility icon, and an Uninstall icon. By default, the icons
are installed in the PanelBuilder 1400e program folder. Then
choose Next.
13. Choose whether the installation utility will modify the
AUTOEXEC.BAT file.
If you are installing on Windows 95, the entry
C:\Progra~1\Rockwe~1\RDM;%Path%
is required in the PATH variable for the FTU32 to work correctly.