Upply loop for maintenance, see, Draining supply – Rockwell Automation 20L-LL PowerFlex 700L Liquid-to-Liquid Heat Exchanger User Manual
Page 30
2-4
Operation
PowerFlex 700L Liquid-to-Liquid Heat Exchanger User Manual
9. Entrapped air must be removed for the heat exchanger to function
properly. Remove the fill tube cap and depress the PRIME SWITCH for
2-3 minutes.
10. Replace and tighten the fill tube cap on the tank.
11. Reinstall the top and side covers on the heat exchanger. The
recommended tightening torque is 0.9 N-m (8 in-lbs.).
Draining Supply Side
Cooling Loop for Periodic
Maintenance
1. Shut off flow to the “IN FROM SUPPLY” connection of the cooling
loop.
2. Place a 5 gallon container under the pipe marked “SUPPLY DRAIN”
on the front of the heat exchanger (
3. Use a 9/16 inch or adjustable wrench to remove the plug from the
“SUPPLY DRAIN” pipe. (There is no need to use a backup wrench on
the pipe nipple.)
4. Allow the fluid to drain.
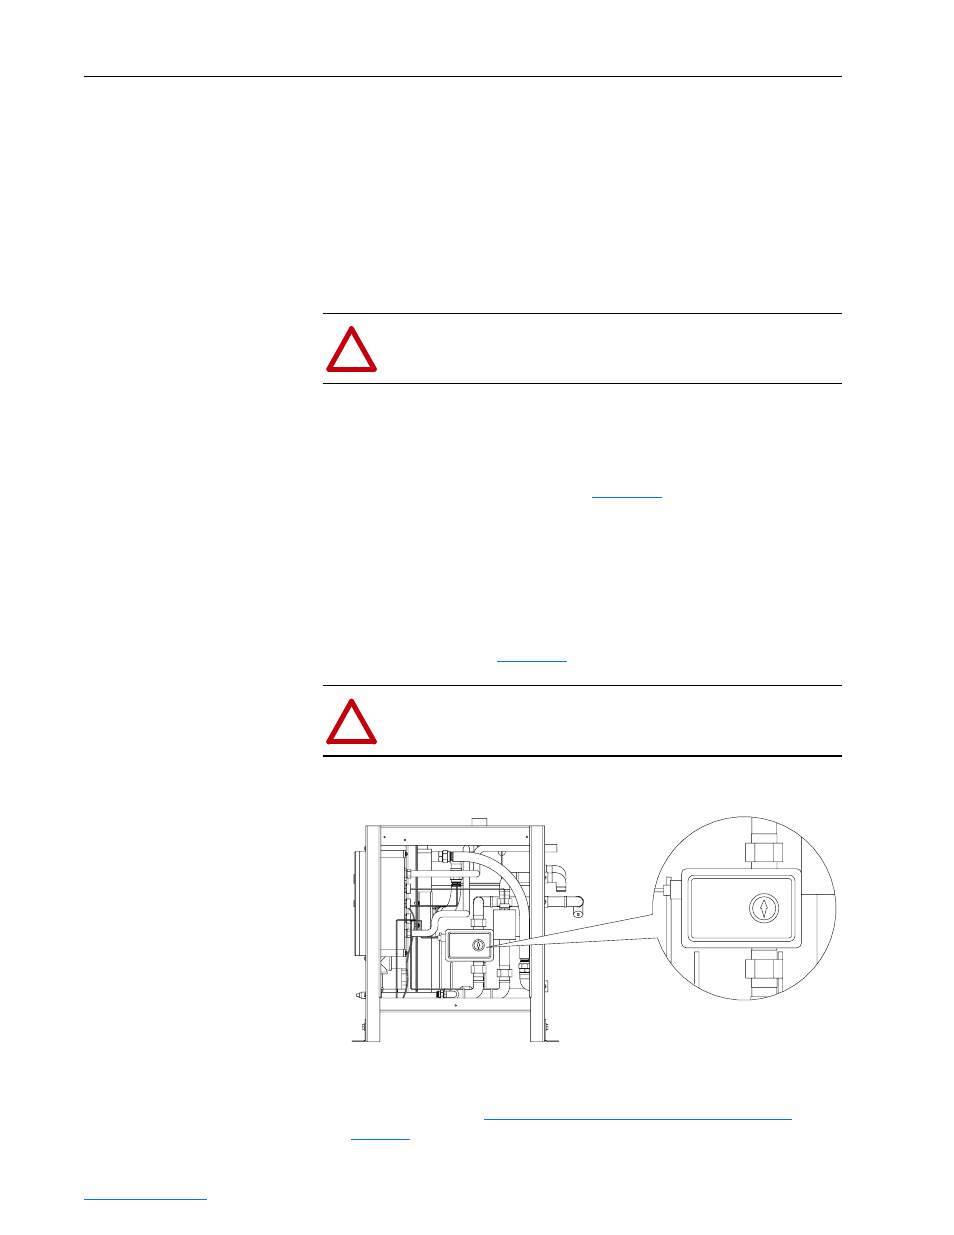
5. After flow stops, push the PRIME SWITCH for 8 seconds to open the
motorized valve (see
Figure 2.2
).
Figure 2.2 Supply Loop Motorized Valve Open Indication
6. Disconnect the hoses on the rear of the heat exchanger marked “IN
FROM SUPPLY” and “RETURN TO SUPPLY” using the tools and
method outlined in
Connecting Hoses to the Heat Exchanger on
. Place the ends of the hoses in a container to drain.
!
ATTENTION: Risk of equipment damage exists. It is
recommended to drain the supply side before draining the drive
side to avoid any possible damage to the pump.
!
ATTENTION: Risk of equipment damage exists. Pressing the
PRIME SWITCH longer than 20 seconds may damage the pump
if the drive loop is already drained.