Global prefix/suffix, Example: setting a prefix – Wasp Barcode WDI4600 2D Product Reference Guide User Manual
Page 229
Data Editing
Product Reference Guide
219
Please Keep In Mind...
•
Modifying a message string is not a mandatory requirement. Data editing is a sophisti-
cated feature allowing highly customizable output for advanced users. Factory default set-
tings for data editing is typically set to NONE.
•
A prefix or suffix may be applied only to a specified symbology (reference
Selection" starting on page 79
) or across all symbologies (set via the Global features in this
chapter).
•
You can add any character from the
(from 00-FF) on the inside back cover of
this manual as a prefix, suffix or Label ID.
•
Enter prefixes and suffixes in the order in which you want them to appear on the output.
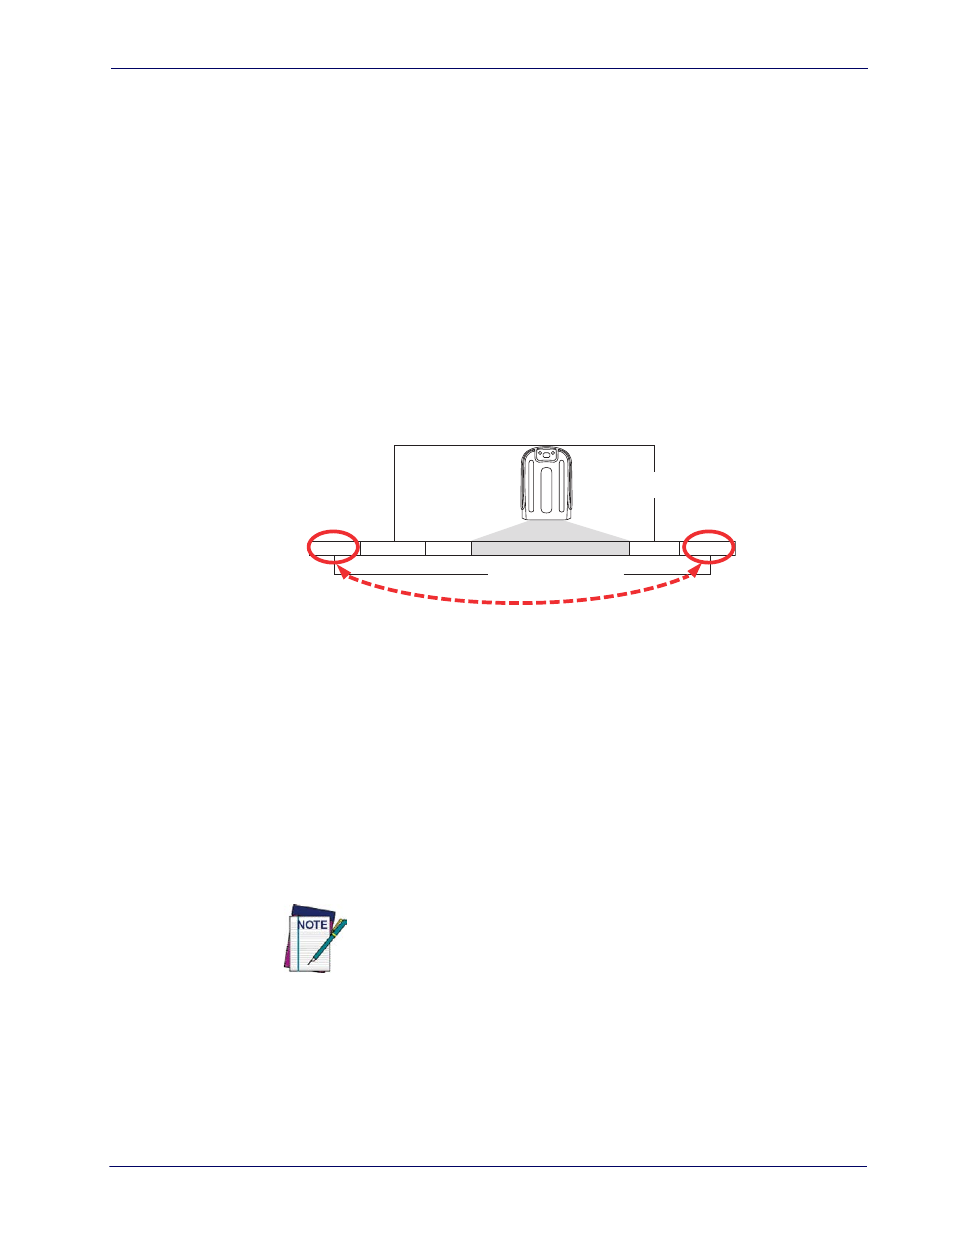
Global Prefix/Suffix
Up to 20 ASCII characters may be added as a prefix (in a position before the barcode data) and/
or as a suffix (in a position following the barcode data) as indicated in Figure 7.
Figure 7. Prefix and Suffix Positions
Prefix
Suffix
AIM ID
Label ID
Label ID
Bar Code Data
00 - 20 Characters (ASCII)
AND
OR
OR...
Example: Setting a Prefix
In this example, we’ll set a prefix for all symbologies.
1. Determine which ASCII character(s) are to be added to scanned barcode data. In this
example, we’ll add a dollar sign (‘$’) as a prefix.
2. Go to
and scan the ENTER/EXIT PROGRAMMING MODE barcode, then
scan the SET GLOBAL PREFIX barcode.
3. Reference the
on the inside back cover of this manual to find the hex value
assigned to the desired character. The corresponding hex number for the ‘$’ character is
24. To enter this selection code, scan the ‘2’ and ‘4’ barcodes from
.
If you make a mistake before the last character, scan the CANCEL barcode to
abort and not save the entry string. You can then start again at the begin-
ning.
4. If less than the expected string of 20 characters are selected, scan the ENTER/EXIT bar-
code to terminate the string.
5. Scan the ENTER/EXIT barcode once again to exit Programming Mode.
6. The resulting message string would appear as follows:
Scanned barcode data: 12345
Resulting message string output: $12345