Ins tru ctio n s he et – Prescolite HV HID CYLINDERS User Manual
Page 2
w
w
w
.p
r
e
s
c
o
li
te
.c
o
m
•P
res
co
lite
To
llF
ree
Te
ch
nic
al
Su
pp
ort
1.8
88
.P
RS
.4T
EC
•
Ho
urs
:8
am
-5
pm
ET
Part No. . . . . . . . . . . . . . . . . . . . . . . . . . . . . . . . .05296800
Ins
tru
ctio
nS
he
et
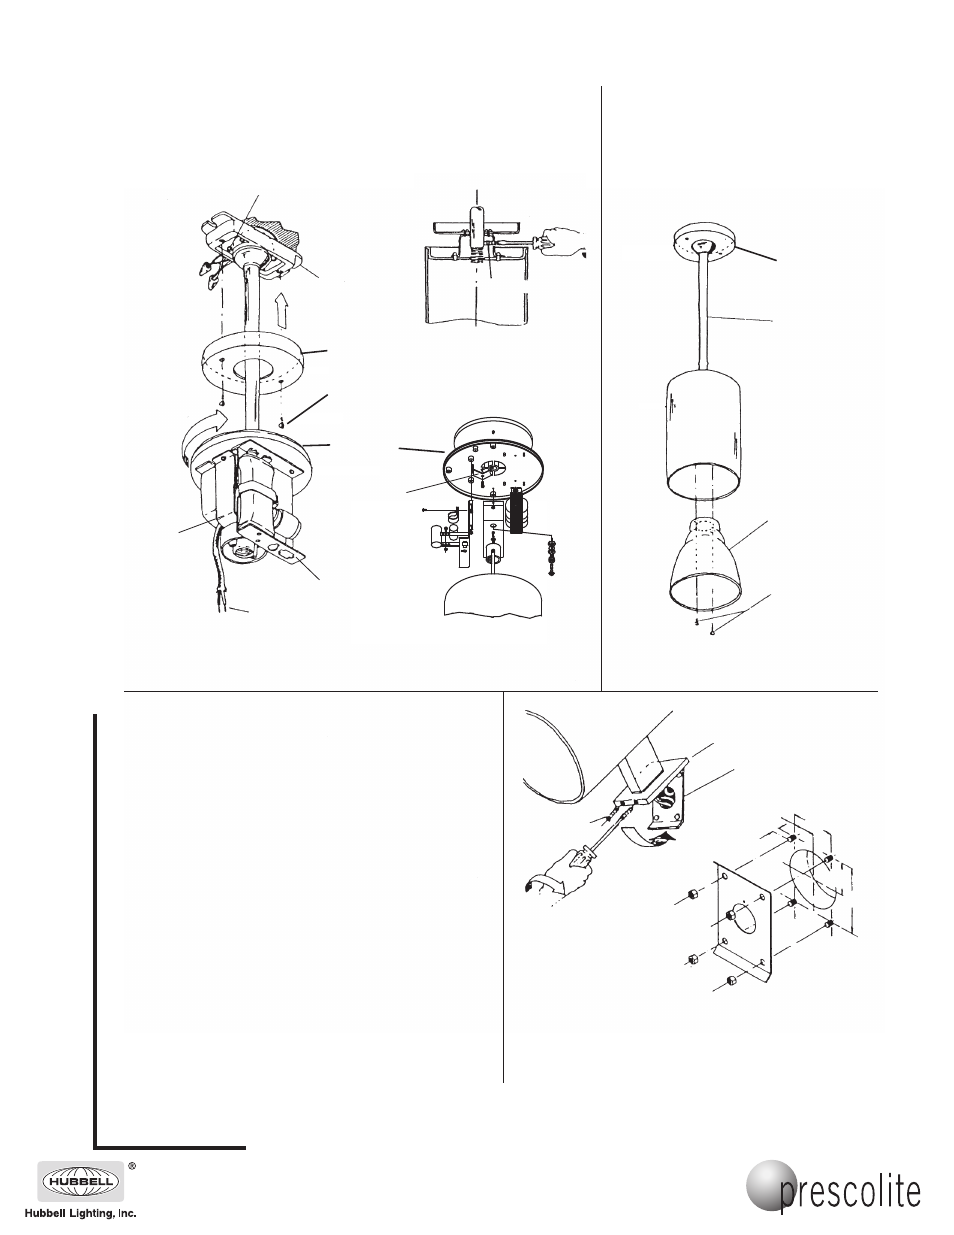
Fig. 3
Pendant
Assembly
Leads
Canopy
Ball Clamp Screws
Pendant Mount
Assembly
Canopy
Retaining
Screws
Luminaire
Top Assembly
Set Screw
Set Screw
Rotate
Fig. 3a
Fig. 3b
Fig. 4
Fig. 5
Reflector
Reflector
Retaining
Screws
2
1
/
2
"
4" Max.
1 5/8"
Mounting Plate
Canopy
Housing
Fig. 6
3
1
/
4
"
Canopy
Housing Cylinder
Pendant
C. WALLMOUNT
1.
Secure mounting plate to wall with box centrally located (Fig. 6).
Maximum bolt size is 3/8". If studs are used, they should protrude
no more than 1/2" beyond wall surface (Fig. 6). (Bolts/studs are by
others).
2.
Hang luminaire on mounting plate and make electrical connections.
Lower luminaire until it rests against wall. Lock it in place by tight-
ening the two set screws located at bottom of canopy casting (Fig.
5).
3.
Splice ground wire to fixture ground wire, splice whites supply lead
to white fixture lead labeled ‘com’, splice black supply lead to black
fixture lead labeled ‘line’.
4.
Install proper lamp.
NOTE
In compliance with Underwriters Laboratories Standard UL
1570, 1571, or 1572; the use of a silicone base caulking
compound must be used to provide a watertight seal
between fixture & mounting surface to prevent electrical
wiring from getting wet.
CAUTION: To avoid electrical shock be sure power is turned off before installing or servicing this fixture.
701 Millennium Boulevard • Greenville, SC 29607
With representatives offices in principal cities throughout North America.
Copyright 2007, 02/07 revision, All Rights Reserved - Printed in U.S.A.
Capacitor
Bracket
Thread
Clamp
Socket
Bracket