Install the faceplate, Din-rail setup, One port gateway – ETC DMX-RDM One Port Gateway Setup Guide User Manual
Page 3
E T C S e t u p G u i d e
One Port Gateway
Page 3 of 4
One Port Gateway
Install the faceplate
The faceplate assembly includes magnets that secure it to the gateway.
Step 1: Attach the faceplate alignment
bracket to the gateway using the
provided screws.
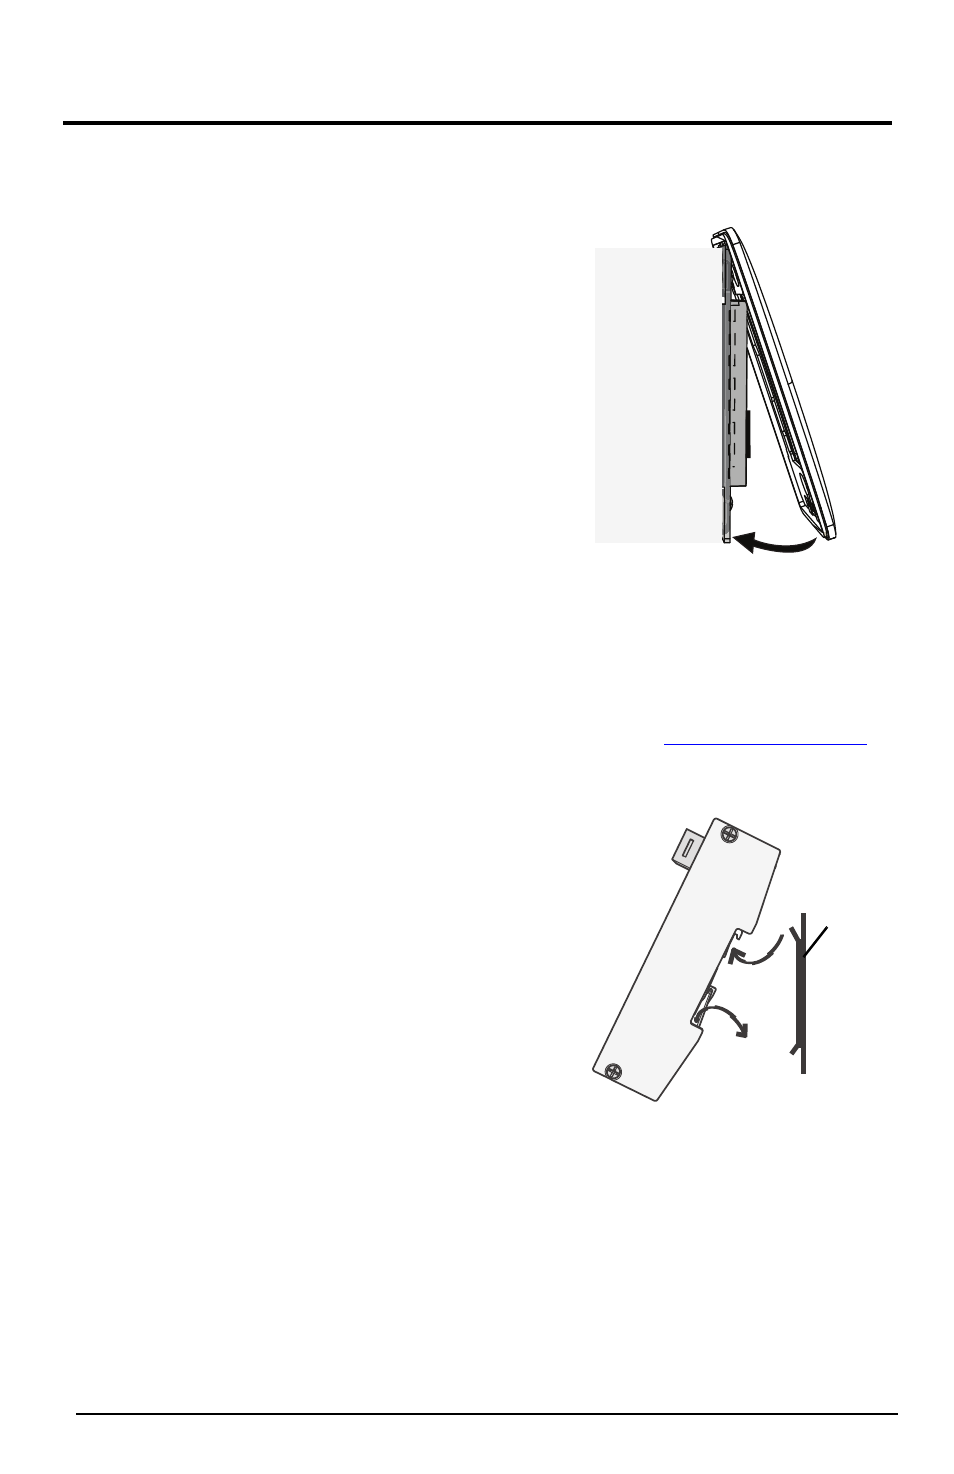
Step 2: Align the top of the faceplate to the
gateway with the bottom edge
angled out approximately 20°.
Step 3: Hook the top of the faceplate to the
tabs located on the gateway
electronics assembly. The faceplate
should stay in place if wiggled side
to side
Step 4: Pivot the faceplate downward until
the magnets engage.
If the magnets do not fully engage, wiggle the bottom of the faceplate until all
magnets are properly seated and the faceplate is secure.
DIN-rail Setup
The DIN-rail mounted one port gateway kit consists of the gateway, a Cat5
termination kit, and a DMX termination kit. Additional information on these
termination kits can be downloaded from ETC’s website,
www.etcconnect.com
.
To install the gateway:
Step 1: Ensure the section of DIN-rail to be
used is mounted securely.
Step 2: Hook the top of the gateway over
the top of the DIN-rail as shown.
Step 3: Pivot the gateway downward until it
is seated securely on the DIN-rail.
Step 4: Terminate the bare end of the Cat5
wire using the provided termination
kit and plug it into the connector on
the front of the gateway.
Step 5: Terminate the DMX wire using the
provided termination kit and plug it into the DMX connector on the front
of the gateway.
To remove the gateway:
Step 1: Push the gateway straight up to depress the DIN-rail clip.
Step 2: Pivot the top edge of the gateway off of the DIN-rail.
Step 3: The gateway is now loose. Slide the gateway down and off of the DIN-
rail.
din rail
hook
pivot