Installation, Portable setup, Wall mount setup – ETC DMX-RDM One Port Gateway Setup Guide User Manual
Page 2: Install the gateway into a backbox, One port gateway, N o t e
E T C S e t u p G u i d e
One Port Gateway
One Port Gateway
Page 2 of 4
Installation
Portable Setup
The portable or touring One Port Gateway is designed for simple
setup and can be pipe mounted using the supplied mounting
bracket.
Step 1:
Connect a Cat5 Cable (not provided) to the RJ45
connector on the side of the unit.
Wall Mount Setup
Both surface and flush mount
installations are acceptable. For
surface mounting, ETC
recommends the use of an ETC
single gang surface mount
backbox (part# 7081A2004-1).
For flush mounting, ETC
recommends the use of RACO
#691 backbox or equivalent
(provided by others). All wall-
mount gateways include a
standard faceplate but are
compatible with any Decorator
style faceplate.
Install the gateway into a backbox
Step 1: Ensure the backbox is clean and free of any obstructions.
Step 2: Terminate the incoming Cat5 wiring using the supplied Cat5
termination kit.
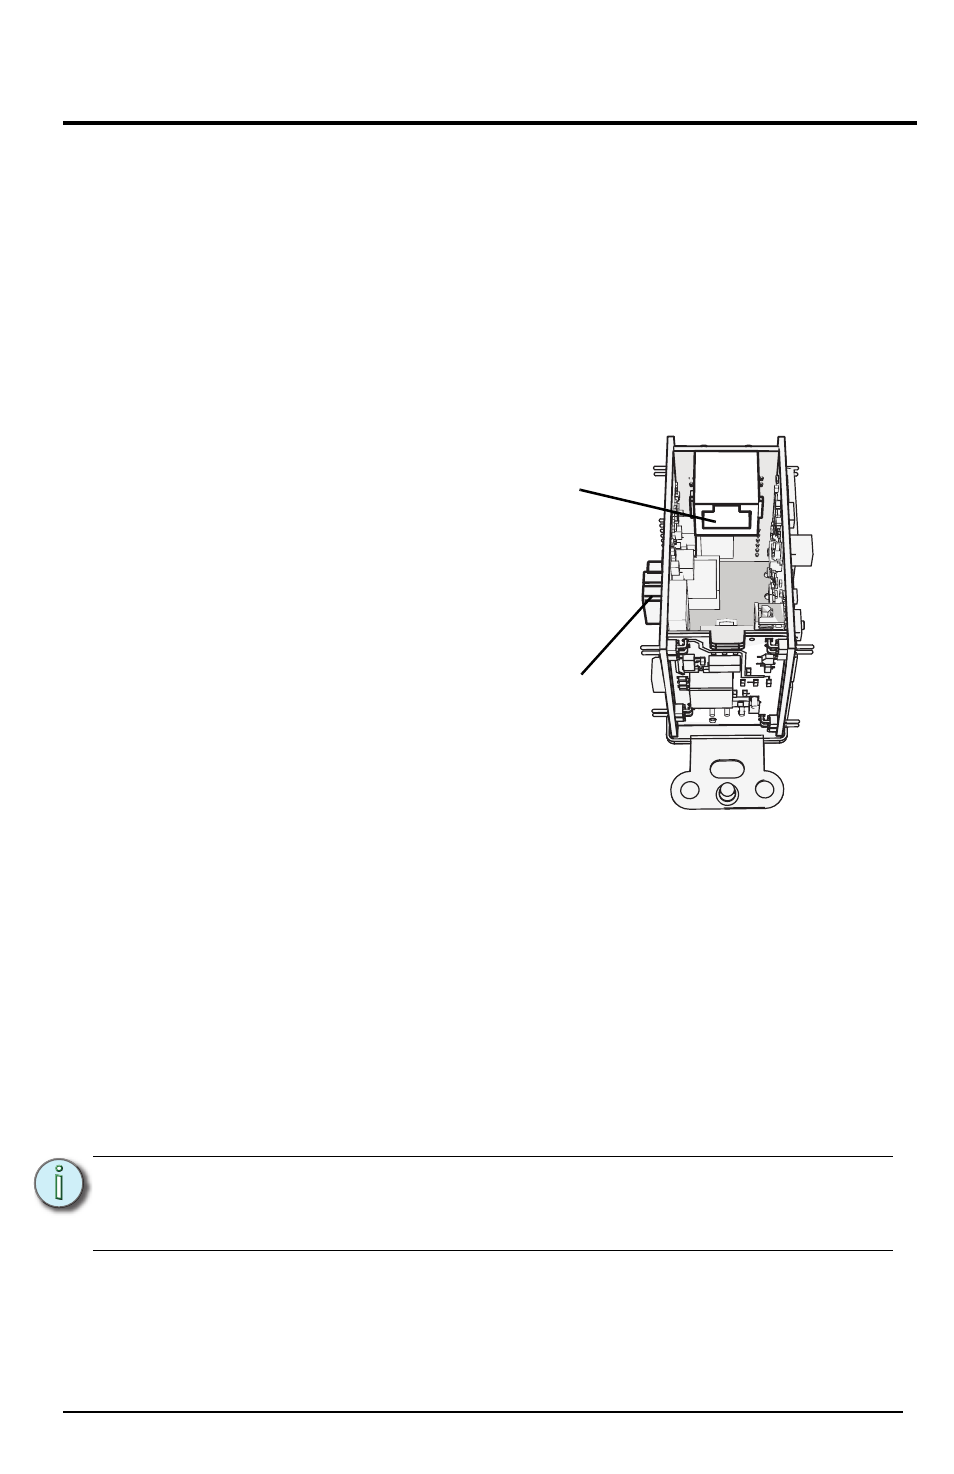
Step 3: Connect Power to the gateway
• If using PoE for power, plug the supplied RJ45 patch cable (12”/
300mm) into the female RJ45 that you have previously installed
into the backbox and the connector on the One Port Gateway.
• If using DC power, connect the incoming 12-24VDC power leads
to the DC power terminals on the side of the gateway.
Step 4: Use the included mounting screws to attach the gateway to the
backbox.
N o t e :
All 1-port Gateways require proper grounding. When installing the
gateway in a backbox that is not grounded, use the included
ground wire to connect the gateway to earth ground.
Network
connection
DC power
connection