Securing sensor3 racks to a wall, Figure 3, Use figure 3 – ETC Sensor3 CE (ESR3) Rack User Manual
Page 15: N o t e
2
Installation of Racks
7
Securing Sensor3 Racks to a Wall
Racks installed on the floor or a pedestal can also be secured to a wall for greater stability.
Step 1:
Prepare the rack for floor or pedestal mounting (
Pedestal Mounting an ESR3-24 Rack, page 6
Step 2:
Mark the locations for your securing hardware on the wall.
•
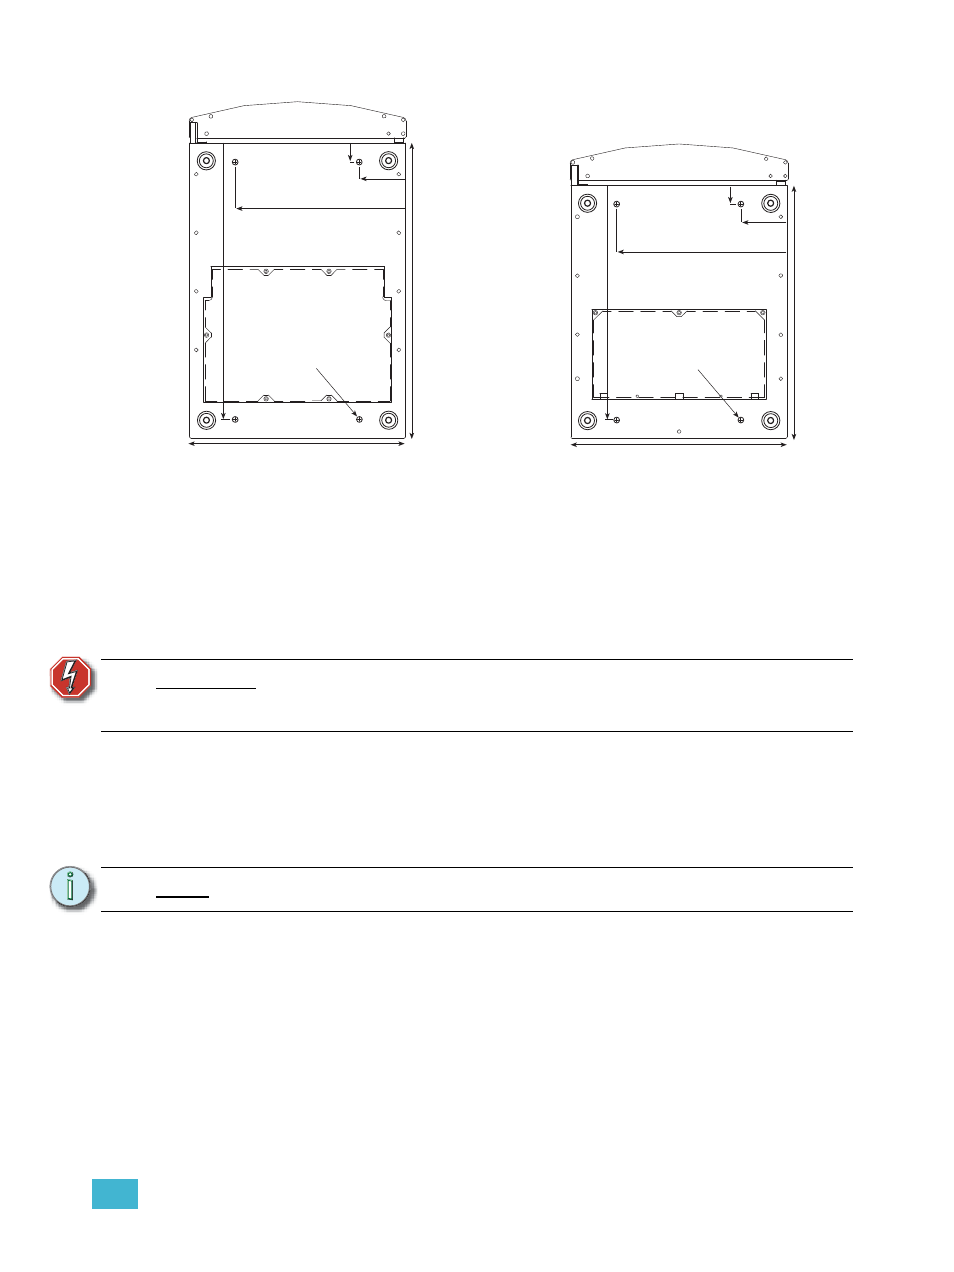
For ESR3-12 or ESR3-24 racks, use the diagram in Figure 2 to determine
where you need to install your hardware.
•
For ESR3-36 and ESR3-48 racks, put the rack in position and mark the holes
directly.
Step 3:
Drill holes or install mounting hardware in the marked locations.
Step 4:
Finish mounting the rack to the floor or pedestal.
Step 5:
Attach the rack to the wall with your securing hardware.
W A R N I N G :
Make sure the holes for the mounting hardware are located where the
hardware cannot come into contact with electrical wiring. Make all
modifications in accordance with your country’s electrical codes.
N o t e :
Be sure to level your racks before marking the hole positions.
ESR3-48 Floor mount hole diagram
ESR3-36 / ESR3-24 Floor mount hole
Dia. 10mm
480mm
294mm
79mm
32mm
373mm
511mm
Figure 3: Hole diagrams for mounting racks to the floor
Dia. 10mm
404mm
294mm
79mm
32mm
373mm
436mm