Connect lan1, Operation position, Power up – ETC Unison Paradigm 18-inch Touchscreen Wall Mount Kit User Manual
Page 4: Paradigm 18" touchscreen wall mount kit
E T C I n s t a l l a t i o n G u i d e
Paradigm 18" Touchscreen Wall Mount Kit
Paradigm 18" Touchscreen Wall Mount Kit Installation Guide Page 4 of 4
Electronic Theatre Controls, Inc.
Connect LAN1
Step 8:
Connect the loose end of the Ethernet extension cable from Step 5 above to the “LAN1”
receptacle located on the touchscreen I/O.
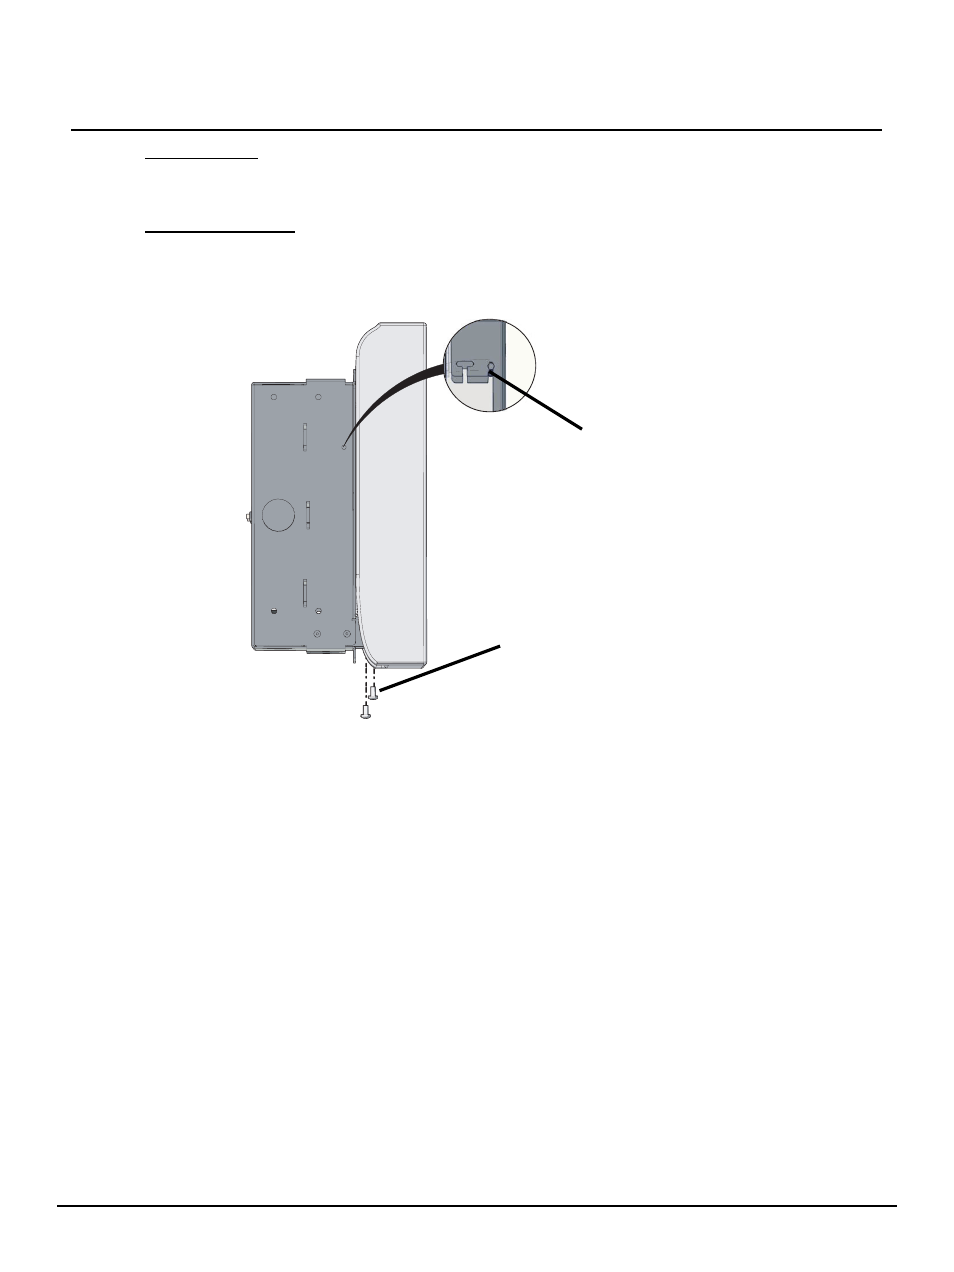
Operation Position
Step 9:
The wall mounting bracket includes a single slot on each side, provided as the final
operation position. Slide the touchscreen up, removing it from the service position, adjust
the depth to rest on the single slot, then slide it back down to the operation position. The
touchscreen will be flush with the surface when it is mounted in the operation position.
Step 10: Secure the touchscreen in place using two screws (provided in the wall mounting kit)
through the bottom of the backbox to the mounting bracket (see graphic above).
Power Up
Step 1:
Apply power to the circuit.
Step 2:
Reference the Paradigm 18” Touchscreen Setup and Connect Guide for further
instruction to use the touchscreen and Virtual Touchscreen (VTS) application.
Step 10
Step 9