Attach the bracket to the touchscreen, Final installation, Connect power and data – ETC Unison Paradigm 18-inch Touchscreen Wall Mount Kit User Manual
Page 3: Power, Data, Service position, Connect 12v dc in, Paradigm 18" touchscreen wall mount kit
E T C I n s t a l l a t i o n G u i d e
Paradigm 18" Touchscreen Wall Mount Kit
Paradigm 18" Touchscreen Wall Mount Kit Installation Guide Page 3 of 4
Electronic Theatre Controls, Inc.
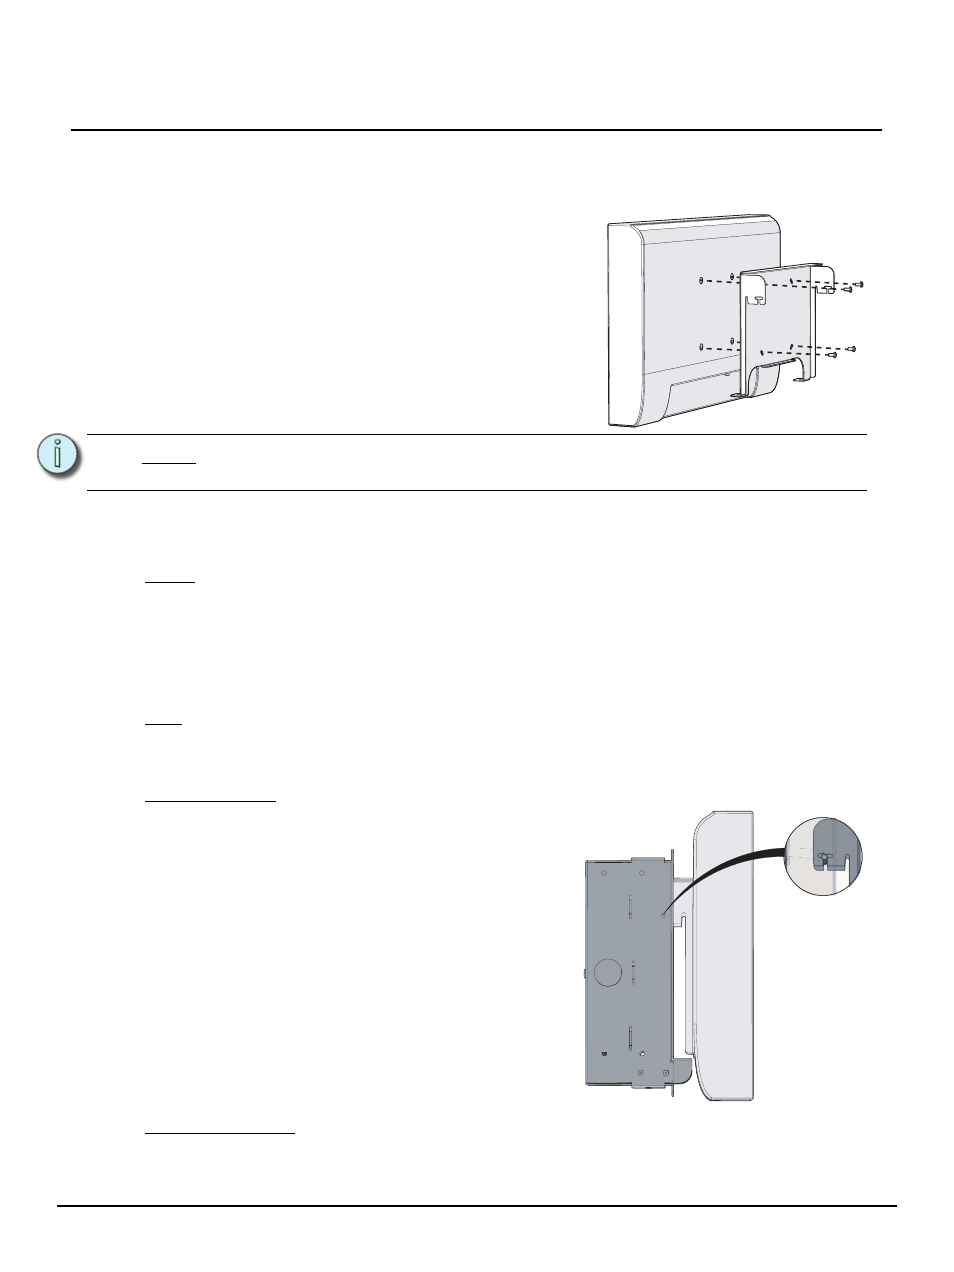
Attach the Bracket to the Touchscreen
Step 1:
Locate the Paradigm 18” Touchscreen (P-TS18), the accessory box from the touchscreen
packaging, and the mounting bracket from the wall mounting kit.
Final Installation
Connect Power and Data
Power
Step 1:
Locate the power supply in the touchscreen accessory box. The two power cables that
are supplied with the power supply are not used for this installation.
Step 2:
Attach the power cable that is provided in the wall mount kit to the power supply then to
the receptacle located on the left side compartment in the backbox.
Step 3:
Secure the power supply to the backbox with a cable tie or strap.
Data
Step 4:
Locate the two foot Ethernet extension cable, provided in the wall mount kit.
Step 5:
Attach the cable to the “C5e+” connector on the right side compartment in the backbox.
Service Position
Connect 12V DC IN
Step 7:
Pivot the touchscreen and insert the power supply round plug into the “12V DC IN”
receptacle located on the touchscreen I/O.
N o t e :
The Paradigm 18” Touchscreen ships with a table top stand which is not required for
wall mount installation. Recycle or discard the stand parts.
Step 3
Step 2:
Remove and discard the four screws that are
installed from the factory to the rear panel of the
18” touchscreen.
Step 3:
Attach the touchscreen to the wall mounting
bracket using the four screws provided in the
P-TS18 accessory box.
Step 6:
The “T” shaped slot on each side of the
mounting bracket is provided as a service
position. Align the mounting bracket (with
touchscreen) to the pins located in the
backbox and rest it on the “T” slots provided.
• With the touchscreen in the service
position, access the touchscreen inputs
and outputs are easily accessible by
simply pivoting the touchscreen.