Instructions for vertical splicing, Bar-to-bar) – ERICO CADWELD for Rebar Splicing System User Manual
Page 5
3
www.erico.com
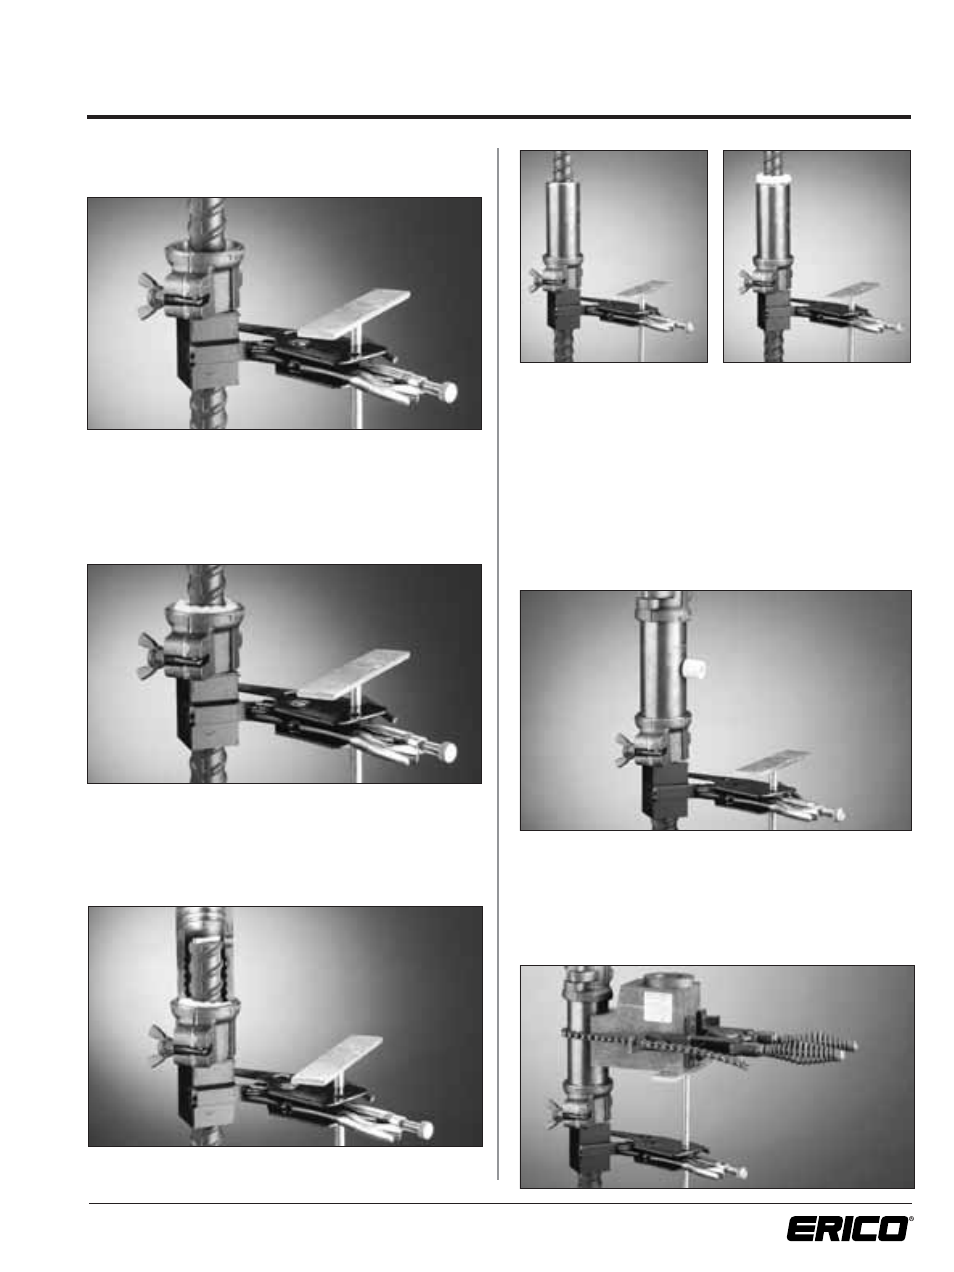
Instructions For Vertical Splicing
(Bar-to-Bar)
1. Clean rebar ends as per “Rebar Cleaning Procedure”
on page 2, as required.
2. Position bottom support clamp and end alignment fitting
so end of rebar will be at tap hole opening of sleeve.
“T” shaped support rod on bottom support clamp
should be in line with the sleeve tap hole so that
support will be directly beneath the pouring basin.
3. Place a double wrap of packing material into position in
the lower end alignment fitting. Using a blunt screwdriver,
place the first wrap around the bar into the space
between the bar and end alignment fitting. The second
wrap around the bar is placed loosely above the first.
4. Place splice sleeve into lower fitting and seat firmly
against the packing to seal lower end of sleeve.
5. Lower top rebar into position. The average gap
between bar ends should not exceed 1/4-in. (6mm).
If a natural gap is not provided by the shape of the
reinforcing bar ends, a spacer can be used.
Spacers are enclosed in an envelope in each carton of
CADWELD
®
ferrous filler material.
Both bar ends should be visible through the sleeve tap
hole.
6. Place a single wrap of packing material loosely around
bar on top of splice sleeve; DO NOT PACK.
7. Place end alignment fitting on top of splice sleeve;
position ceramic insert guide tube assembly firmly into
taphole, making sure it is completely seated inside the
hole.
8. Flame dry pouring basin and crucible before using.
As a check, a drop of water should boil off rapidly.