Instructions for venting cadweld, Horizontal splices – ERICO CADWELD for Rebar Splicing System User Manual
Page 10
8
www.erico.com
Instructions For
Venting CADWELD
®
Horizontal Splices*
The use of wire or nails for venting is two-fold. Primarily,
they raise or lift the sleeve from the top of the rebar, creat-
ing a gap between the sleeve and bar. The gap is necessary
for proper fill at the top of a horizontal splice. Gravity takes
care of filling the bottom of the sleeve.
The second purpose of the wires or nails is to provide a
path for the escape of air from the inside of the sleeve.
During splicing, air inside the sleeve is greatly expanded by
the incoming molten metal. If this air is trapped in the
sleeve, it takes up volume and will not allow the metal to
fill correctly. Creating an avenue of escape (with the wires
or nails) allows the metal to adequately fill the splice sleeve.
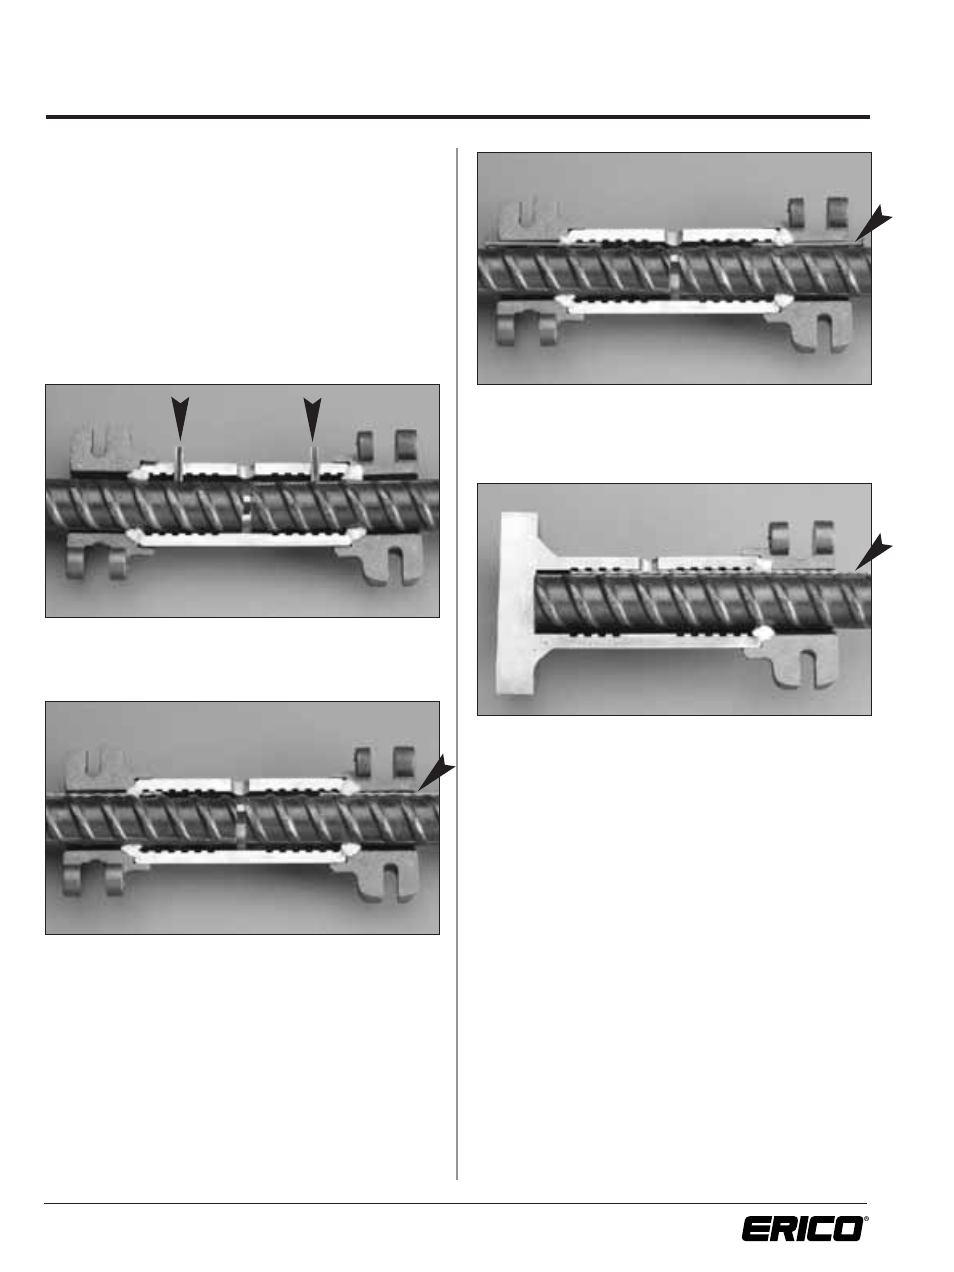
Venting with vent pins. Raise sleeve until it touches the
bottom of the bar and firmly drive down vent pins with a
hammer.
Venting with twisted tie wire. Place uncoated steel wire
on top of bar. Wire should be long enough to protrude
approximately 2-in. (50 mm) into sleeve and out beyond
End Alignment Fitting as shown above.
Venting with nails. Place uncoated steel nail on top of
bar. Nail should be long enough to protrude approximately
2-in. (50mm) into sleeve and out beyond End Alignment
Fitting as shown above.
Venting of B-Series structure splice with twisted tie
wire. Place uncoated steel wire on top of bar. Wire should
be long enough to protrude full length of sleeve and out
beyond End Alignment Fitting as shown above.
*Formerly Bulletin 101