Wheel installation, Wheel installation -2, Wheel torque chart -2 – JLG 1250AJP Service Manual User Manual
Page 50
SECTION 3 - 1CHASSIS & TURNTABLE
3-2
– JLG Lift –
3121171
Wheel Installation
It is extremely important to apply and maintain proper
wheel mounting torque.
WHEEL NUTS MUST BE INSTALLED AND MAINTAINED AT THE
PROPER TORQUE TO PREVENT LOOSE WHEELS, BROKEN
STUDS, AND POSSIBLE DANGEROUS SEPARATION OF WHEEL
FROM THE AXLE. BE SURE TO USE ONLY THE NUTS MATCHED
TO THE CONE ANGLE OF THE WHEEL.
Tighten the lug nuts to the proper torque to prevent
wheels from coming loose. Use a torque wrench to tighten
the fasteners. If you do not have a torque wrench, tighten
the fasteners with a lug wrench, then immediately have a
service garage or dealer tighten the lug nuts to the proper
torque. Over-tightening will result in breaking the studs or
permanently deforming the mounting stud holes in the
wheels. The proper procedure for attaching wheels is as
follows:
1. Start all nuts by hand to prevent cross threading. DO
NOT use a lubricant on threads or nuts.
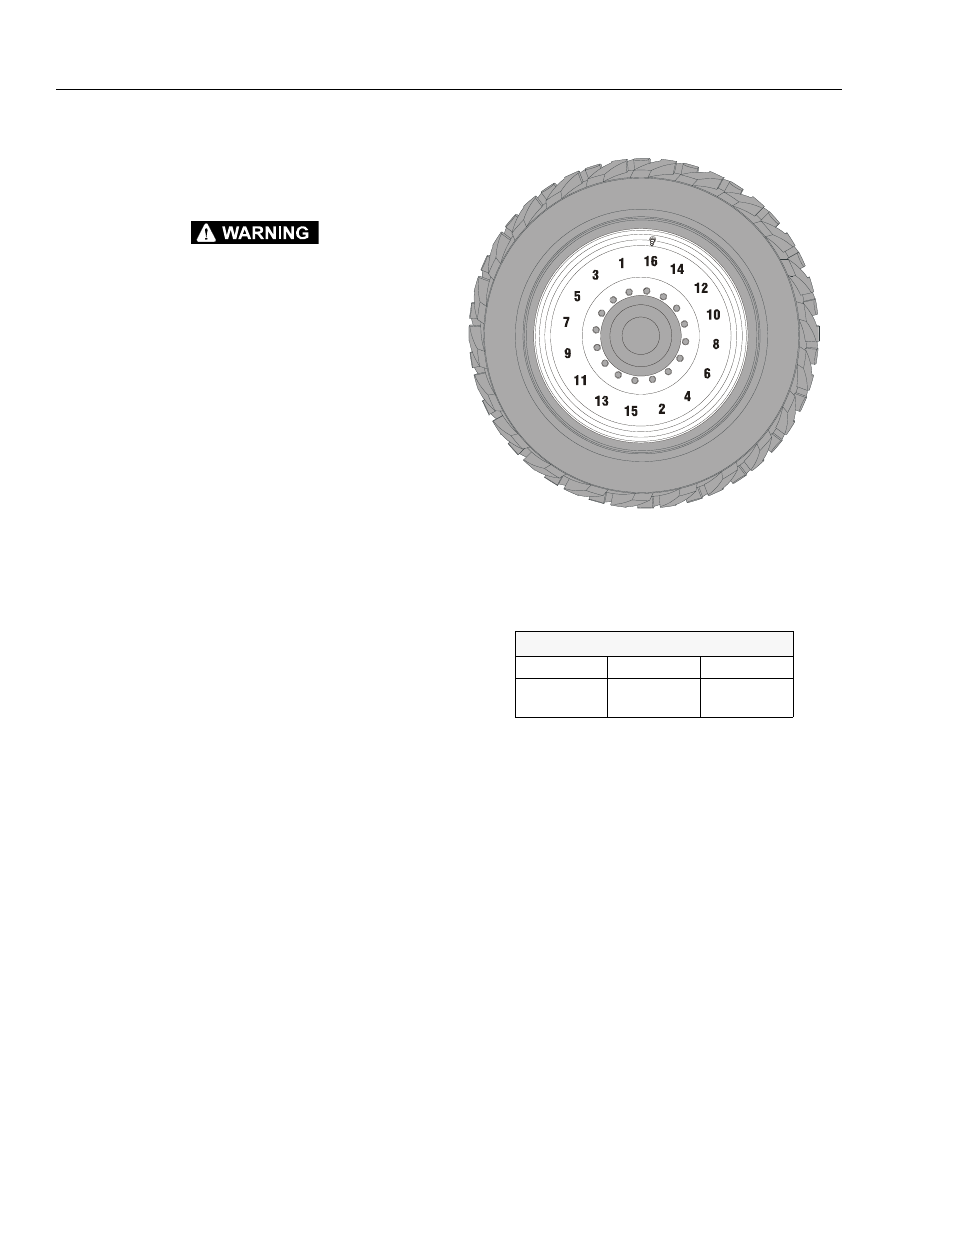
2. Tighten nuts in the following sequence:
3. The tightening of the nuts should be done in stages.
Following the recommended sequence, tighten nuts
per wheel torque chart.
4. Wheel nuts should be torqued before first road use
and after each wheel removal. Check and torque
every 3 months or 150 hours of operation.
Table 3-1. Wheel Torque Chart
TORQUE SEQUENCE
1st Stage
2nd Stage
3rd Stage
45 ft. lbs.
(60 Nm)
100 ft. lbs.
(140 Nm)
180 ft. lbs.
(252 Nm)