Bleeding after installation, Bleeding after installation -113, Jib alignment timing marks -113 – JLG 1250AJP Service Manual User Manual
Page 353
SECTION 4 - BOOM & PLATFORM
3121171
– JLG Lift –
4-113
Bleeding After Installation
NOTE: Bleeding will be necessary if excessive backlash is
displayed after the actuator is installed. To do this,
bleeder valves must be installed in the actuator at the
locations shown below. The following steps are rec-
ommended when a minimum of two gallons (8 liters)
is purged.
1. Connect a 5 foot (1.5 m) long 3/16" inside diameter,
5/16" outside diameter clear vinyl drain tube to each
of the two bleeder valves. Secure the tubes in place
with hose clamps.
2. Place the end of the tubes in a clean 5 gallon (19 L)
container to collect the purged oil. The oil can be
returned to the reservoir when the procedure is com-
plete.
3. Open both bleeder valves 1/4 turn. Using the
hydraulic system, rotate the platform to the end of
rotation and maintain hydraulic pressure. Oil with
small air bubbles should be seen flowing through
the tubes. Allow 1/2 gallon (2 L) of oil to be purged
from the actuator.
4. Keep the bleeder valves open and rotate the plat-
form in the opposite direction to the end of rotation.
Maintain hydraulic pressure until an additional 1/2
gallon (2 L) of oil is pumped out.
5. Repeat steps 3 and 4. After the last 1/2 gallon (2 L)
of oil is purged, close both bleed nipples before
rotating away from the end of rotation.
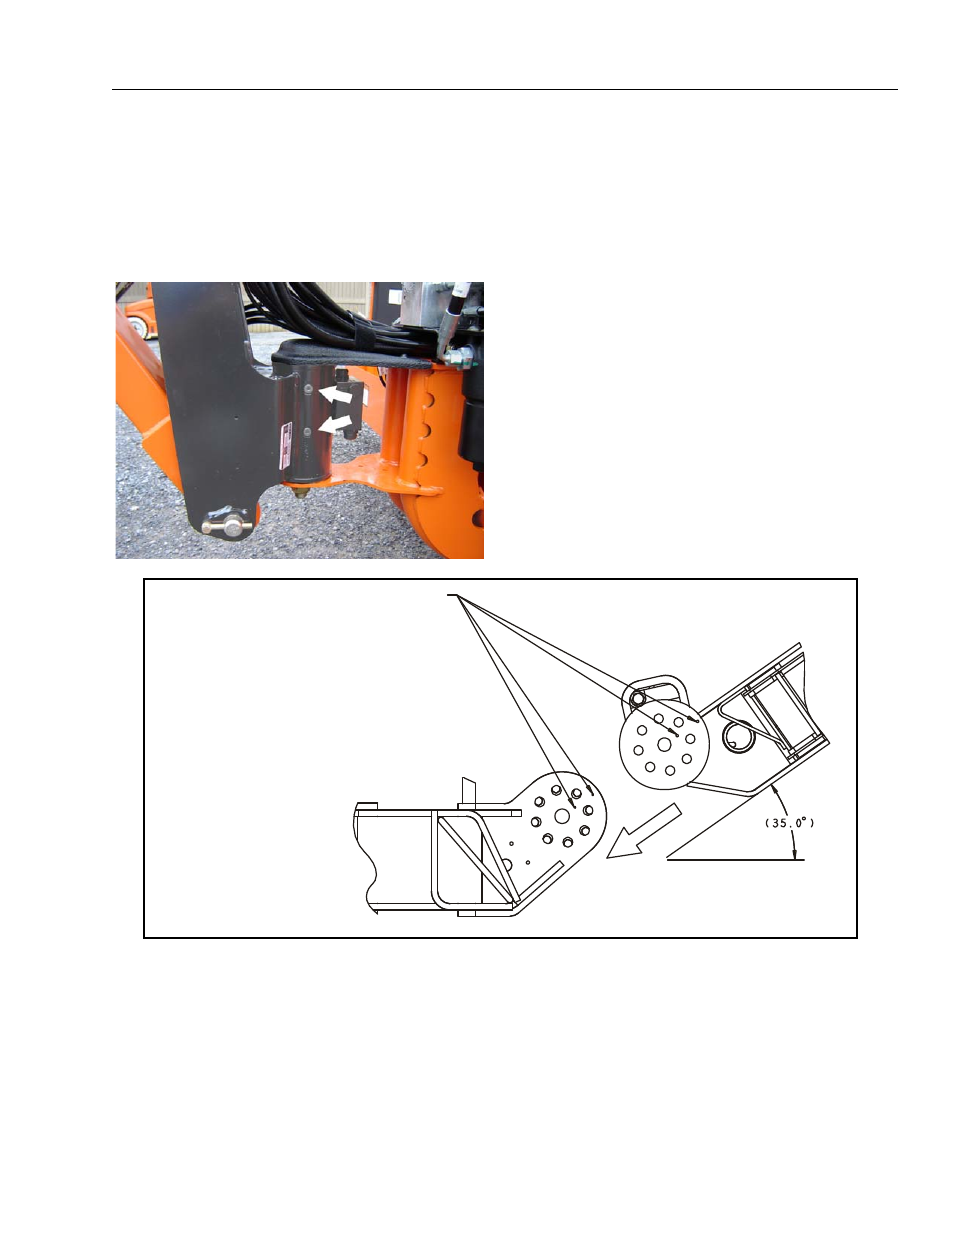
Figure 4-56. Jib Alignment Timing Marks
ALIGN TIMING MARKS IN ROTATOR WITH
TIMING MARKS IN PIVOT AS SHOWN
JIB WILL BE 35 DEGREES OUT OF LINE
WITH THE BOOM WITH ROTATOR CENTERED
REALIGN THE JIB WITH THE BOOM AFTER
ALL HARDWARE IS ASSEMBLED