JLG G6-42A Service Manual User Manual
Page 52
Boom
3-14
G6-42A, G9-43A, G10-43A
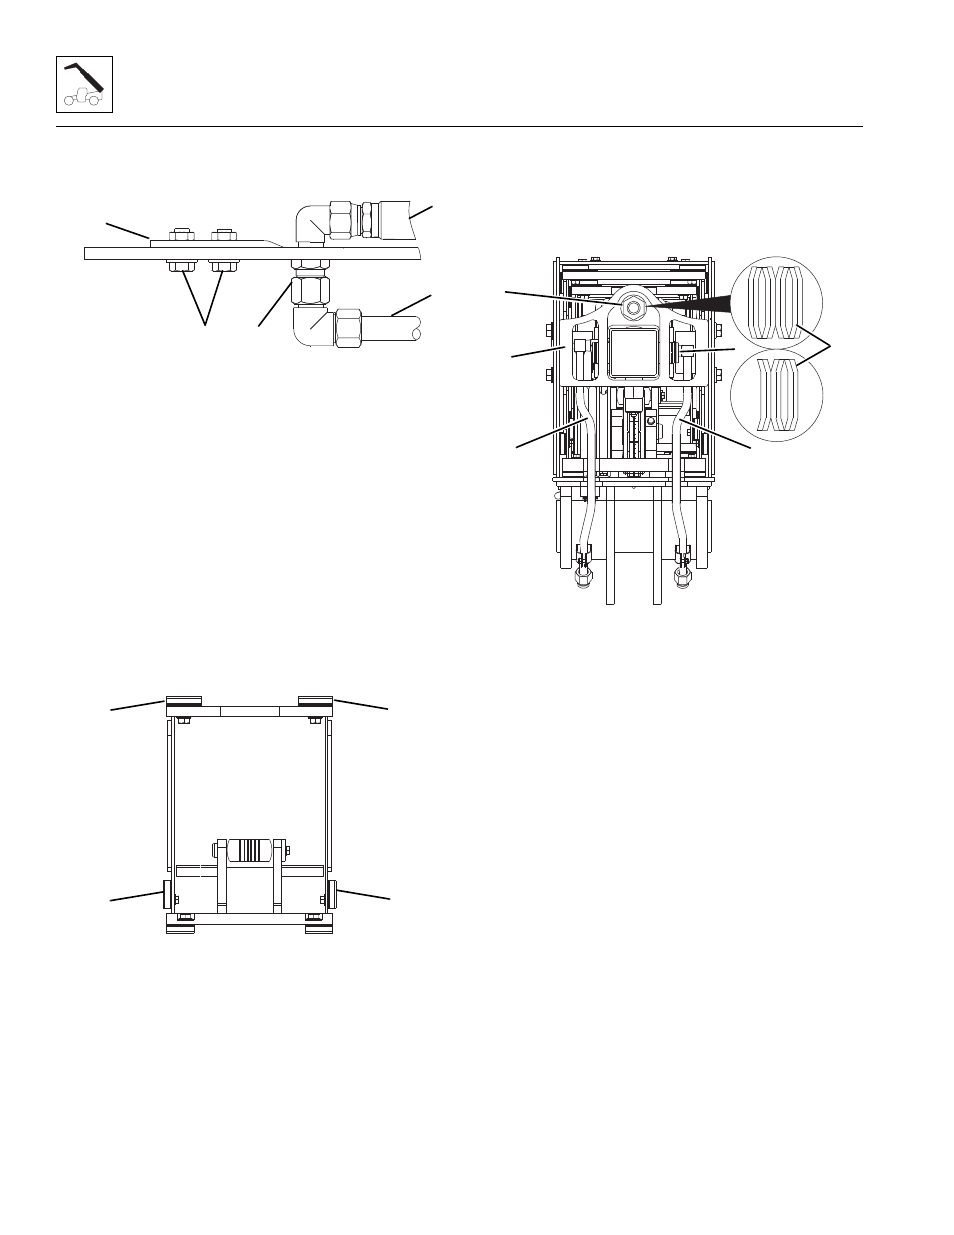
10. Install the anchor plate (6) using existing hardware
(7) into the first boom section. Torque as required.
11. Install the previously removed tilt hose retainer
bracket (8) and (if equipped) both auxiliary hose
retainer at the bottom of the first boom section using
mounting bolts (9). Torque as required.
12. Remove plugs from the previously removed tilt
hoses (10) and (if equipped) both auxiliary hoses.
13. Connect both tilt hoses (10) and (if equipped) both
auxiliary hoses to the fittings on the hose retainer
bracket. Torque as required.
14. Connect both tilt tubes (11) and (if equipped) both
auxiliary tubes to the fittings on the hose retainer
bracket. Torque as required.
15. Push the second and third boom sections the
remainder of the way into the first boom section.
16. Install the previously removed wear pad and spacer
(12) on the left or right side of the second boom
section. Snug mounting bolts. Shim as needed
AFTER boom section is installed. Refer to Section
3.10.2, “Wear Pad Installation and Lubrication,” for
detailed information.
17. Install previously removed wear pad and spacer (13)
on top of second boom section. Snug mounting
bolts. Shim as needed AFTER boom section is
installed. Refer to Section 3.10.2, “Wear Pad
Installation and Lubrication,” for detailed information.
18. Install the previously removed strong back (16) with
the existing hardware. Torque as required.
19. Install extend/retract cylinder pin (17) through strong
back (16). Secure pin with retaining rings.
20. Apply thread lubricant to extend chain clevis rod
threads (18).
21. Install extend chain clevis rod into strong back (16).
22. Install belleville washers (19) as previously removed
(cupped washer facing strong back). Install
adjustment nut and lock nut. Snug, but Do Not
tighten at this time.
23. Remove the caps and plugs from the extend/retract
cylinder fittings and the extend/retract tubes (20).
24. Install both extend/retract tubes (20) and torque
as required.
25. Uncap and reconnect the previously labeled
hydraulic hoses to the extend/retract cylinder.
26. Uncap and connect and remaining hydraulic fittings
to their appropriate locations.
27. Recheck wear pad gaps to ensure they meet the
minimum gap requirement. Shim if necessary.
28. Ensure that the boom chains are properly adjusted.
Refer to Section 3.8, “Boom Adjustments.”
29. Properly connect the battery.
MY3990
9
8
10
11
9
MY3890
12
12
13
13
MAL2660
18
20
20
17
16
19
G6-42A
G9-43A
G10-43A