Shortcut menu – Pioneer CNDV-50MT User Manual
Page 18
16
Ch
ap
te
r
1
Ba
sic
Op
er
at
ion
1
With the map displayed, press the NAVI
MENU button.
2
To change to the menu you want to use,
touch the name of the menu displayed at
the top of the screen.
The main menu is divided into four:
“Destination”, “Information”, “Route
Options”, and “Settings”.
3
If you want to return to the map, press the
NAVI (or POS) (or NAVI MENU) button.
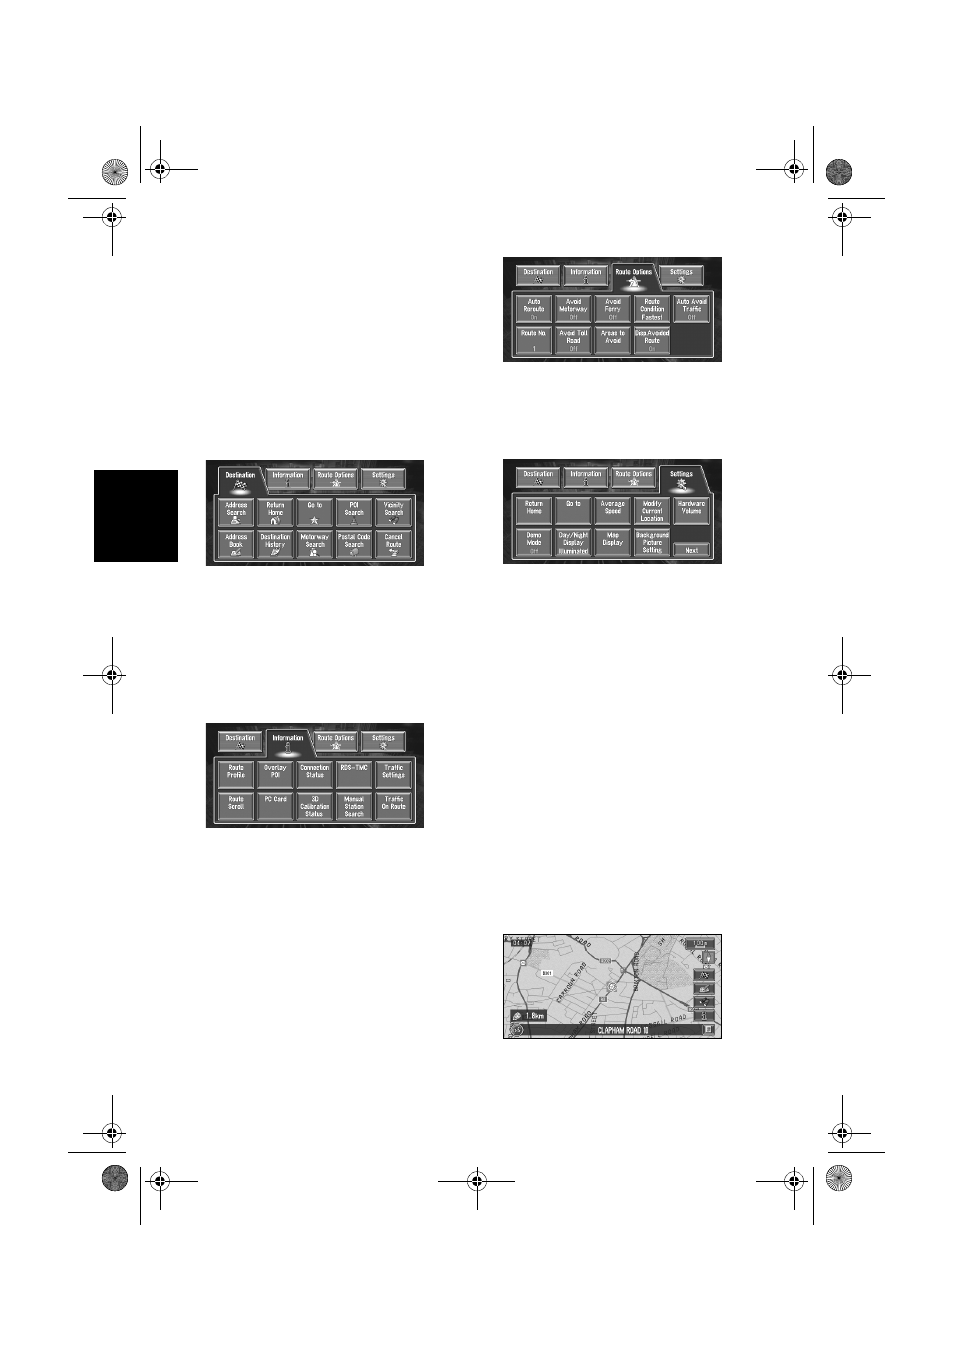
Destination menu
Select the destination search method. Also the
set route can be cancelled from this menu.
➲
Specifying the address and searching the
destination ➞ Page 12
➲
Searching the destination by map ➞ Page 21
➲
Other search methods ➞ Page 23 to 26
Information menu
Used to check the route you set or check the
navigation status. You can also check traffic
information or select the RDS-TMC station.
❒
You can use “Route Profile” and “Route
Scroll” only when a route has been entered.
➲
Checking the set route ➞ Page 29
➲
Checking the navigation status ➞ Page 47
➲
Using a PC card ➞ Page 43
Route Options menu
Used to specify the conditions for setting the
route to the destination.
➲
Setting the Route Options ➞ Page 27
Settings menu
Set the navigation functions so they can be used
easily.
➲
Settings menu ➞ Chapter 4
❒
If the contents of the menu are not fully
displayed on the screen, touch “Next” to view
the remaining contents.
Shortcut menu
Shortcuts allow you to perform various tasks,
such as route calculation for the location
indicated by the cross pointer, or registering a
location in the Address Book, faster than using
the Main menu.
1
When the map is displayed, briefly touch
any part of the map.
If you continue to touch the map, it will start
scrolling.
➲
Moving the map to view the part you want
to see ➞ Page 20
MAN-CNDV-50MTP-EN.book Page 16 Friday, April 29, 2005 10:33 AM